
Photoshop step-by-step: Create image blur
If you’ve ever tried to deliberately shoot creative blur images, you’ll have probably realised it’s not easy. This is because subjects can quickly become unrecognisable when you isolate them from their background, and it can be difficult to give your viewer something to focus on when everything in the frame is abstract. One technique is to use Photoshop to do the blurring for you in a targeted fashion.
Before we get started, it’s worth noting that this is a creative technique that may be more manipulation than some readers are comfortable with. If that’s you, remember that the fun in editing is setting your own limits for how far you want to go, and experimentation is a great way to improve your post production skills. With that out of the way, let’s dive in.

Motion blur
Add blur to create a sense of motion
Photoshop’s Motion Blur Tool is excellent for creating a sense of motion of an object or subject moving in front of you. The best kind of subjects for this technique are those that are moving in front of you from left-to-right or right-to-left. Think cars moving on the road, kids/people running or walking, running animals, flying birds, aeroplanes, etc.
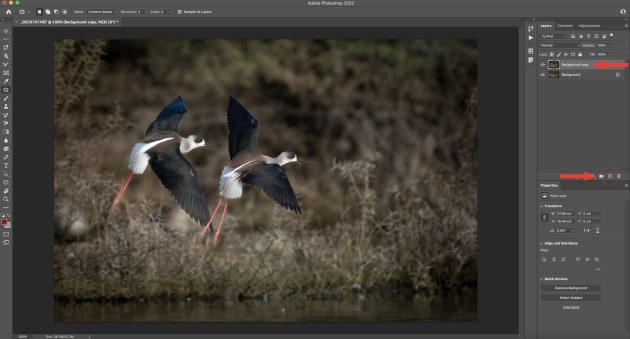
1) Create a background layer
First, we’ll create a background copy layer by selecting the background layer and dragging it to the Create New Layer icon (+ symbol). This means any changes we make will only be done to the background copy of the image, and not the original.
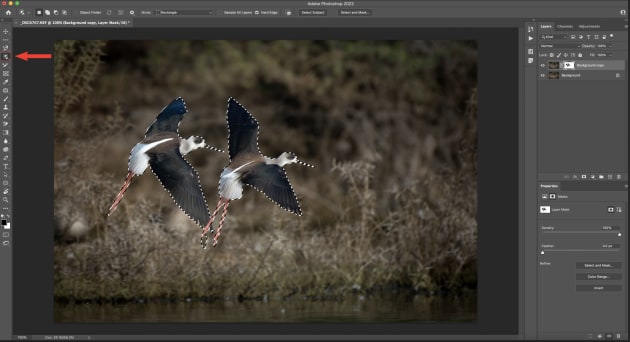
2) Make a selection
Now, with a copy of the background layer selected, make the selection where you want to apply the Motion Blur. There’s a few selection tools you can use to do this, but for this image I’ve used the Object Selection Tool. Once the selection is made, you’ll need to invert the selection (Shift + Command + I (Mac) or Shift + Control + I (PC)). This will give you a line of marching ants around your frame, which means the blur will only be applied to areas outside the subject.
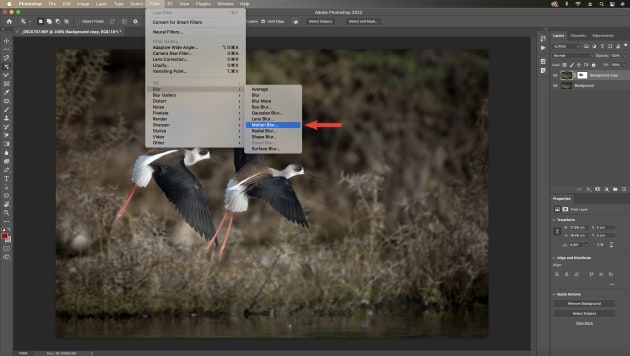
3) Setup the blur
Next, click on the background copy of the image. From the top panel select Filter > Blur > Motion Blur. The Motion blur window will pop up. In this window, there are a few options. The Angle controls the direction of the blur. To apply horizontal blur, as I have here, use a 0 degree or 180 degree angle. If you want to apply vertical blur, then you can use either 90 degrees or 270 degrees.
Adjust the distance
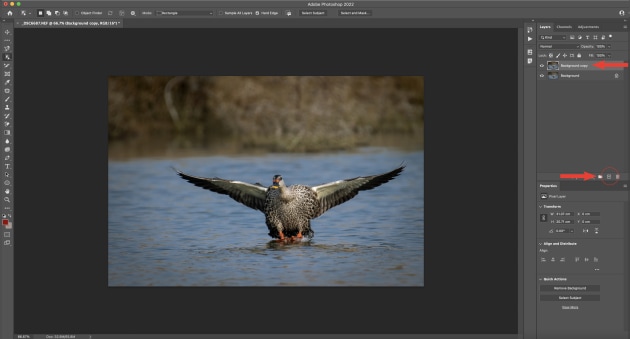
The Distance option controls the intensity of the motion blur. A high value of Distance will make the blur look artificial. I suggest you use a moderate number, but every image will demand a different Distance.
Generally, I find the Distance option in the range of 50 to 115 pixels works for most subjects. Once you’re happy, you can turn off the marching ants with Command + D (Mac) or Control + D (PC).

Zoom blur
Add zoom blur to show motion of a subject coming towards or leaving you.
You can emphasize an object coming towards you or going away from you using Zoom Blur. This technique apples a motion effect from a given point that works as a centre. From there, the blur can spin around it or converge the lines moving inwards/outwards from it. Like with motion blurs, zoom blurs can become very interesting and dynamic if the objects coming towards or leaving away from you are already moving.
First, we’ll create a background copy layer by selecting the background layer and dragging it to the Create New Layer icon (+ symbol).
1) Make a selection
With a Copy of the background layer selected, make the selection where you want to apply the Motion Blur. Once the selection is made, you’ll need to invert the selection again (as in step two in the previous section) so the blur is only applied around your subject.

2) Setup the blur
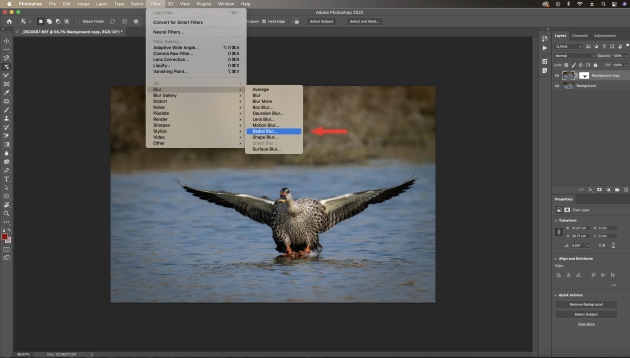
Once the selection is made, click on the background copy of the image, and select Filter > Blur > Radial Blur. The Radial blur window will pop up.
3) Tweak the zoom
Now, select the Blur method as Zoom. Adjust the centre of the Blur over your subject using the Blur centre option. The Amount option controls the intensity of the Blur. If there is fast motion, then I suggest you select a slightly higher number.
However, for most situations a moderate number between 25 to 50 is usually enough of an effect, but try different numbers and see which works best for your image. Blur quality ranges from Draft for ‘fast’ but grainy results, to Good and Best for smoother results, which should be almost indistinguishable except on large selections.

Radial blur
Use spin blur to enhance circular shapes.
The last blur technique I’ll share with you is spin blur. Using this helps emphasise shape, and is especially good for circular objects - think wheels, merry-go-rounds, or anything else that moves in a circular motion. Here, I’ve used it on an image of this millipede to emphasise its beautiful circular shape.
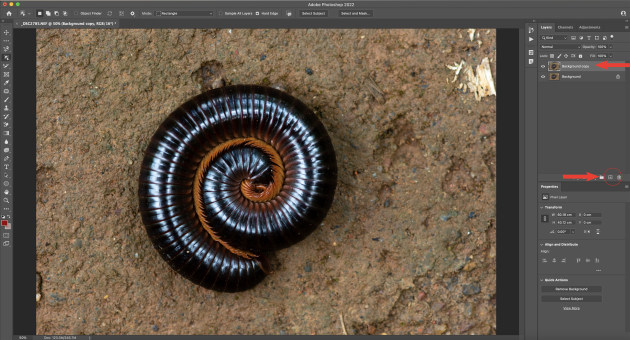
1) Create a background layer
As with Motion and Zoom blur, first create a Background Copy Layer by selecting the background layer and dragging it to the Create New Layer icon (+ symbol).

2) Make a selection
With a Copy of the background layer selected, make the selection where you want to apply the Spin Blur. Here, I used the Polygonal lasso tool to manually select the millipede’s legs as well, as I wanted to subtly spin blur these as well.
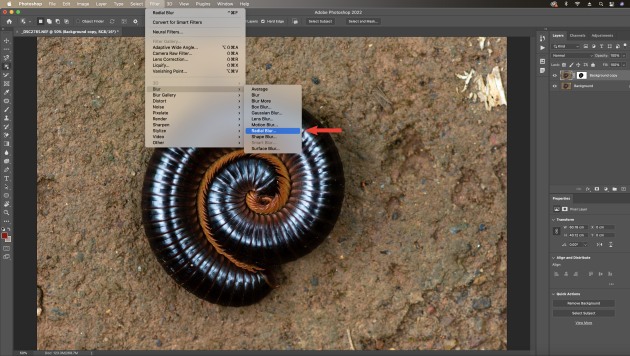
3) Setup the blur
Once the selection is made, click on the background copy of the image. Like with the Radial filter, we’ll select Filter > Blur > Radial Blur. The Radial blur window will pop up. Select the blur method as Spin, and then select where you’d like the blur to originate from using the blur centre option.
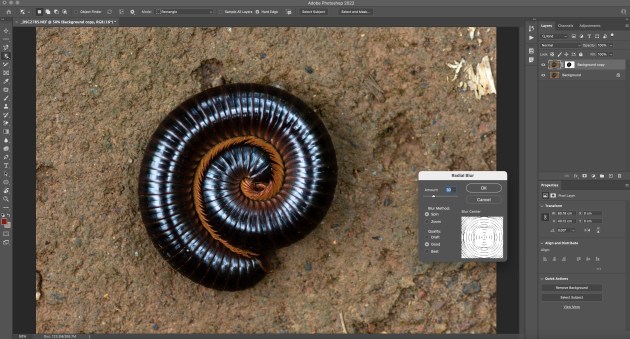
4) Adjust the intensity
The amount option controls the intensity of the blur. If there is fast circular motion, then select a slightly higher number. For most situations, a moderate number between 15 to 40 should do the trick, but select different numbers and see which works best for your image. Turn off the marching ants and you’re done.
About the author: Shreyas is an Adventure explorer, Nature and Wildlife Photographer. After photographing in different parts of India for more than a decade, he has focussed on what he is most passionate about: Digital Post Processing and Photography Mentoring. You can see more of his work and tutorials at shreyas-yadav.com.