
Editing wildlife - 5 Lightroom tips for better images (part two)
This is part two of a feature on editing wildlife images, and picks up where part one left off with global adjustments you can make to your images with Lightroom. You can see the first part of this feature here.
6) Noise Reduction
Generally speaking, there are two types of noise in an image: colour noise, which is marked by coloured pixels such as red, green and blue on a uniform object; and luminance noise, which makes an image appear grainy. Here’s how to correct both.
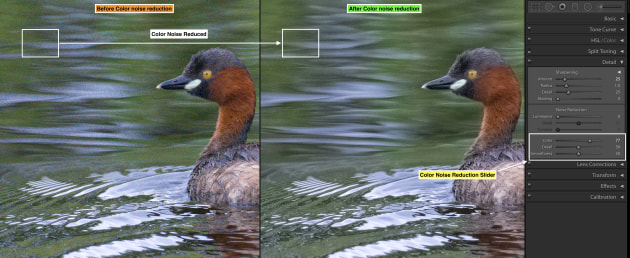
Colour noise
Reducing colour noise requires three sliders – Colour, Details, and Smoothness. The Colour slider defines what intensity the noise reduction will be applied. To reduce the colour noise, drag the Colour slider towards the right. The Details slider essentially sets up the threshold for what will be edited. If the Details slider is set to a high value, then the details in the colour will be preserved. Finally, the Smoothness slider helps in preserving the tones of the colours.
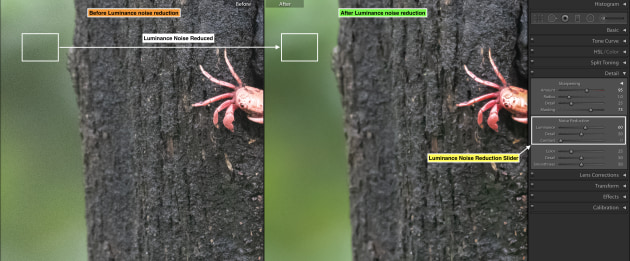
Luminance noise reduction
In the Luminance noise reduction option, there are three sliders – Luminance, Details, and Contrast. First, drag the Luminance slider control towards the right, and you will see luminance noise reduction will be applied strongly. The Detail slider will help in preserving some of the details which are lost due to the noise reduction, and the Contrast slider helps in preserving some amount of the contrast.
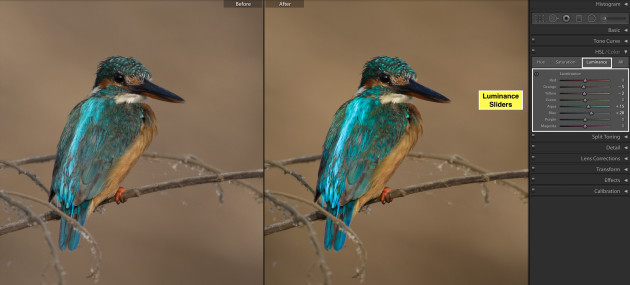
7) HSL Sliders
HSL (Hue, Saturation and Luminance) provide a more precise way to adjust global colours within an image. This makes them a great way to change the way reds are rendered for a more filmic look, for example, or make blues pop in water in a seascape shot.
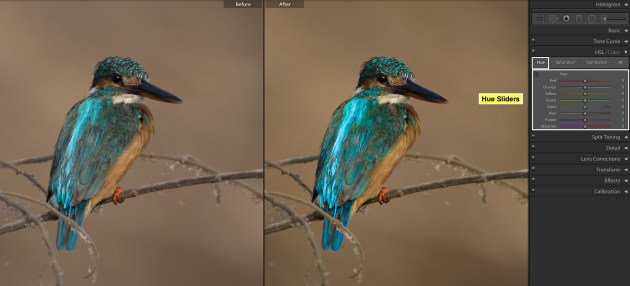
Every colour has shades, and the Hue slider helps set up these shades. Increasing Saturation intensifies the colour, while desaturation mutes the colour. And finally, Luminance is the relative brightness of a colour.
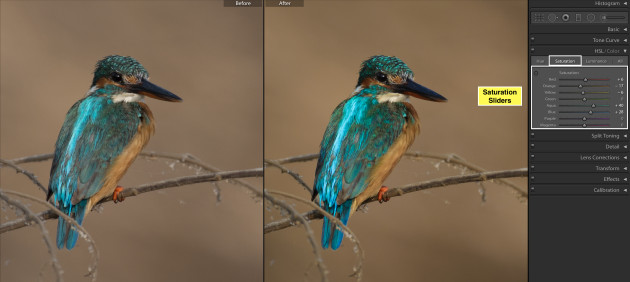
Increasing the luminance of a colour will make that colour appear bright, and reducing the luminance will make the colour appear dark.
To use the HSL sliders, firstly set them to 0. As you drag the sliders towards the right or positive number, it increases Hue, Saturation or Luminance.
Similarly, if you drag the sliders towards the left or negative number, it decreases Hue, Saturation or Luminance.
Alternatively, you can change the HSL using the colour picker tool. Select the colour picker tool and click on the colour you want to edit. Then select the colour using the colour picker tool and drag the cursor up to increase the effect, or down to decrease the impact of HSL.
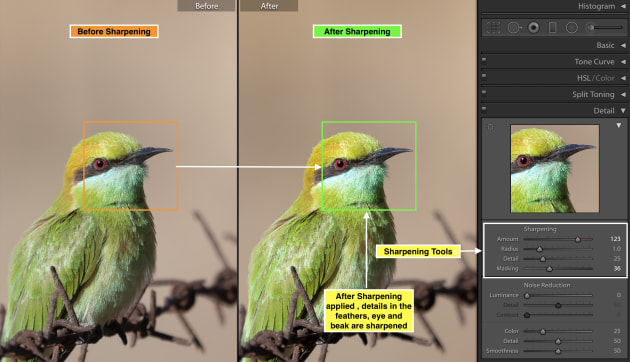
8) Sharpening
I apply image sharpening after all the colour and exposure corrections are done. The Sharpening tool consists of four sliders:
Amount
As you increase the Amount by dragging the slider, the overall amount of sharpening applied will increase. The image will get sharper.
Radius
The Radius parameter defines how much area is to be sharpened on the Pixel level. I recommend keeping the radius value between 0.6 and 0.9.
Details
The Details slider controls focus on the edges of an image. As you increase the value, details will be revealed sharply. I typically keep the Details slider to a value of 25.
Masking
The Masking option allows you to select the area you want to sharpen. Press the Alt/Option key and increase the masking slider towards the right. When the Masking value is set to 0, sharpening will be applied to the complete image.
As you increase the Masking slider towards the right by pressing the Alt/Option key you will notice the areas which are already in focus are white. This is where sharpening will be applied, and the areas which are out of focus are black. In these areas, no sharpening will be applied.
9) Local or Targeted Adjustments
With the global adjustments out of the way, let’s look at two simple local adjustments you can apply. They use the Graduated filter and the Adjustment brush.
Firstly, each of the adjustments can be used in three different ways with different types of Range Masks. A mask is simply a way for you to control what areas of a photo receive the edits you want to apply.
Using a Range Mask, the options are Colour, Luminosity and Depth, but for brevity we will focus on Colour and Luminosity here. With Colour, the selection is based on a particular colour in an image, and with Luminosity, the selection is made based on light levels or luminosity levels (the relative brightness of a colour).
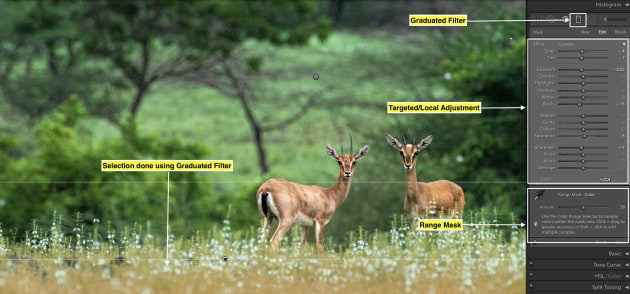
Graduated filter – Colour Range Mask
From the Basic panel tab, select the Graduated Filter tool. Make the initial selection for your graduated filter by clicking and dragging the cursor across the required area. Then, under the Range mask option, select Colour Range mask. Using the eyedropper tool, select the colour in the image you want to tweak.
You can use the Amount slider for fine-tuning the colour selection – the higher the amount slider, the greater the colour range. After the selection is made, you can use the sliders in the Mask>Edit panel to make targeted adjustments to the areas in your mask. The Radial filter can also be used in a similar way.
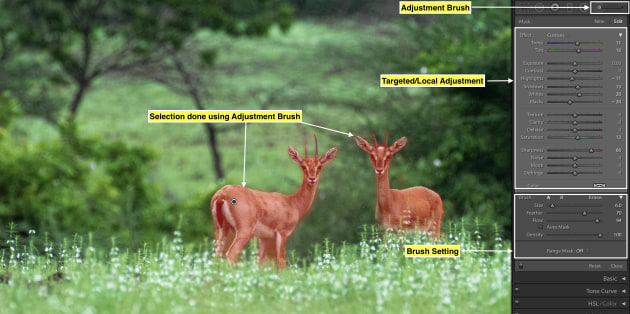
Adjustment Brush
The Adjustment brush allows you to make adjustments to only certain areas of an image by “painting” the adjustment where you want it. It’s found under the basic panel. The size slider controls the size of the brush, and feather controls the transition between the selected area and the non-selected areas. With ‘Show selected mask overlay’ checked, you will see the initial selection in red.
Once the required area is painted, you can select Range mask as with the graduated filter in step 9, or after the selection is made, click on the Mask>Edit panel to make targeted adjustments to the area you have painted.
About the author: Shreyas is an Adventure explorer, Nature and Wildlife Photographer. After photographing in different parts of India for more than a decade, he has focussed on what he is most passionate about : Digital Post Processing and Photography Mentoring. You can see more of his work and tutorials at shreyas-yadav.com.