
5 more Lightroom shortcuts you need to know
Last week we shared 5 Lightroom shortcuts you need to know, and this week we thought we'd share five more!

1) Zoom in and out
This shortcut is pretty straightforward, but it’s a useful one as many people find zooming in Lightroom a challenge. The keyboard shortcut to zoom is Command = (easier to think of it as plus for zoom) on a Mac, and Control = on a PC. To zoom out again it’s Command - (minus) on a Mac and Control - on a PC.
It comes into its own when you’re using the detail sliders – Sharpening and Noise reduction – so you can get in close and see the effects of your changes. For portraits and wildlife images, zoom right in on the eyes.
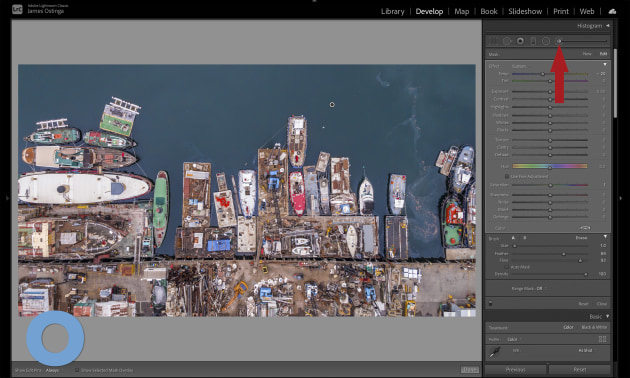
2) Reveal and hide mask
When you’re using the masking tools (Adjustment Brush, Radial Filter and Gradient Filter) press O on your keyboard to toggle the red masked area on and off.
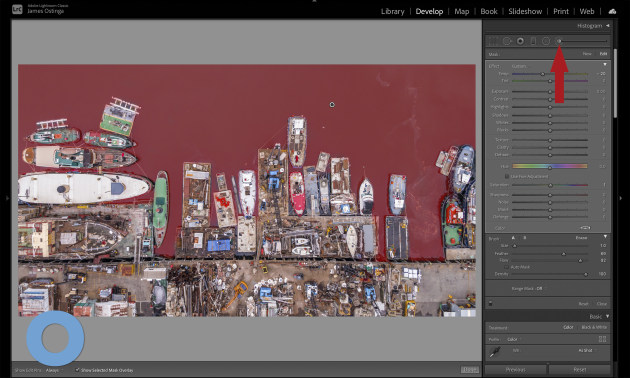
Try it out: Paint in an area, press O, adjust the sliders, paint some more, press O again. For me, it’s become a process I do on autopilot, and much quicker than using the mouse to click and unclick the ‘Show Selected Mask Overlay’ option.

3) Brush adjustments
On the topic of masking tools, if you’re creating complex masks with the Adjustment Brush, use the square bracket keys to make the brush bigger (]) and smaller ([). To adjust the feather of the brush use Shift-] (more feather) and Shift-[ (less feather).

4) Make a virtual copy
What if you want to create two different edits of one image, say a colour and a black and white version? No problem: select the image and press the Command and apostrophe keys on a Mac, or the Control and apostrophe keys on a PC, to create a virtual copy. Now you can edit one image multiple ways.

5) Clipping warning
In the Develop module, press J on your keyboard to toggle the clipping warnings on and off. Switched on, you’ll get a visual warning if the darkest or lightest parts of the image lose detail. Solid black areas of the photo will appear bright blue; solid white areas will appear bright red.
Being able to switch the warnings on and off quickly is useful if there is clipping in the photo that you don’t want to fix – say from a direct light source. In this image, I might be happy for the bright window and the light in the ceiling to clip to white, but I don’t want to see the red warning area all the time – J to toggle on, J to toggle off!