
Sponsored: Capture New Zealand’s beauty with these drone photography tips
For many photographers, flying a drone in New Zealand is the dream. With its rugged coastlines, snow-capped mountains, and secluded beaches, the country is breathtakingly beautiful.
The good news is: you can take a drone on an airplane. Airlines vary slightly, but in most cases, you’ll need to remove the batteries and store it in your carry-on luggage.
When you touch down in New Zealand, here are some top drone landscape photography tips from the experts at Ted’s Cameras:
#1 Learn the laws and regulations
Safety first! Before you take to the sky, read up on the drone rules in New Zealand. The Civil Aviation Authority lays out the law, but here’s the gist: you can only fly in daylight hours, and up to a height of 120m. If you’re planning to fly over people or private property, you must get permission. Airports are a no-no, but that shouldn’t be an issue when you’re shooting landscapes.
Those are the overall laws. In New Zealand, national parks and conservation areas are managed by the Department of Conservation (DOC).
If you want to capture those awe-inspiring natural landscapes, you’ll need to apply for a concession. A one-off concession costs $50.
With all other public land, you’ll have to follow the rules and regulations set by the local council.

#2 Bring a carry-on drone case
Crossing oceans to get to New Zealand? Protect your drone and accessories with a case. Nobody wants to open their baggage and discover a broken drone!
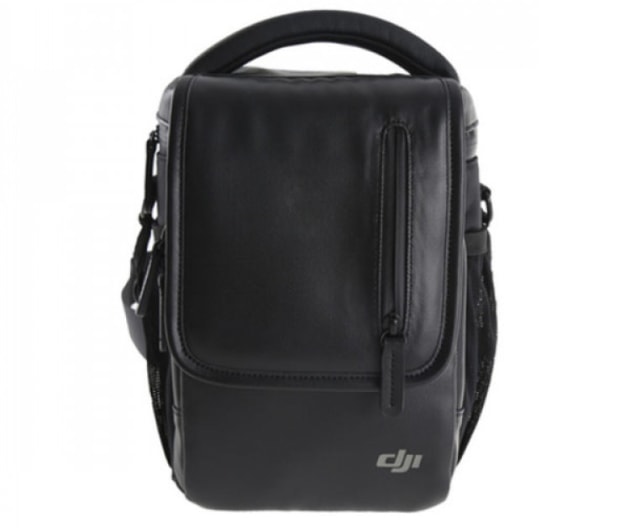
We recommend the DJI Mavic Shoulder Bag. Made from soft yet resistant material, it fits an aircraft, controller, smartphone, four batteries, and small accessories (like cables).
It slings over your shoulder, so it’s easy and comfortable to carry on long shoot days.
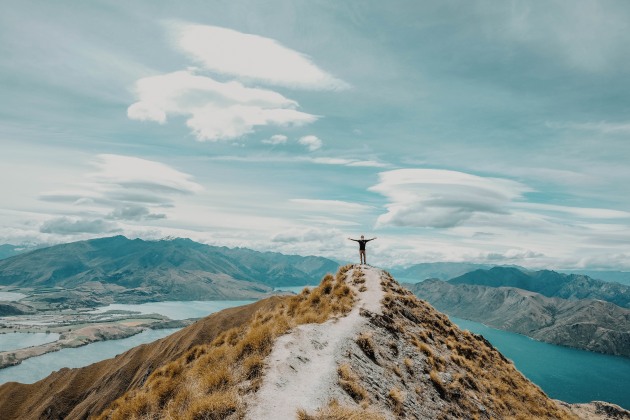
#3 Head for the National Parks
New Zealand is flush with national parks that are begging to be explored. If you’re game, lace up your hiking boots, pack some snacks, and set off to see some of the country’s most pristine places.
Our top pick is Mount Aspiring National Park, which is home to the Haast Blue Pools.
They’re a little out of the way. You’ll need to hike a forest trail, jump on a swing bridge and stroll along a boardwalk to reach the crystal-clear pools – but the water feels amazing.
Tongariro National Park is another beauty. Tackle the Tongariro Alpine Crossing, and you’ll score footage of volcanic craters, pastel-coloured lakes, and panoramic views of Mount Ngauruhoe and Mount Ruapehu.
Don’t forget to check out the areas surrounding national parks, too. They’re a treasure trove of people living peacefully and respectfully on the land, and the contrast between the sparse population and the vast, picturesque landscapes is incredible. Remember to bring extra batteries – when you’re shooting, one is never enough!
#4 Shoot at the right time of day
Ask any landscape photographer about their favourite time of the day to shoot, and they’ll say ‘golden hour.’ By this, they mean just before sunrise and sunset. The light is warmer, softer, and illuminates the landscape in the best way.
A drone is different from a camera, so take these tips on board:
- Stay low - You can fly hundreds of metres into the sky, but that doesn’t mean you should. Often, the most amazing drone photos are taken closer to the ground. The drone can capture the depth, contours and size of the landscape, while you may lose those details if you fly too high.
- Use Google Maps - When you’re scouting for photo opps, turn on Terrain View in Google Maps.
- Search for symmetry - Think patterns and lines. With a drone, you have the advantage of a birds-eye view, but seeking out these features will make your photos more mesmerising. It’s easier in cities, but you can find symmetry in natural landscapes – if you know where to look!
- Take panoramic shots - Some drones, such as the DJI Spark, have a built-in panoramic mode. If your drone doesn’t, try taking a bunch of shots while panning the camera, and then stitch them together using editing software. This technique will help you to capture wide, high-resolution photos.
- Add ND filters to your kit - For landscape photography, Natural Density (ND) filters are fantastic. They’re like a pair of sunglasses for your camera. They reduce the amount of light entering the lens, and let you control the shutter speed and exposure time. We like the DJI Mavic PT47 ND Filter Set. It includes ND4, ND8, ND16 and ND32 filters to cater to all types of lighting.
#5 Know your drone's limitations
How far can it fly? How long will the battery last? And is there a maximum flying time in the area you’re shooting? Read the manual and test your drone before lift-off.
In New Zealand, it’s normal to experience four seasons in one day. Try to fly in the most ideal conditions possible, and be mindful of any rain or wind. As always, make sure you can see your drone at all times so you can easily guide it back.
#6 Get inspired!
There’s no shortage of inspiration online.
Fuel your wanderlust with tourist websites, travel blogs and Instagram, and chances are, you’ll be booking your second trip before you’ve left for your first.

#7 Be mindful of other people and wildlife
The country is stunning, and it’s your duty to keep it that way.
When you’re travelling in New Zealand, respect the land and take note of the Tiaki Promise to preserve the land for future generations.In a nutshell, it says to tread lightly and leave no trace on the land, and be considerate of other people and cultures.
If you’re hoping to fly over farms or the water, remember to apply for a DOC concession or get consent from the landowner.