
Lightroom how to: Apply a localised Tone Curve
Have you ever wanted to add punch, softness or a cinematic fade to only a selected area in your image, such as a sky, foreground, subject, or background, without affecting the rest of the image?
Many Lightroom users don’t realise the Tone Curve is also available inside masks, and is an easy way to do just that. Let’s show you how.
Step one
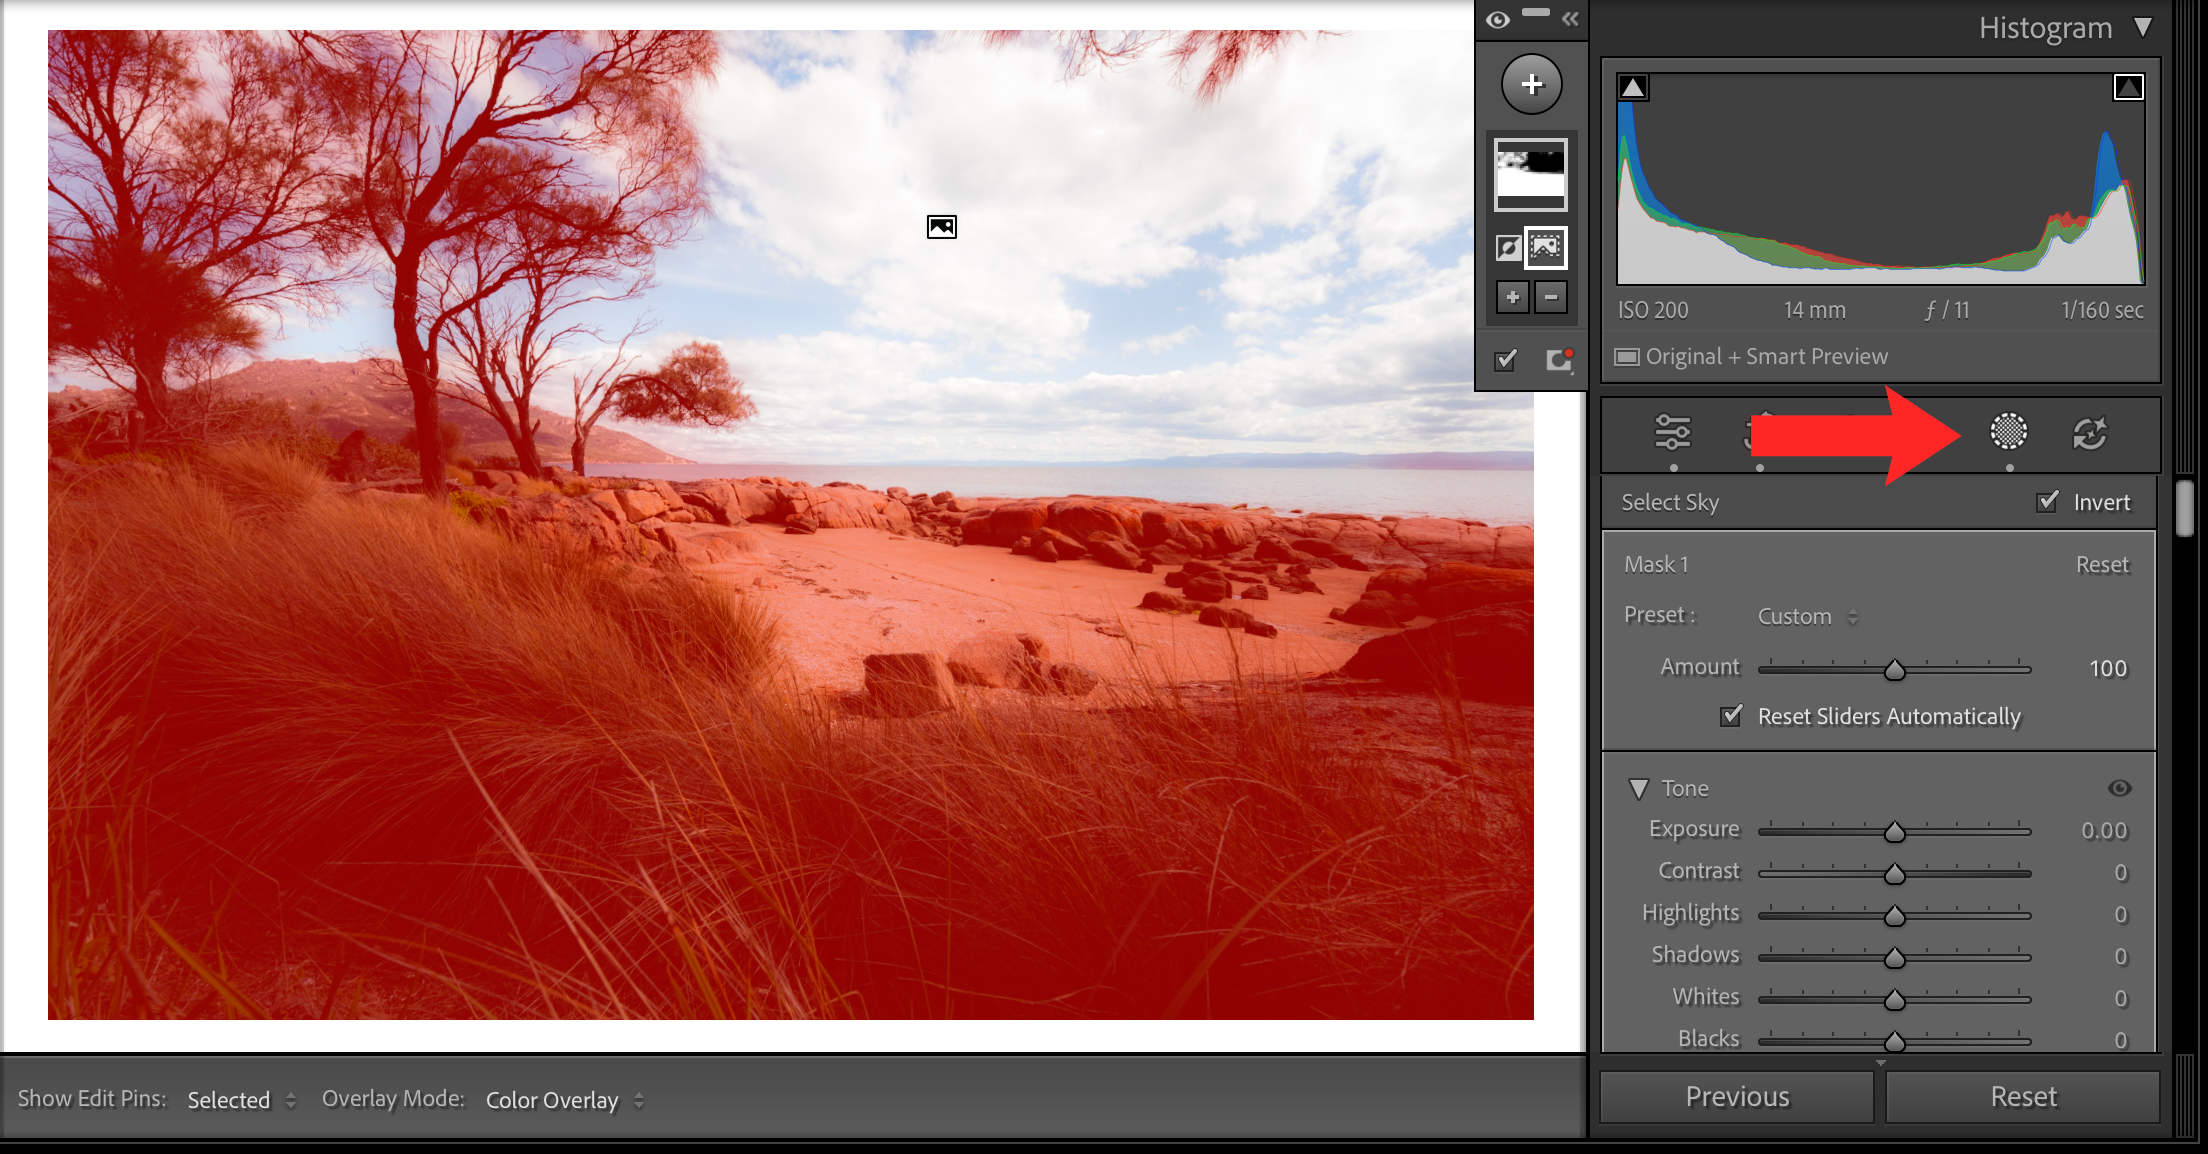
First, we’ll create a mask for the area you want to affect. Open the Masking panel and choose an appropriate tool
The Linear Gradient works best for skies, or subjects with a defined, straight edge. The Brush and Radial Gradient work best for specific subjects. You’ll want to refine the mask so it cleanly covers only the area you want to edit.
Adobe’s AI-powered Select Subject or Select Sky tools also do a pretty good job and can help speed up the process.
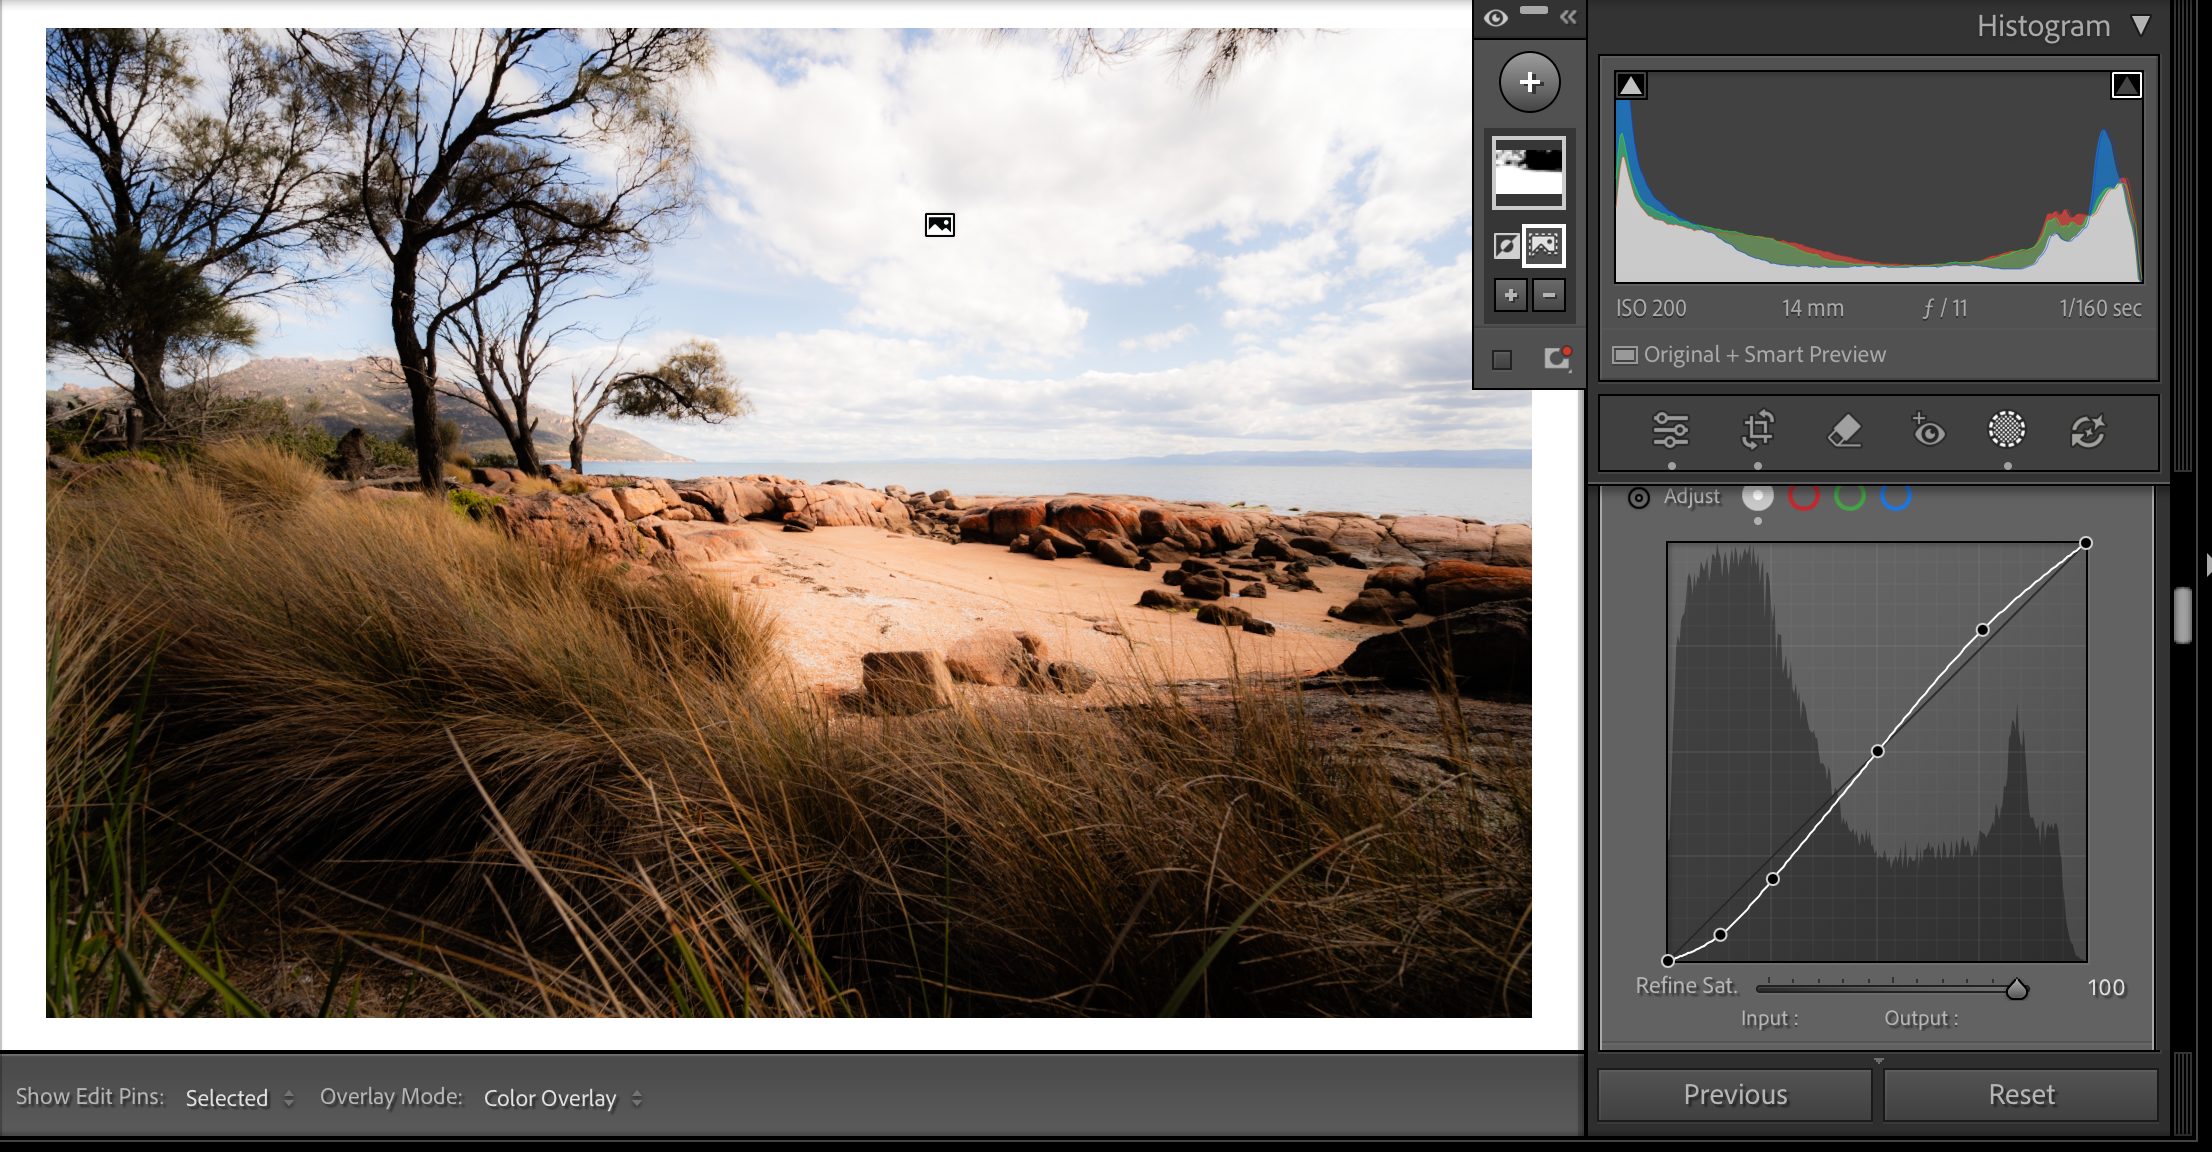
If you’re editing a Landscape and having trouble selecting the entire foreground, you might find it quicker to first select the sky and then tick ‘Invert’, just to the right on the panel. That’s what I did here.
Tip: You may need to ‘zoom in’ to target a particular area of your image. You can do this by clicking off the masking panel and clicking on the area you want to target. Lightroom will zoom in to 200% when you do this, allowing for more detailed selections.
Step two
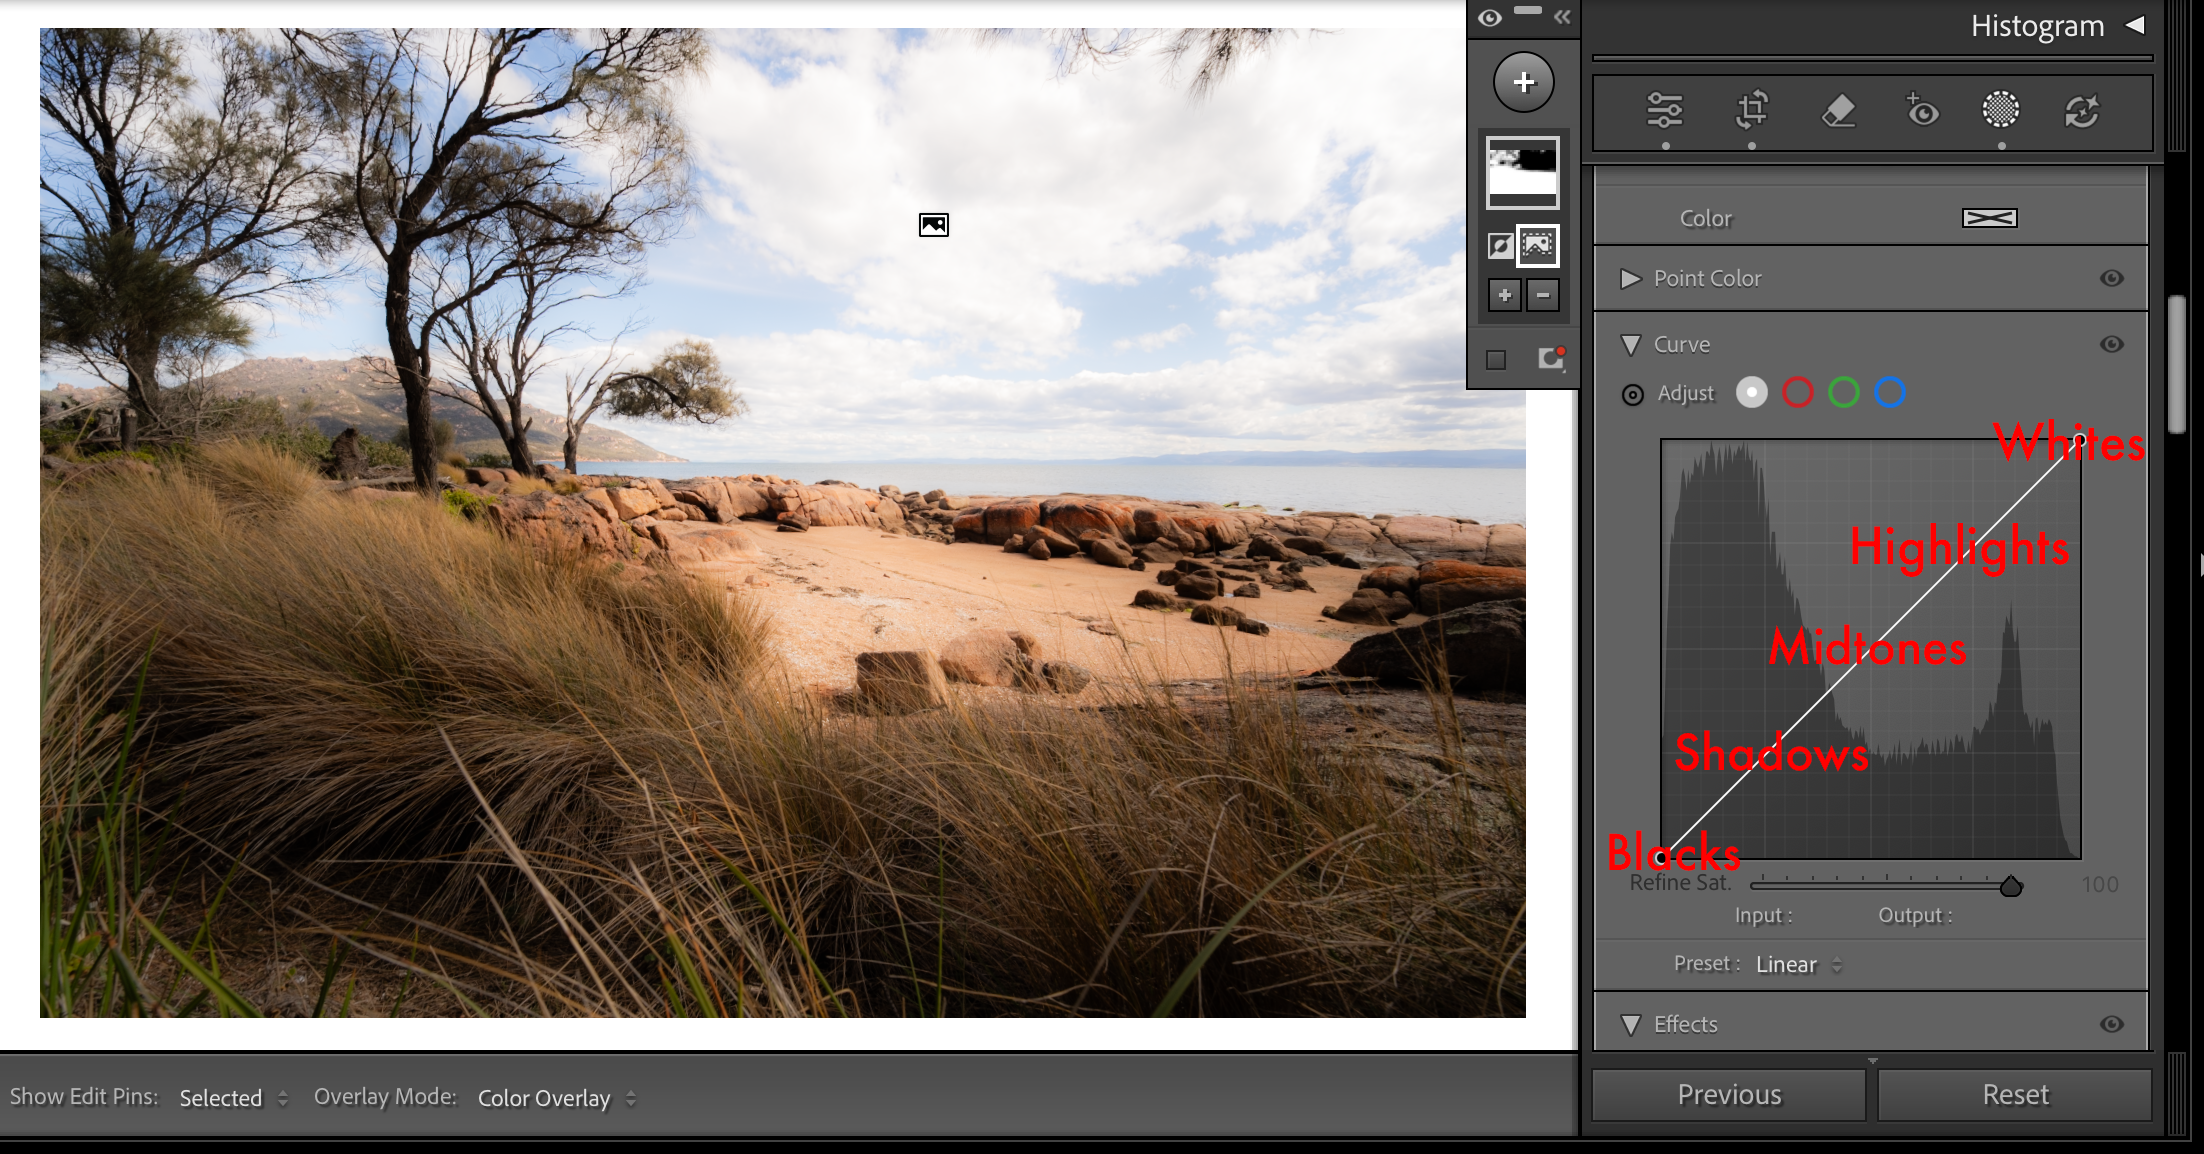
Open the Tone Curve inside the mask
With the mask active, scroll down to Curve in the local adjustment controls. Because we’ve masked the area we’re editing, this is separate from the global Tone Curve and only affects the masked area.
Just like basic global corrections in Lightroom, the Tone Curve allows you to adjust blacks, shadows, highlights, and whites, as well as midtones, but with more granular control.
Step three
Add a curve for contrast
There’s a few ways you can use the tool. The most popular is to use a gentle S-curve. This lifts highlights slightly while simultaneously pulling shadows down slightly.
You can add points simply by clicking anywhere in the grid and you can remove points by double clicking them.
With this image, I’ve increased the contrast in the shadows here slightly. Notice how I use a very subtle change to the curve to do this. This is enough to lift shadows but also increase contrast locally without making the whole image harsher. Small movements go a long way.
Tip: You can reset the Curve by choosing Linear from the Preset menu. There are also presets for medium and high contrast here that can be a good starting point.
Step four

Lift the black point for a softer, cinematic look (optional)
Another trick is to raise the left-most point of the curve slightly to lift the black point. This gives the selected areas a somewhat faded/flat film look which can be an entire style of its own, and is pretty popular on social media.
Certain images benefit from lifting the black point better than others, but it works particularly well on textured subjects, skies or misty landscapes, and creates separation without obvious dark edges.
Step five
Fine-tune your local adjustments
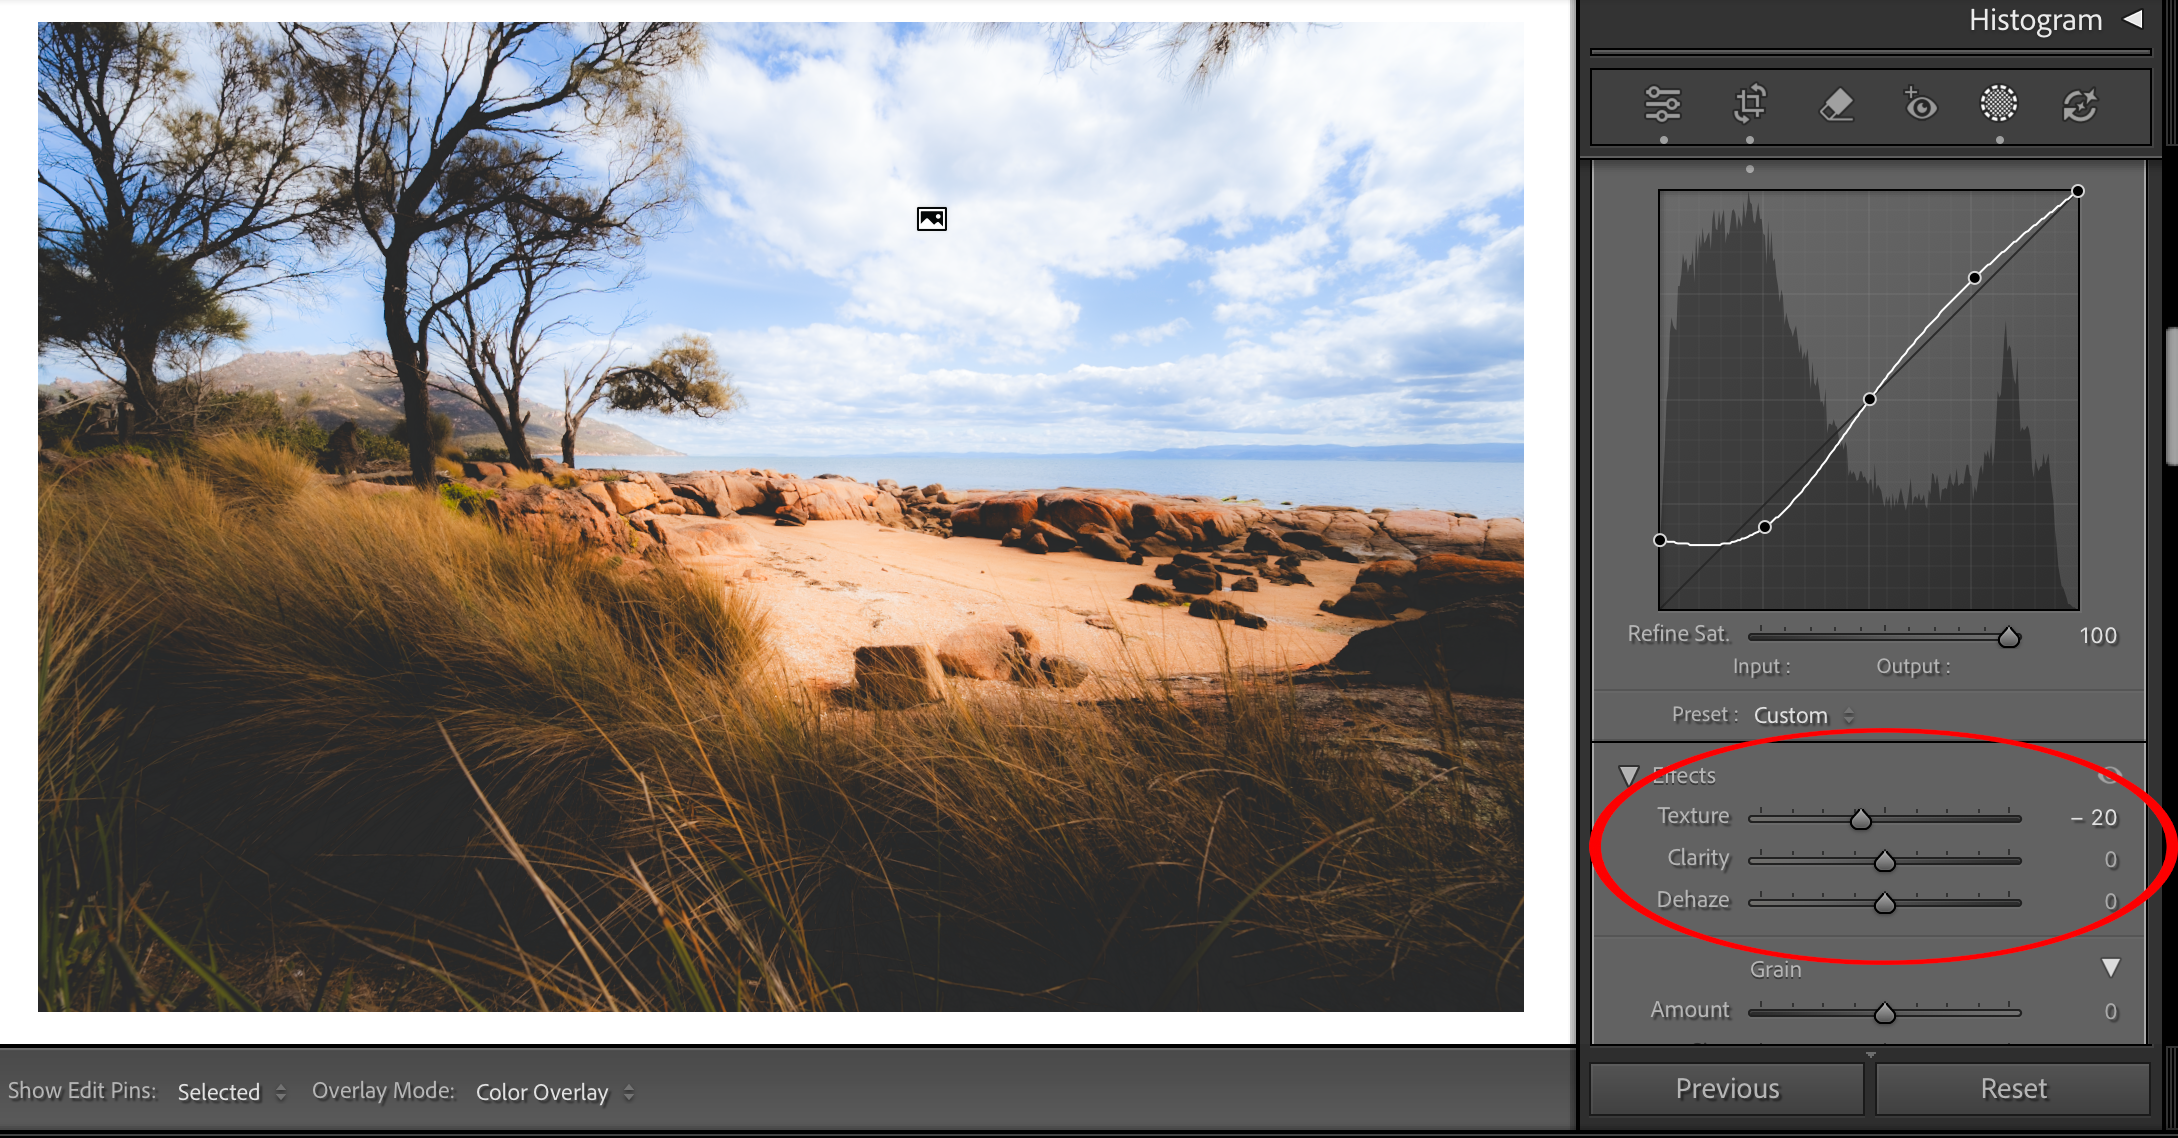
After shaping contrast with the curve, your image might benefit from a couple of other local adjustments.
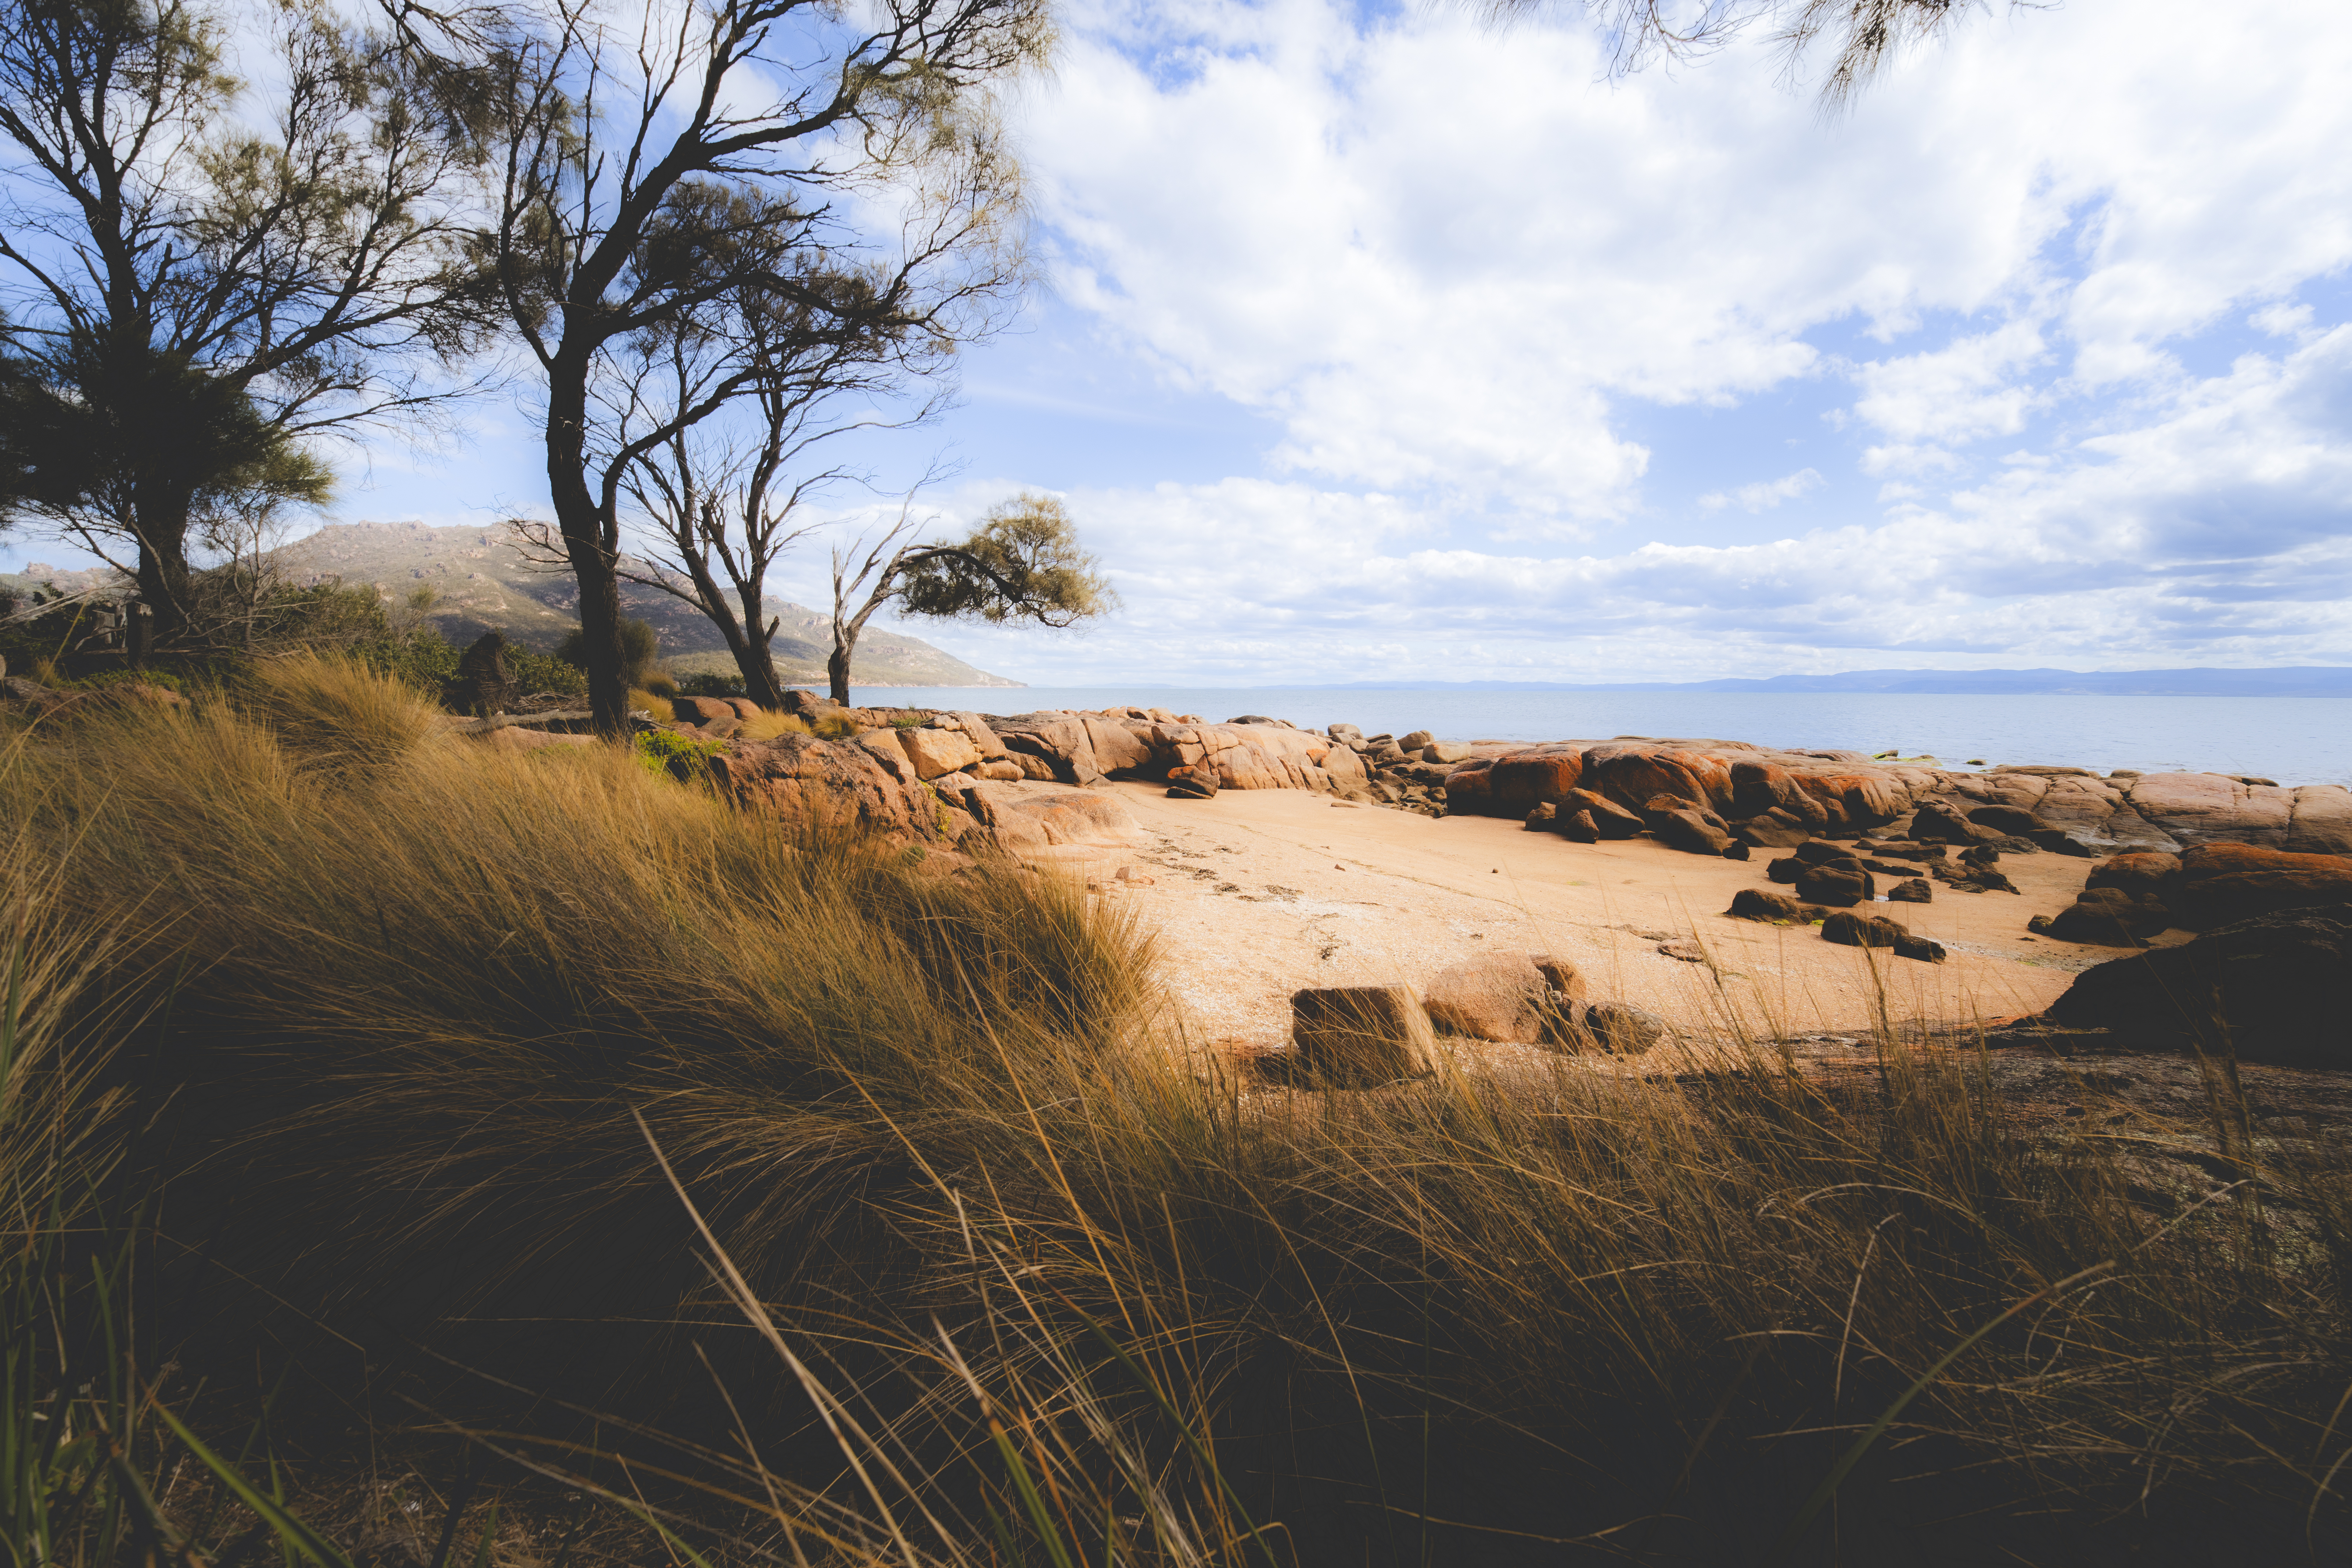
Here for example, I adjusted Exposure in the Tone panel a little to balance brightness, and reduced Texture to control the perceived sharpness and play up the softer filmic look, while avoiding crunchy detail.
I also pumped up the blues in the sky a little with a sky specific mask.
Step six
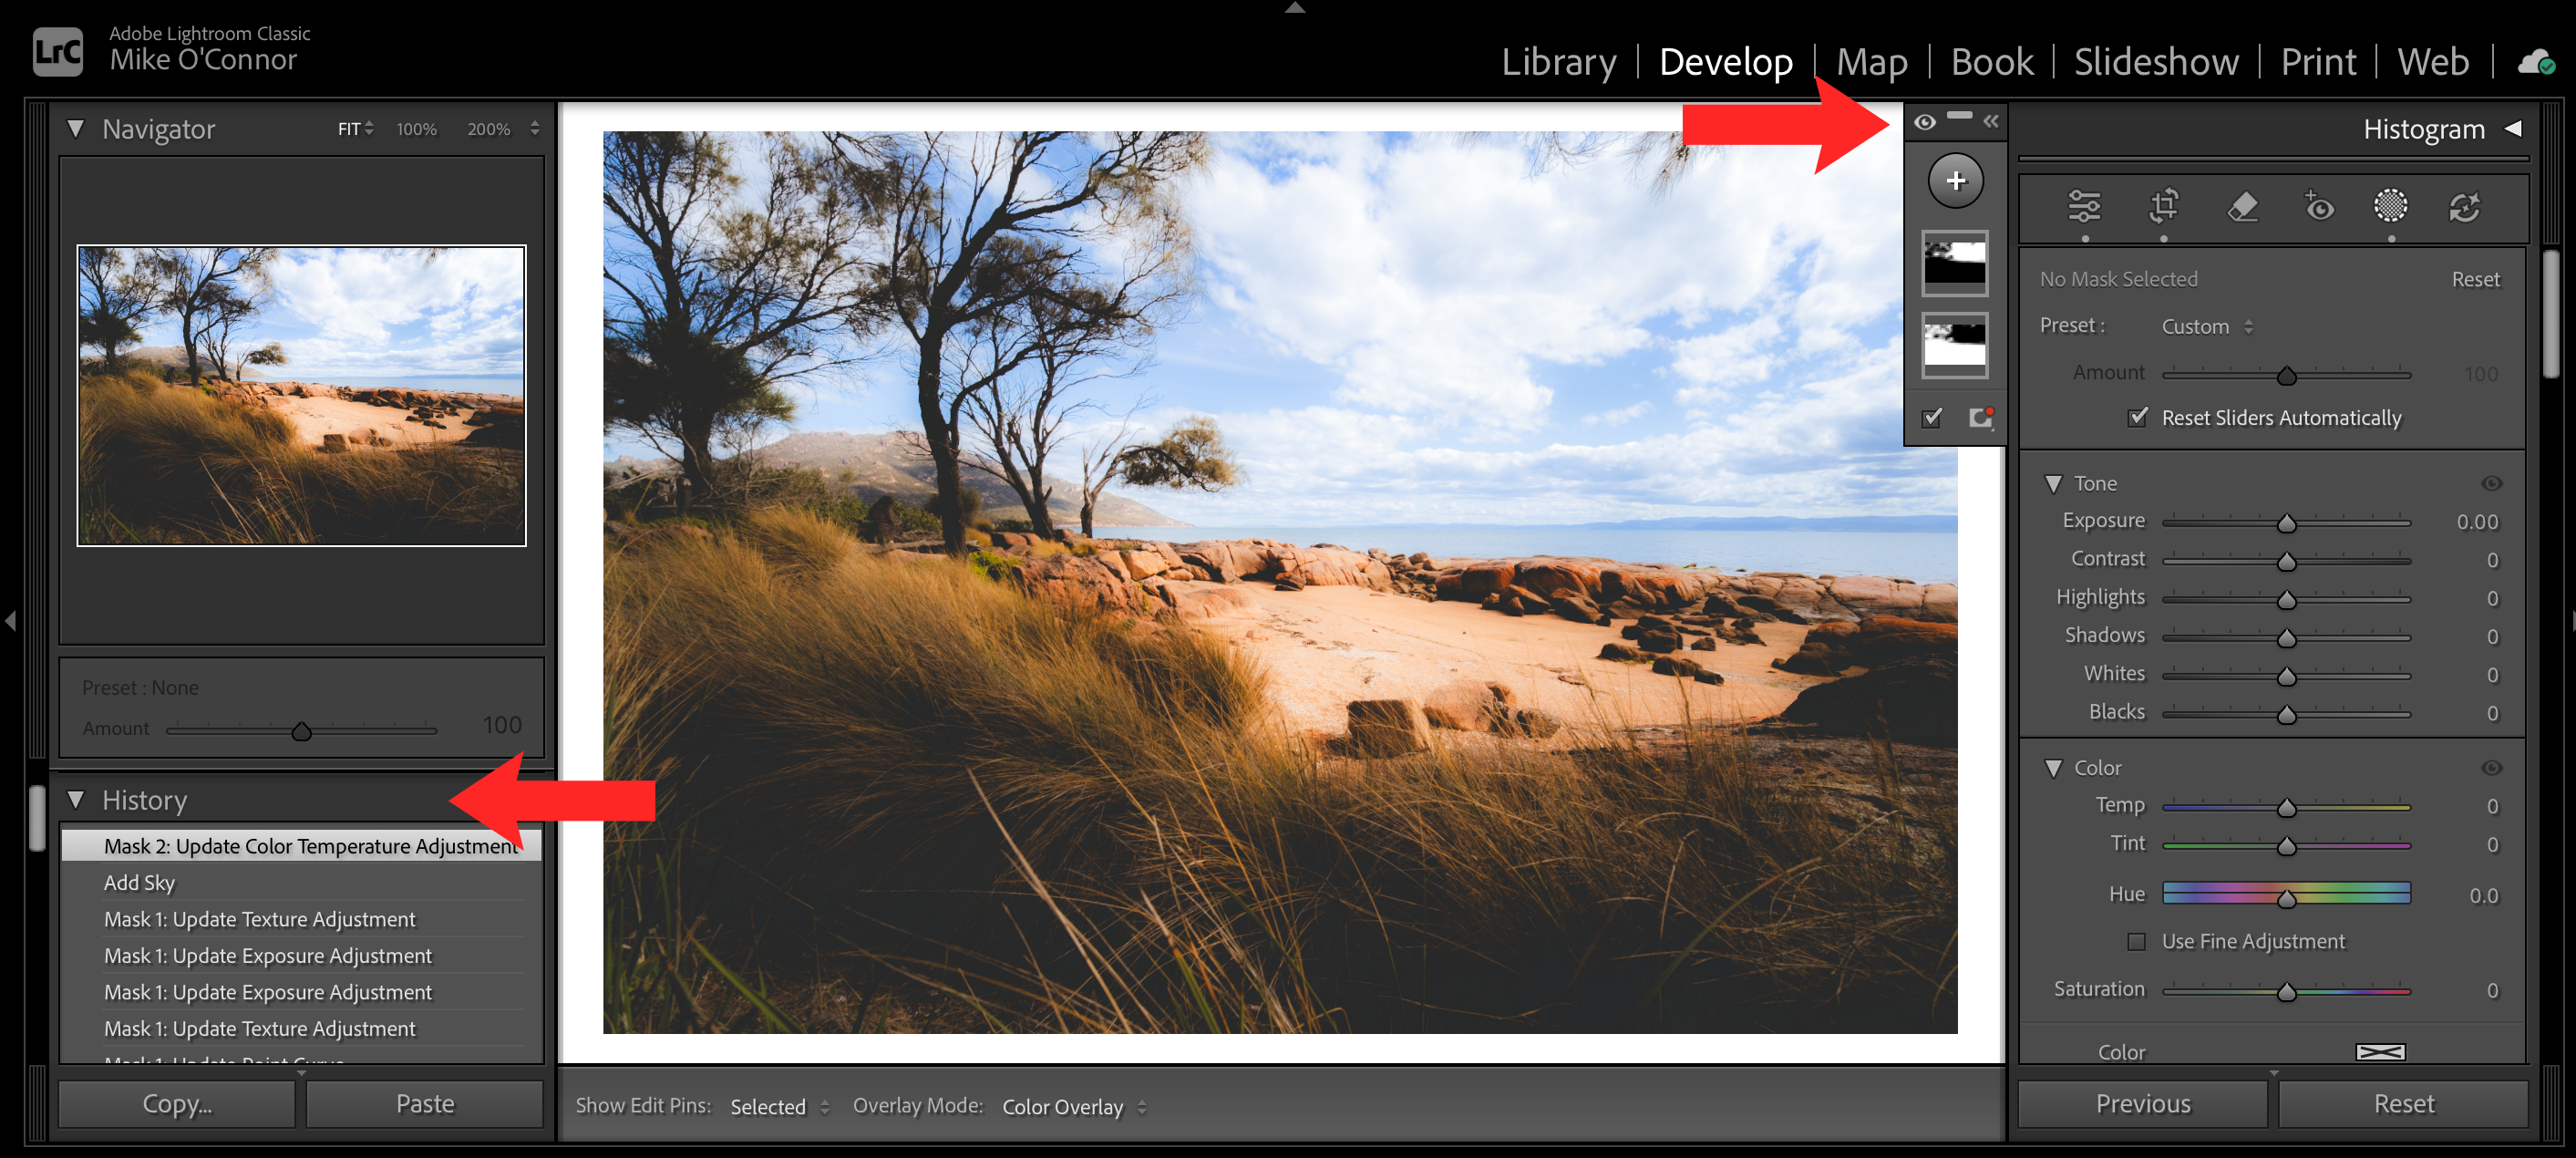
Toggle the mask on and off to check realism
Finally, you can use the mask visibility toggle (the eyeball) to compare your before and after.
If the effect draws attention to itself, back off the curve slightly, and remember that all changes aren’t permanent, just go through the History tab on the left to walk back any changes.