
How to make a mini photo series
Collating a series of nine images together is a great way to not only give some of your lesser images a second lease on life, but also focus your creativity. Lee Cleland explains how you can put together your own mini series.

If you are anything like most photographers, there’s thousands upon thousands of images on your hard drives. Maybe you keep your best shots in a separate folder that grows over the years, but what do you do with all the others?
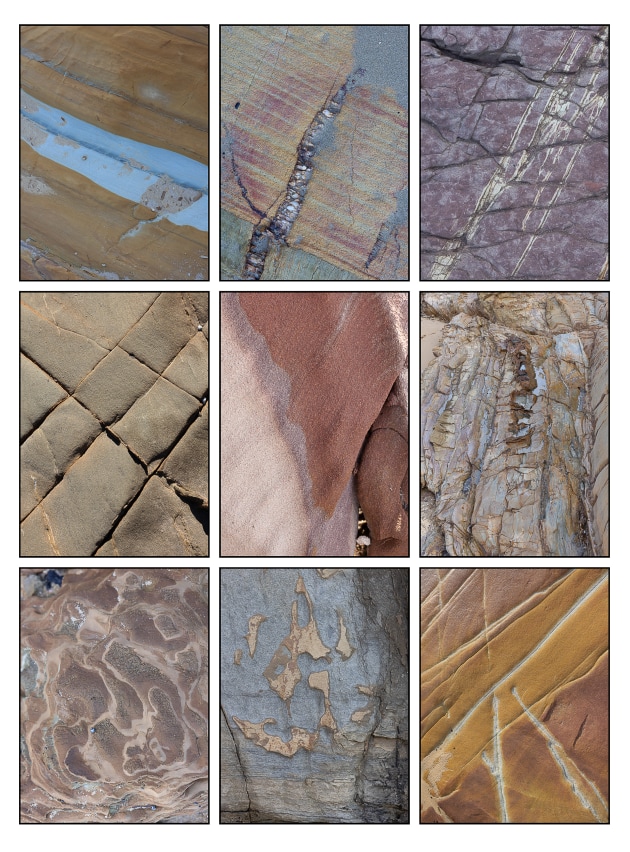
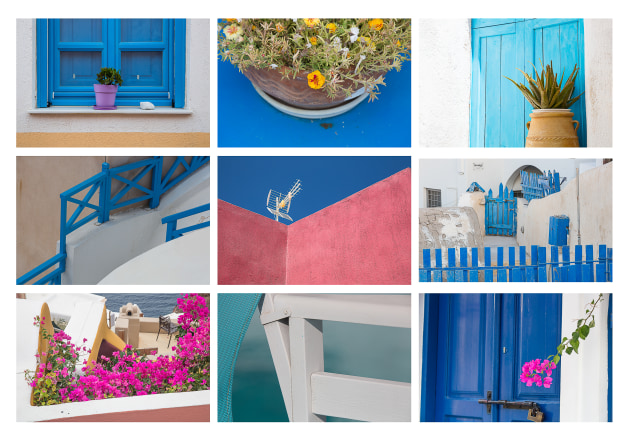
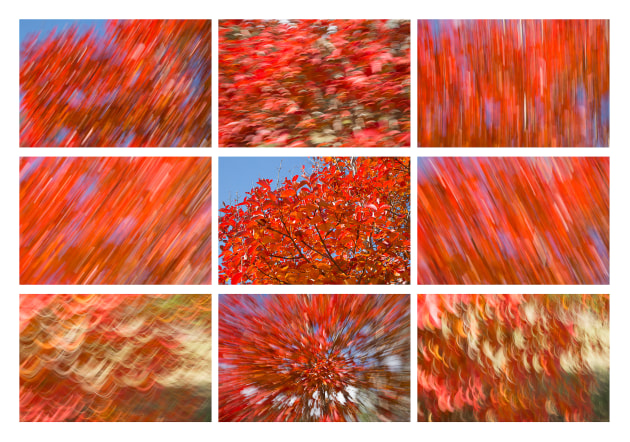
Putting my images into a series of nine is something I’ve been doing for the last few years, and I’ve found it adds a new dimension to my photography and how I showcase my images. Why nine you ask? Nine images are visually appealing and yet still a challenge to put into a 3x3 grid. At the same time, nine images of the same orientation will give you a pleasing finished look.

Putting your images into a group of nine makes them collectively stronger by saying ‘I think these are important’. As an exercise, it encourages you to think how images can work together to make a story, and it helps to clarify what you love to shoot and how you can take better shots.
Finally, it’s a step towards understanding how to make a portfolio or body of work for competitions or exhibition, and it’s also great for understanding how to organise photos for photobooks.
Getting started
If you already know what you love to shoot, you’re halfway there. Anything can make a series of nine: kitchen utensils, forest trails, shells, birds in flight, sunrise reflections – anything!
The key, however, is to be specific and focus on the details–instead of a variety of architectural images for example, you could choose open doorways, reflections on city windows, or angles of city buildings. In my own work I’ve been less interested in the technical elements (one lens, one focal length etc), but instead the composition of each individual image and the placement of ‘how’ those nine images work together in a 3x3 grid.

Images should have a common theme, be cohesive and be connected and balanced. You need to have at least 20, and preferably 30-50 images, to choose your final nine and it helps to have a few basic constraints.
One technique I use is to first take a few images of the same thing in each orientation, then decide and stick with it – colour or black and white, low key or high key, the flowers will be pink but different species, etc.
You will also need variety within your series, but not so much that each image stands alone and is very different to the next. This is a fine line, and you may find that your favourite image just does not work in your series. This is when you need to get tough and only keep images that work together.

Bringing a sense of order
Each image should stand on its own but be stronger when near other similar images.
Part of the skill is in the order. Which image positioned next to which, and then which on the next row works with the one above, beside or below it. Sometimes a series might be composed of different aspects of a theme, and these may work best as three separate rows of three across or down.
I use Adobe Lightroom to make my selections, but there will be other programs that allow you to do a similar thing. Let’s take a look at the process in LR.
Using Lightroom to select images
First, put your chosen 20-50 images into a Collection in Lightroom. If you only have 20 images, select all the images and click ‘N’ which will display the 20 images on one screen.
If you have more than 20 images, go through in lots of 20 until you whittle them down to 20 that you think will work while still giving you enough choice for your nine final images.
Here’s a tip – If you hover the mouse over the bottom right-hand corner of an image, an X will appear. Click on this X to remove images from your screen. They will still be in the filmstrip below if you change your mind and want to re-include them. You can do this with Ctrl/Cmd and clicking on the image.
With your final 20 images on the screen (Ctrl/Cmd click on each of the images and then click ‘N’), you may immediately notice one or two that stick out or just do not look right. Take them off the screen by clicking on the X in the bottom right-hand corner of the image. Make sure you stay with the theme/concept and don’t get carried away because you love a certain image.
Drag the images around the screen looking at what appears to work next to another image. Some just won’t work – get rid of them until you have whittled it down to 12 and then be ruthless to get your final nine together.
If you can see all nine images on your screen as a 3x3 grid it makes positioning of the final nine much easier. Each image should work with the one next to it and the ones above and below, depending on where in the grid they are placed.
Next steps
Once you have your selected final nine images in their correct order for a 3x3 grid, go to the Print Module in Lightroom. You are not going to print your images (unless you choose to) so you do not need a printer. Instead, I use the Print Module as a way of combining images together on one page by using a template. I can then save the 3x3 grid of images as a single image for future use.
For all layouts I use an A4 page. I’ll use one in Portrait orientation for square and portrait grids, and Landscape orientation for landscape grids. The page orientation can be changed in ‘Print Set Up’ at the bottom of the left side panel.
I have used the 2/3:4/6 aspect ratio for the Portrait and Landscape sizes, but if your camera takes images at a different aspect ratio you will have to play with the cell spacing and possibly the bottom margin to get the layout looking balanced.

At the top of the right-side panel under ‘Layout Style’ choose ‘Single Image/Contact Sheet’. Untick anything that is ticked under ‘Image Settings’. Next is ‘Layout’, and I chose ‘Ruler Units of inches’. This is what I have used in the box at the bottom of page 42 to fill in the rest of the layout.
Then, under ‘Guides’ I tick all except ‘Dimensions’. Under ‘Page’, the only thing you may want to change after the images are all in place is the page background colour though I generally keep it white. Check that nothing else below this on the right-side panel is ticked.
When you want to make a new single Image from nine images, click on the template you want under ‘User Templates’ to bring it onto your screen. The images auto-fill the template, which is why they need to be selected in the correct order in the Collections area of Lightroom as the order cannot be changed once in the Print Module.
Check that the images are in the correct order in your template, then at the bottom of the right panel click on ‘Print to File’. In the pop-up box, choose where you want to save the 3x3 grid image, give it a name and save. It will be saved as a jpg, but be sure to remember where you saved the image. You can import it back into Lightroom and crop the excess margins, which is important on the square image as there is so much unneeded white page.
I enjoy the challenge of deciding on a specific theme and then going out and looking for those images that I think will make a strong series of nine. It gets me outdoors with a reason to do something I enjoy and of course I always come back with unexpected images that often have nothing at all to do with my theme!
It can also be an interesting exercise to look back through your image archive if you know you shoot a lot of, say, waterfalls, or dead beetles, or flowers, and to see if you can make a cohesive series. You may be surprised at the series you can create that you did not know existed.
Whatever the way you choose to work, with new images or old, making a series of nines will increase your range of skills from technological and compositional to that elusive indefinable area of photography – aesthetics.
Final tips for organising your series of nine
- If there is one image with a strong colour, it may work best in the central frame
- If some images have strong diagonals, they could be used as beginning and end, facing inwards like bookends
- If you have three lots of three closely related images, try placing them in rows of three across or down
- If you have five similar images try placing them in the four corners and centre.