
Bye Photoshop: Four in-camera creative photo tricks
In today’s world of digital photography, clicking the shutter can only be half the job. Downloading your photos to the computer and processing them is often a necessary task to get the most from your files, but some photographers have grown tired of this over-reliance on image-editing software.
The solution? Forego the computer altogether and get creative images completely in-camera. You see, the advantage of digital cameras is that they are packed with a huge range of modes and functions that you can use and manipulate to create inspiring and experimental imagery while out in the field.
This feature will serve up not one, but four projects and ideas you can try out that will not only push your technical skills as a photographer, but will also net you a mini portfolio of creative images captured in-camera.
ICM
ICM stands for Intentional Camera Movement and is a technique that can help create abstract imagery from everyday scenes. The idea is to combine two elements; a slower shutter speed and moving the camera while the shutter is open. The result is a streaked effect which can look amazing with the right subject.
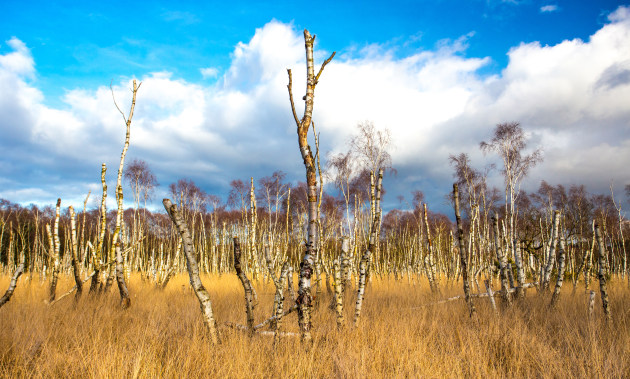

For a successful ICM image, two things are needed; a correct shutter speed that will make sure the shutter is open long enough to produce blur, but won’t overexpose the scene, blowing out any detail in the frame. Also, a smooth level of motion is needed to pan the camera left to right or up and down during the exposure. If the movement is jerky, the results will suffer.
You can try ICM with any subject, but there are certain places that work better than others. For example, forest locations with tall trees works especially well with ICM as the streak effect combines nicely with the vertical lines of the trees. Conversely, a horizontal pan will work well with coastlines.
Picture Styles
Want to get stylised images without running the files through Photoshop? Well, the answer could well already be on your camera.
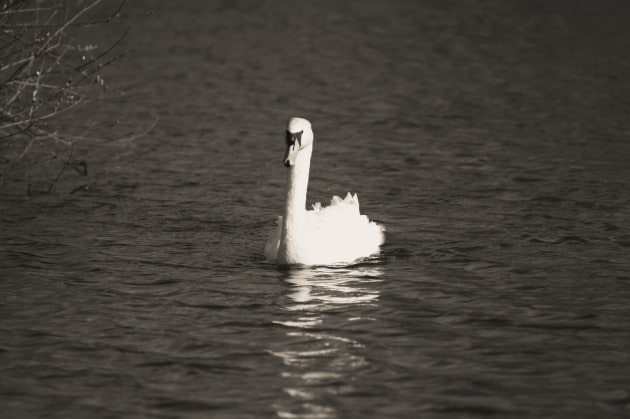
Virtually every camera on the shelves today offers some level of creative in-camera style mode. Known as Picture Styles or art Filters, these modes process the image at the point of capture and some cameras have a huge number of options to choose from.

Ranging from subtle adjustments such as adding a more vibrant pop to the colours, right through to mono, retro and black and white options, you can capture a massive variation of styles, all from simply turning the dial on your camera.
Even better, some cameras allow users to capture the stylised JPEG image, while at the same time also capturing a plain RAW file so, if you don’t like the result of the Picture Style images, you have a backup RAW file that you can edit down the line.
To take this approach even further, some cameras allow users to create their own Picture Styles, enabling parameters such as Saturation, Sharpness and Contrast to be tweaked to your liking and saved for later use.
Multiple Exposure
Most of us have probably seen cool examples of multiple exposures created by Photoshop before. This technique involves overlaying one image on top of another in the image-editing software and then changing the Blending Mode to allow the pixels to seep through and create the multiple exposure effect.
When done right, this technique can look amazing, but did you know that most digital cameras allow you to do this technique completely in-camera?

Usually found in the shooting menus, activating this feature will allow you to take a photo, take a second photo and the camera will merge them together to create one single file. Some cameras even allow you to capture more than two files to merge together, in fact some cameras allow hundreds of files to be shot to create a mega multiple exposure creation.

You can often tweak the strength of the effect too, depending on the model of your camera. This technique often works well when you mix a subject (say a portrait) with a textured background - for example, a tree or a brick wall.
In-camera RAW processing
RAW image editing software such as Adobe Lightroom works by taking your RAW file (containing RAW tonal data of the scene) and then adjusting parameters such as Exposure, Saturation, Contrast, Sharpness etc, before exporting the file as a JPEG.
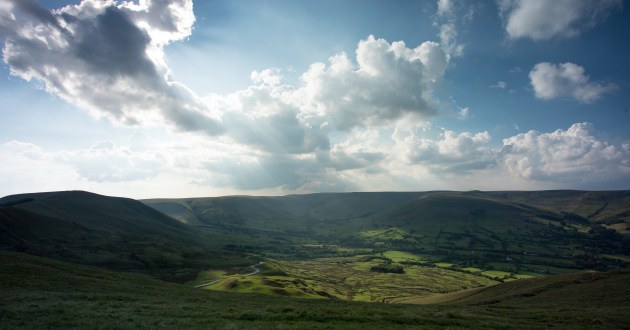
Amazingly, some cameras enable you to do this in-camera. Now, don’t be fooled into thinking this is only for high-end megabucks cameras, because this option is actually usually found on consumer-level cameras.
Follow the menu screens and you’ll be able to make changes to White Balance, Lens Correction and even combat the effects of shooting at high ISO by adding some anti digital noise effect to clean up the frame.
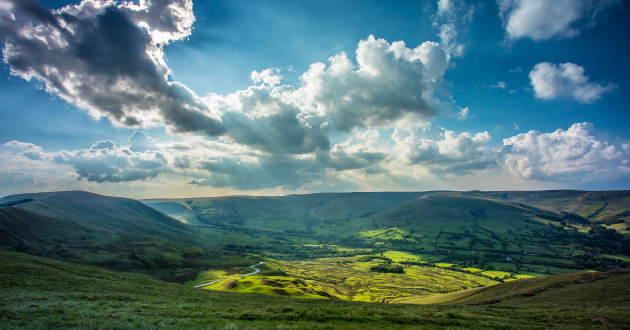
Now, let’s be honest, the options and results won’t be as extensive as you find in software such as Lightroom, but even having the ability to make these changes while you’re halfway up a mountain or on some remote island is mind-blowing.
Keep a lookout for part two, with more tips, next week.