
3 quick tips for using Lightroom's Adjustment Brush
Located at the top of the Develop module is one of Lightroom’s most useful tools – the Adjustment Brush. At its essence, the Adjustment Brush gives you access to Lightroom’s major global editing tools like Temperature, Exposure and Contrast, but with the ability to localise your edits.
From making tweaks to highlights, whitening teeth or sharpening up a small part of an image, I find it’s rare that I edit an image without using it at least once.
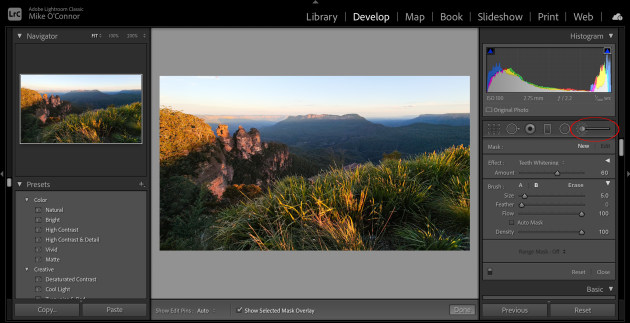
In this tutorial, I’ll share a few different ways you can use the Adjustment Brush to enhance your images. The Adjustment Brush icon can be found in the Develop module below the Histogram, and above the Basic panel on the far right. Let’s get started.
1) Speed up how you use the brush
Lightroom’s best feature is its shortcuts, so let’s start with a few handy ones you can try when using the Adjustment Brush. First, you can select the Adjustment Brush at any time by pressing ‘K’, and hitting it twice will reset any changes you’ve made and give you a new brush to work with.
It’s often useful to show and hide the Mask overlay when you’re using the brush, and the shortcut for this is ‘O’. You can also adjust the size of the brush with the scroll wheel on a mouse, or by using the square brackets if you prefer a keyboard-based shortcut. To adjust the amount of feather (the amount of softness at the edges of the brush), use Shift + the square brackets, and if you ever want to show and hide the pin, you can hit the ‘H’ key. On that, you can also duplicate a pin by right clicking on it and selecting ‘Duplicate’.
Another handy shortcut to use when you’re painting is to hold down the Option key (Mac) Alt key (PC) to temporarily convert to the eraser tool to paint away parts of your adjustment.

2) Use the Adjustment Brush with presets
One of the best time-saving features of the Adjustment Brush is the variety of presets you can use to quickly edit your images. At the top of the greyed-out box when you select the tool (next to the word ‘Effect’) you’ll find a selection of options available from a drop down.
The presets are simply default values that Lightroom thinks would work well to accomplish specific tasks, so as well as familiar settings like Dodge and Burn (for localised adjustment to exposure) there’s also a few handy ones for editing portraits such as Teeth Whitening and Iris Enhance. With all of the presets, you’re free to override the setting sliders to make the chosen effect as dramatic as you like. Here’s a quick tip – you can reset any slider back to 0 by double clicking the ‘Effect’ label.
Finally, you can also make and save your own presets as well. This is done at the bottom with ‘Save current settings as new preset’, and is particularly useful if you want to create a few different options to cycle between without setting them up each time.
3) Use the Adjustment Brush like a paintbrush
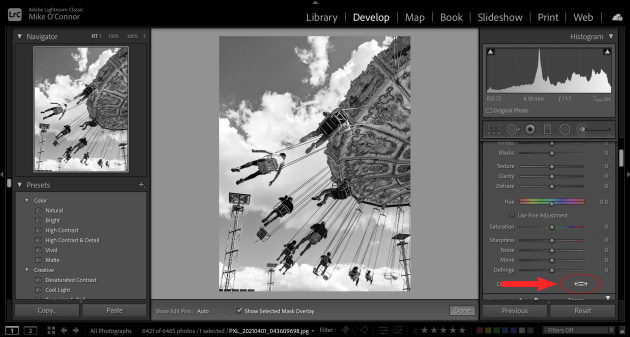
You use a paintbrush to paint things, so it’s probably no surprise you can use the Adjustment Brush to do the same thing. If you want to add brushstrokes of colour to your images, near the bottom of the colour panel is a rectangular box with a large X through it. Click on that and you will see a colour picker with an eyedropper tool that you can use to give your brush strokes a bit of colour.
The effect is simply stacked on any adjustments you are already using such as Exposure or Clarity, so if you want to just brush a straight colour on an image make sure you turn these off first.
We'll have another three adjustment brush techniques next week - watch this space.