


Mick Fletoridis is a Sydney-based photography, writing and now video, expert.
More and more clients who hire photographers for events are also expecting video coverage to complement stills. This can prove problematic, especially for photographers who generally work solo or have no experience in producing video. As someone who recently started shooting corporate events on a freelance basis I hope to offer some tips that might streamline the process for other photographers planning to do the same. While this article isn’t really aimed at the specialist field of wedding photography some of the following may also be relevant for that field.
Starting Out
Thanks to previous roles as a magazine and website editor I’d had a lot of experience shooting still images. In recent years I branched out into shooting and editing videos for posting on websites and Youtube. A timely conversation at a pub with a past work colleague led to an offer of shooting a video at a trade event for a prominent air conditioning manufacturer. While over a few beers it had sounded like a great idea, in the harsh light of the next day panic set in. My approach? "Feel the fear and do it anyway."
Having agreed to do the video shoot I had a week or so to prepare as best I could. The event was taking place at a venue at Homebush in Sydney so I jumped online to research the building’s location and layout. I was also in contact with the editor of the trade magazine covering the event who was going to be pointing me in the direction of things and people he wanted me to shoot on the day. As a stills photographer had already been hired for the event my sole focus would be video.
Once I’d researched the venue and worked out a travel route for getting there on the day I turned my thoughts to equipment. While looking into the venue I’d also thought about taking a drive over prior to the day to check it out, but decided it was too far and as I had some other things going on at the time I’d work it out on the day. First mistake…
Preparation
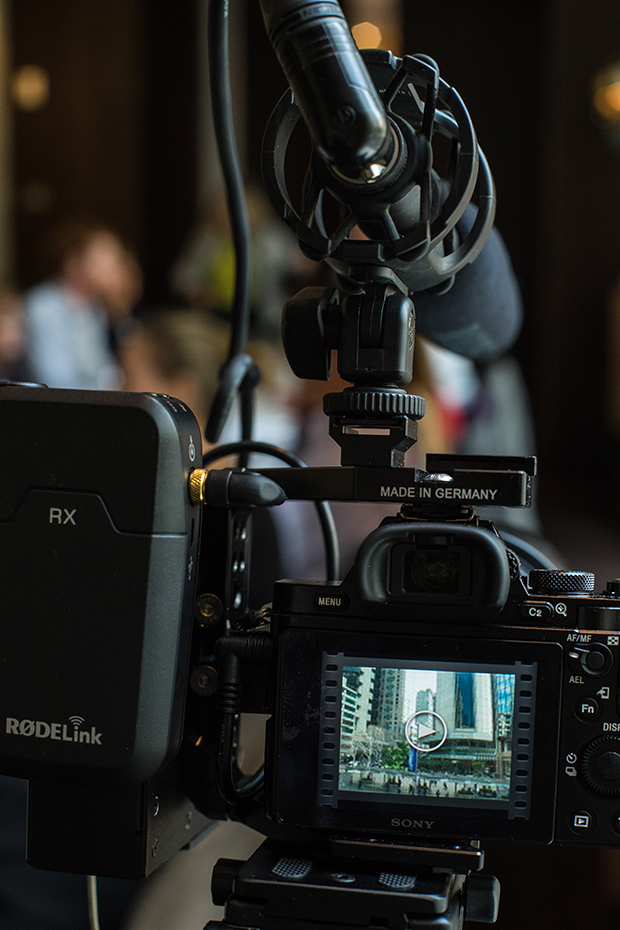
Having shot video before I was reasonably confident in the gear I planned to use for the event. I’d previously shot video with a DSLR, a Canon EOS 5D MKII. While not specifically designed for video, the 5D MK II (and MK III) has a great following among videographers as it can be fitted with different lenses and delivers cinematic, high-quality HD footage. I also had a backup camera, a Sony A7, which I’d recently purchased second hand but wasn’t overly familiar with at that stage. The Sony was a “just in case” option if things went wrong with the trusty Canon. Handily, I have a Metabones adaptor for the A7 which lets me use it with Canon lenses. The next priority was to ensure I had ample spare batteries and memory cards for both cameras.
I then switched focus to the often overlooked but vitally important aspect of audio. I had a couple of options here – a Rode Video Mic which mounts on the camera’s hotshoe and plugs directly into the camera and records audio directly in sync with video footage. This is a great microphone for close up interview or run and gun style shooting but limited for picking up audio from any distance over a couple of metres or so. The other option, which I ultimately went for, was a Rode NG2 microphone connected to the camera via a Juiced Link pre-amplifier. This was mounted to the camera base to provide better sound and recording level control. The pre-amp also provides an 'audio out' for monitoring recording sound with a pair of headphones – essential for ensuring you are recording audio if you forget to check levels on the camera, as I often do...
With the audio (hopefully) sorted a tripod was the next priority. The Manfrotto 055XPROB tripod had proven to be a reliable and stable part of my photography kit in recent years and works especially well for shooting video with a suitable head. As I discovered, quality video heads are fairly expensive to buy when you’re starting out. Thankfully there are other options that won’t break the bank and still give good service. After researching video heads online I found the Fancier FT-717AH video head which cost around $100 and has proven to be great value. It screws directly onto the Manfrotto tripod and features a quick release plate and adjustable control arm and importantly, provides smooth resistance for panning shots. This head is also available under various manufacturer names such as Weifeng and others and is reasonably easy to find online.
Finally, I had to work out how the gear would be packed on the day to minimise space and too many trips back and forth to the car. This involved a Pelican case for storing the cameras and a backpack for mic gear and other accessories. Along with the tripod it all looked manageable for one trip.
Once I was satisfied I had the gear sorted I played around with setting up the equipment to ensure everything worked together. I made sure I was familiar with setting up the camera to shoot video and the best settings to do so. I like to shoot video in manual mode, which provides more control over the style of footage but can make it more difficult to get the exposure right. Anyone not fully familiar with their camera should make sure they are, or alternatively shoot in an auto mode.
As this was to be the first time I’d seriously used the video head I practiced shooting some footage around home to become more familiar with it. After a few attempts the recorded video was starting to look fairly smooth so I was feeling reasonably confident.
The Big Day
On the day of the event I’d planned to arrive a couple of hours early to allow time to scope the location, work out shooting positions and record footage of the venue to “set the scene”. As it turned out I got lost briefly near the venue and wasted 15 minutes or so finding it. Thankfully this didn’t cut into my initial set up time too much. Once I arrived I introduced myself to the people in charge of setting up just to let them know what I was doing and assure them I (hopefully) wouldn’t be in the way. After looking around the venue I found a suitable area to store gear and a position I could shoot from for general-interest shots. I also checked out the stage area which I needed to move to at various times to record footage of the various speakers. Next was recording shots of some of the display products – compressors and general air conditioning machinery – as they would be harder to access when the event got underway. That done I moved outside and started shooting footage of the venue location, relevant signage and people setting up the event which all would be used as general interest “cutaway” type footage. At this stage I was feeling good as I was finally getting some recorded footage – after only planning to do so in the lead-up – although I was winging it somewhat without a formal shot plan. Once attendees started to arrive I started recording them, making sure to include audio, which I hoped would help add to the busy and excited feel of the occasion.
I next met up with the magazine editor who gave me an idea of the people I should try and feature in short interview style pieces to camera during the day. An industry insider I knew also arrived and proved invaluable in introducing me to the various VIPs I needed to get in front of the camera as well as helping with relevant questions to ask.
After several fairly frantic hours which included solving the odd minor technical hitch, I felt I’d recorded enough footage to produce a complete video and packed the gear away. I drove home on a bit of a relieved high after feeling I’d successfully covered my first event. Later that night I realised I’d left some equipment behind and had to return to the venue the next day to pick it up!
Lessons learnt
Since that first gig I’ve managed to acquire more video work. Each job has provided its own set of challenges which I’ve managed to overcome reasonably successfully, although there have been some stressful moments along the way! At the first job I made quite a few mistakes. Thankfully I’ve avoided repeating most, but not all. Hopefully you’ll be a faster learner than me…
One of the first lessons was that checking out the venue before the big day can help prevent many unforeseen issues. As mentioned I didn’t do this the first time around, but luckily managed to work around it. In post-production I discovered the lighting at the venue had thrown up some exposure issues, which made the editing process more difficult. While the footage had looked ok in camera at the time I shot it, more time checking out the venue before recording any footage might have highlighted this issue. It’s a fairly common one that recently cropped up again at another shoot at an industry awards event. There was a dark area directly off stage where award recipients gathered for presentations. Having again NOT pre-visited the venue I was unaware of this and it provided many photographic challenges on the day, especially as I had been asked to provide both video and stills! Having technical issues with a camera flash only added to the stress of that particular job.
Audio. When you’re basically a one-man band you have to do your best to record sound that won’t make people want to switch off. Relying on a shotgun mic (as I generally do) means having to get close to the action to record the clearest sound possible. This brings with it other issues such as unwanted ambient sounds that can get in the way of delivering your intended message. On the other hand, if you’re shooting at a busy and noisy event this can add some appropriate mood audio to help you set the scene. If you’re interviewing the CEO of the company it’s probably best to find a quiet location – as I did at the aforementioned event – and mic them up with a lapel microphone. That way you’ll eliminate any unwanted sounds. Some of the footage I shot at the first event delivered low-level audio, which luckily could be easily adjusted during the edit process. In hindsight I’d forgotten about checking audio levels throughout the day as I’d moved shooting locations.
While video editing is a subject in itself, if you have a clear plan of how the final footage will go together it is a big help. It’s a good idea to plan the shots you need. Write them down on a list and you can tick them off as you go. Drawing up a storyboard for the completed video can also keep you focused on getting the shots you require. If you’re the one who’s also responsible for putting the final video together, more time spent pre-planning could save you a lot of time at the editing desk. If you’re not editing the video yourself it pays to contact the person who will just to make sure you’re on the same page about what’s required.
Don’t be shy to ask for help on the day. Drawing on the experience of others can greatly streamline a shoot and enhance the final result. As I mentioned, I was fortunate at my first event to have the help of someone I knew to show me who I needed to get in front of the camera. As a result we managed to entice several interesting people to be interviewed and it tied the final video together nicely.
One other consideration is how much to charge for your services. Initially I had no idea so settled for what turned out to be a “break even” amount as I didn’t want to overcharge and lose future work opportunities. This was another mistake as I found myself spending many extra hours on late edit changes requested by the client. I hadn’t factored that in at all. It was all part of the experience and I’ve since tried to streamline the editing process so any late changes are factored in to a job quote and are kept to a minimum. Some jobs have worked out more in my favour than others!
Finally, it’s quite easy to forget to have some fun while producing videos. Shooting an event can be as stressful or as fun as you want to make it. If you look as though you’re really enjoying yourself (fake it until you make it!) other people will often respond in an engaging interesting way which only benefits the final product. Have fun and good luck!
Gearing Up
As stable as my trusty Manfrotto 055XPROB tripod is, having to quickly relocate during a shoot, re-adjust and fold out tripod legs can be time consuming and annoying. To this end I recently bought a Surui P-204S monopod that is fully adjustable and has small retractable feet for added stabilisation. The great thing about using a monopod is it takes up no extra space as there are no legs splayed out for people to bump or trip over – this has happened on a few occasions! The Surui can also be used to provide reasonably stable panning shots. It’s also great for small venues with limited space and for shooting in tight corners.
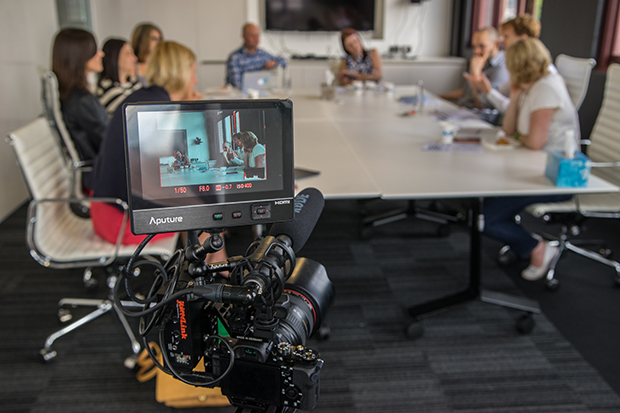
I’ve also invested in a 7-inch Aputure monitor which is mounted off camera and makes it much easier to see if your shot is in focus.
Another useful item I now have in my kit bag is an adjustable LED video light which can be used to light dark areas and is especially useful for interview work. The light can be handheld or mounted to the Surui monopod. On the more expensive side of things I’ve also since invested in a Sony A7S mirrorless camera that delivers amazing low-light performance – a big plus when shooting in dimly-lit venues or even at night. I did make the mistake of using the A7S on a shoot after only owning it for a few days. Not being overly familiar with the camera’s quirky menu system made making adjustments more time consuming than it should have been. Another lesson learnt!