


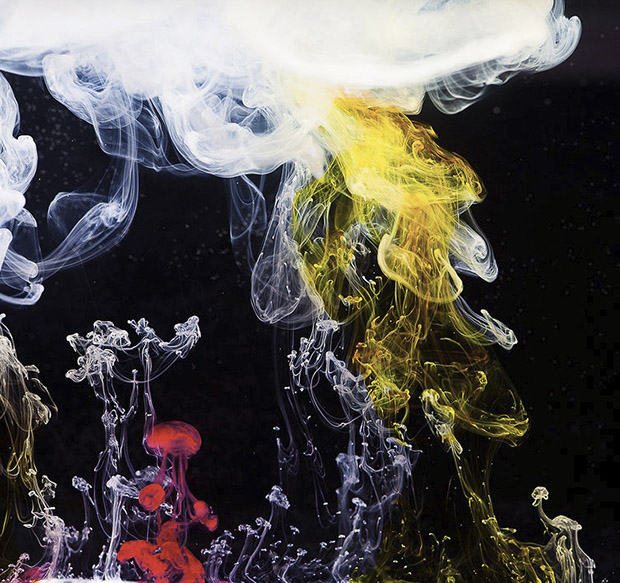
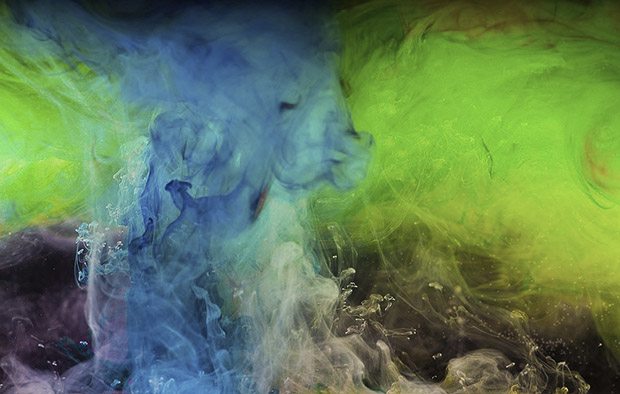
You can create all sorts of weird and wonderful abstract photos if you have access to an unused fish tank and a few coloured inks. Alfonso Calero, who has been experimenting with different techniques for the past few months, shares his best tips.
A few months ago I began photographing coloured ink in water. What started out as a small, weekend project soon became something of an obsession as I started experimenting with different types of ink, lighting, backgrounds, lenses and post-production techniques. No two photos are the same and once you get started you realise that the options are almost endless. Here are some tips to help you get started.
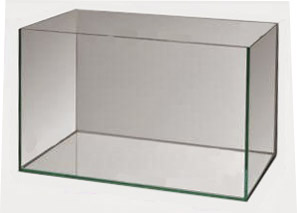
01 THE TANK
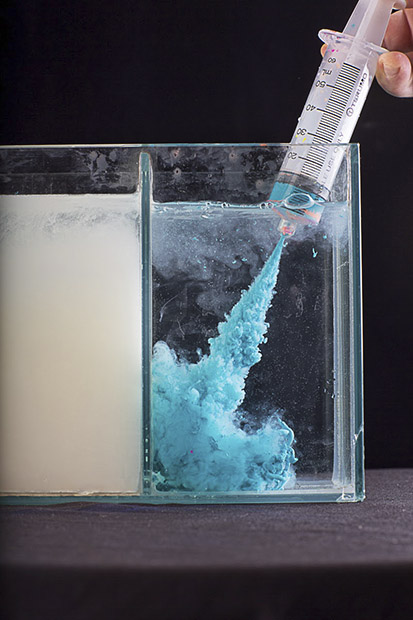
Before you start there are a few things you'll need and obviously a small or medium sized fish tank is pretty useful (preferably one that isn't being used by any fish!). Smaller fish tanks are better as they don't take as long to empty and refill after each shot. I use a tank that's divided into three segments (gives me three shots before I have to change the water), but any flat-sided, clear tank will do the job.

02 CAMERA AND ACCESSORIES
A macro lens is useful, though not essential. Many compact cameras have great macro capabilities so don't be put off if you don't have access to an interchangeable-lens camera. I used a 50mm f/1.4 and a 100mm macro to take the shots you see here and both have their advantages. You'll also need a tripod and, ideally, a remote or cable release to minimise camera shake. I'd recommend a piece of black cardboard, behind the fish tank, as a simple background.
03 FOCUS
To set the camera's focus point, position your camera and tripod directly in front of your tank at a distance/zoom setting that best fills the frame. Place an object inside the tank where the ink will be later on. Half press the camera's shutter button to activate autofocus and then, when the subject is perfectly focused, switch back to manual focus. That way you won't have to worry about focusing when it comes to adding the inks to the water.

04 LIGHTING AND CAMERA SETTINGS
For my lighting setup I used two lights, one to the left of the tank and one to the right, directly aimed close and towards the side glass. Soft boxes were used to diffuse the lights. Some photographers use light triggers to synchronise the shots properly for high-speed photography. I find the best shutter speed is 1/200s to freeze the movement of the ink, with an aperture between f/8 and f/11 to provide a good depth-of-field. Also, choose a low ISO (50 or 100) and shoot in RAW for optimum image quality. Note, if you don't have access to artificial lights, try setting your fish tank up near a window with lots of natural light. You can diffuse the light using curtains or light fabrics or use white cardboard or foamcore to reflect the light into the subject areas.

05 INK IN WATER
Now for the fun part. If needed, wipe down any bubbles that may have formed on the inside of the glass tank. Take two syringes and fill each of them with a mixture of acrylic paint and full-cream milk (the milk reduces the thickness of the paint and helps its spread through the water). I find it works well to inject two different colours at the same time but there are no hard and fast rules – experiment, have fun and shoot plenty of exposures.


Born and raised in the Philippines, Alfonso Calero moved to Australia at the age of 15. He graduated from the Sydney Institute of Technology with an Associate Diploma in Photography in 2001 and has been professionally photographing fine art, food, portraits, landscapes and travel subjects ever since. He is the owner of a travel education and tours company that delivers workshops every Saturday morning in Sydney, Melbourne, Brisbane, Adelaide and Fremantle. One on one or in small group sessions also available. He also takes groups to Japan, Philippines, Spain and Tasmania once a year for 5-10-14 day photography workshops.