


Pro photographer Ben Messina shares some useful tips for anyone hoping to improve the quality of their landscapes. Story by Rob Ditessa.
With a passion for the environment and travel Ben Messina has always had an affinity for landscape photography. The Queensland-based photographer, who is known for his simple yet thought provoking images, got his start in commercial photography when he took over his father Seb's business in Cairns in 2000.
"I ran that successfully for a few years while shooting traditional format landscapes on the side," he says. "While doing a shoot for one of the world’s top landscape photographers I was offered a Linhof 6x17 film camera to use for as long as I wanted. The 6 x 17 bug bit me and I bought my own Fuji GX617 camera, which I still use today. In 2004 I opened my first gallery in Cairns and I’ve been shooting landscapes full-time ever since."
Here, he shares his top tips for composition, lighting, location selection, gear and post-production to help you take your landscape photography to the next level.
01 COMPOSITION
Don’t follow the composition rules too closely. Learn to trust your own eyes.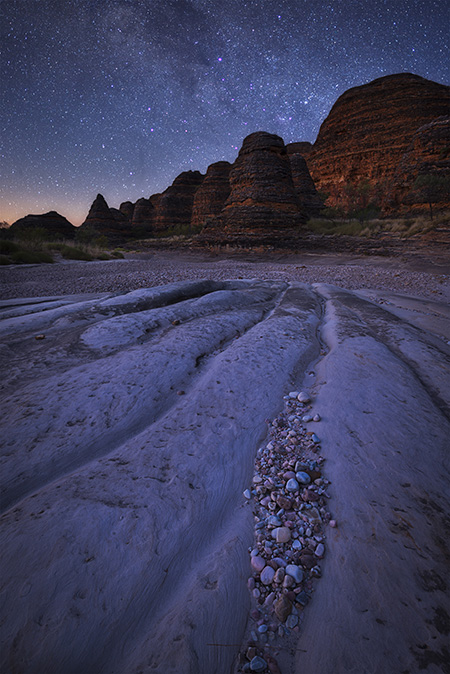
Bungle Bungles under the stars, WA, by Ben Messina. Captured at 10:30pm with the moon rising to left of frame, adding illumination to the foreground. Nikon D800E, Zeiss 21mm f/2.8 lens, 10s @ f/5.6. Photo by Ben Messina © 2014.
02 BAD WEATHER, GOOD LIGHT
Bad weather can make for good pictures. The best light usually occurs either side of bad weather.
Storm Over Sea, Woody Point, Queensland. "I was lucky enough to put myself in the perfect spot to capture this severe storm front coming from the south west out to sea," says Messina. "One minute after I took this shot I was huddled up under a bridge trying to stay clear of the rain and hail." Nikon D800E, 45mm f2.8 PCE lens, 1/25s @ f/11, ten-image stitch. Photo by Ben Messina © 2014.
03 PHOTO STITCH
Using the longer end of your lens range and stitching images together adds image compression and depth to a scene, as well as affording ample resolution.
Glasshouse Mountains Rising Mist, Maleny, Queensland. "I’m lucky to live only a few minutes drive from this view, and on this morning the mist rose up from nowhere as the sun rose," says Messina. "Not even a minute after I captured this image the mist rolled up the hill and I couldn’t see two feet in front of me." Pentax 645Z, 200mm f4 lens, 1/13s @ f9, polariser, nine-images stitched together. Photo by Ben Messina © 2014.
04 BEST LOCATIONS
Talking to people can be a great way to find unique locations. Most areas have secret spots only locals know about, so asking them for recommendations is always a good start.
05 FIRST KIT
Just wanting to be out there and learning is the key. For a first kit I'd recommend a lens with a 16-200mm focal range, a polarising filter, ND filters (three-, six- and 10-stop), a good sturdy tripod and a cable release.
06 POST-PRODUCTION
Keep it simple. Landscape images don’t have to be highly saturated or over processed to connect with people. My adjustments mostly consist of balancing light and shadow, and local contrast to bring out the depth of an image.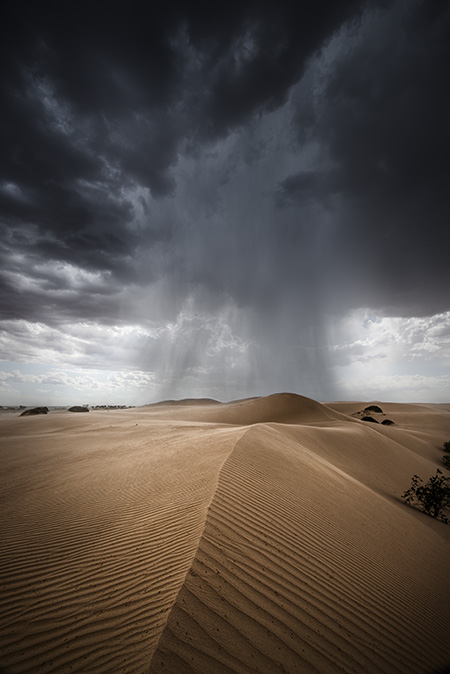
Eye of the storm, Lake Mungo, NSW. "We drove for three days from Brisbane, hoping that predicted rare storms at Lake Mungo would happen," says Messina. "We managed to get in the perfect spot looking up a clay pan sand dune as this small but powerful cell roared over the top of us." Nikon D800E, 16-35mm f/4 lens, 1/60s @ f/13, 2 stop ND Grad. Photo by Ben Messina © 2014.
Edited excerpt from 'Learning Landscapes,' first published in Australian Photography + digital (January 2015).