


Annoying dust spots showing up in your images? James Ostinga shows you how to remove them the easy way.
Software: Adobe Lightroom 4 or 5
Rating: Beginner
01 DOWNLOAD
While it may be difficult to see on screen, the project image (below) is covered in dust spots. We've made a high-res version of the image available here, so you can open the image in Lightroom and follow the steps to remove the dust. Download the project image and take note of where the image is saved on your computer's hard drive.
DOWNLOAD PROJECT IMAGE

02 IMPORT IMAGE
Open Lightroom 4 or 5 and in the main menu go to File > Import Photos and Video. (Note: You need to be in the Library module to import images.) Find the project image, make sure it’s ticked, and click the Import button. (If there are other images in the same location that you don’t want to import, first click the Uncheck All button then tick the box above the project image.) 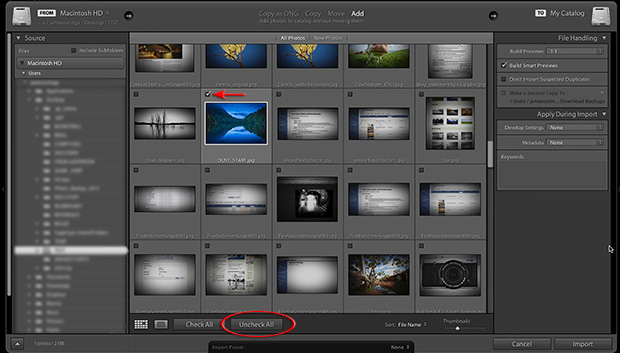
03 VISUALISE SPOTS
Go to the Develop module. You can see in this image that the dust is particularly noticeable in the sky and water. You can get a better overview of the problem areas by clicking on the Visualize Spots checkbox below the image preview. Move the slider up and down to adjust the visibility of the spots. Click the Visualize Spots checkbox again to return to the normal view.
04 NAVIGATION
Before we continue, it helps to know a couple of useful keyboard shortcuts to help you navigate around the image. To zoom in, hold the Space bar on your keyboard and click on the point you want to enlarge. The same shortcut is used to zoom out – hold the Space bar and click. When you are zoomed in on the image, you can scroll around the image by holding the Space bar as you click-and-drag. Zoom in on the dust spots near the top left of the picture. 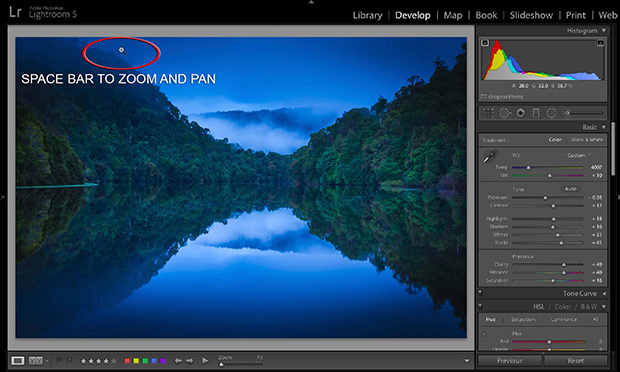
05 SPOT REMOVAL TOOL
From the panel on the right, click on the Spot Removal Tool (it's next to the Crop Tool, just below the histogram). In the tool settings, choose a brush Size of 31 (slightly bigger than the dust spots - you'll need to check this setting for every image you work on), a Feather of 13 and and Opacity of 100.
06 CLICK TO ERASE
From this point on, dust removal is pretty much a matter of clicking on the spots you want to erase. Try moving the cursor over one of the spots you see and clicking. You'll notice that Lightroom displays two circles connected by a line. One of the circles marks the spot and the other marks the area that Lightroom has cloned from. If you don't like the area Lightroom has chosen to clone – it usually gets it right but sometimes it doesn't – you can simply click on the clone circle and drag it to a better location.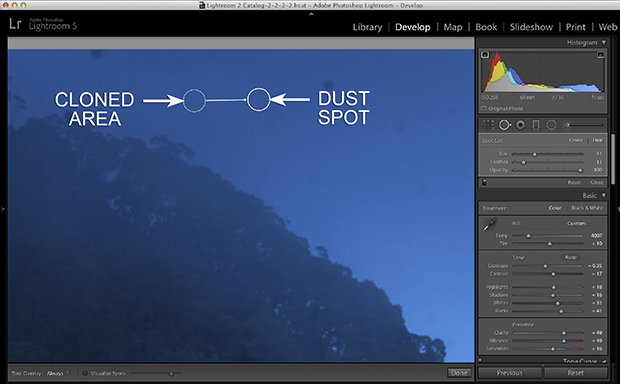
07 DUST TO DUST
Keep going until all the dust spots are gone. The adjacent image shows all the dust spots we found in this picture. See if you can find any we missed! You will be glad to hear that the camera that produced this image has since been professionally cleaned!