
An introduction to AI editing in Adobe Lightroom - selections
From completely AI created artworks to intelligent noise reduction, Artificial intelligence is shifting our ideas of what creativity is at a whirlwind pace.
And although it’s easy to be dismissive of the enhancements now at our fingertips, many photographers will see real benefit from incorporating AI-enhanced tech into their workflows, especially in image editing.
Adobe Lightroom, probably the most popular image editing software on the market, has been receiving AI-enhanced software updates for the last few years. However, it’s not until the latest updates where these tools have become truly mature and a genuine solution to problems that could previously take considerable time and energy to tackle.
So in this guide, we’ll take a quick look at how three of the updates work and how to use them with your own images.
For brevity, we’re going to explore three tools that can help with the subject/background selection process this week.
You’ll need the latest version of Lightroom Classic (v12) to follow along. So let’s get started.
AI-Powered Masking Select Objects
Lightroom’s masking abilities have improved in leaps and bounds in recent years, to the point where there’s often no need to use Photoshop to perform this common task.
With the Select Objects feature in Lightroom you can select any specific object in an image, which can then be used as a base for localised edits. There are two methods through which you can select your chosen object - Brush Select and Rectangle Select, and we’ll look at them both.
Brush select
With the Brush select option you can paint over your chosen object for a precise selection. As you might expect, objects with a clean background will give you the best results, but you may be surprised how well it works to identify the edges of objects even with busy backgrounds.
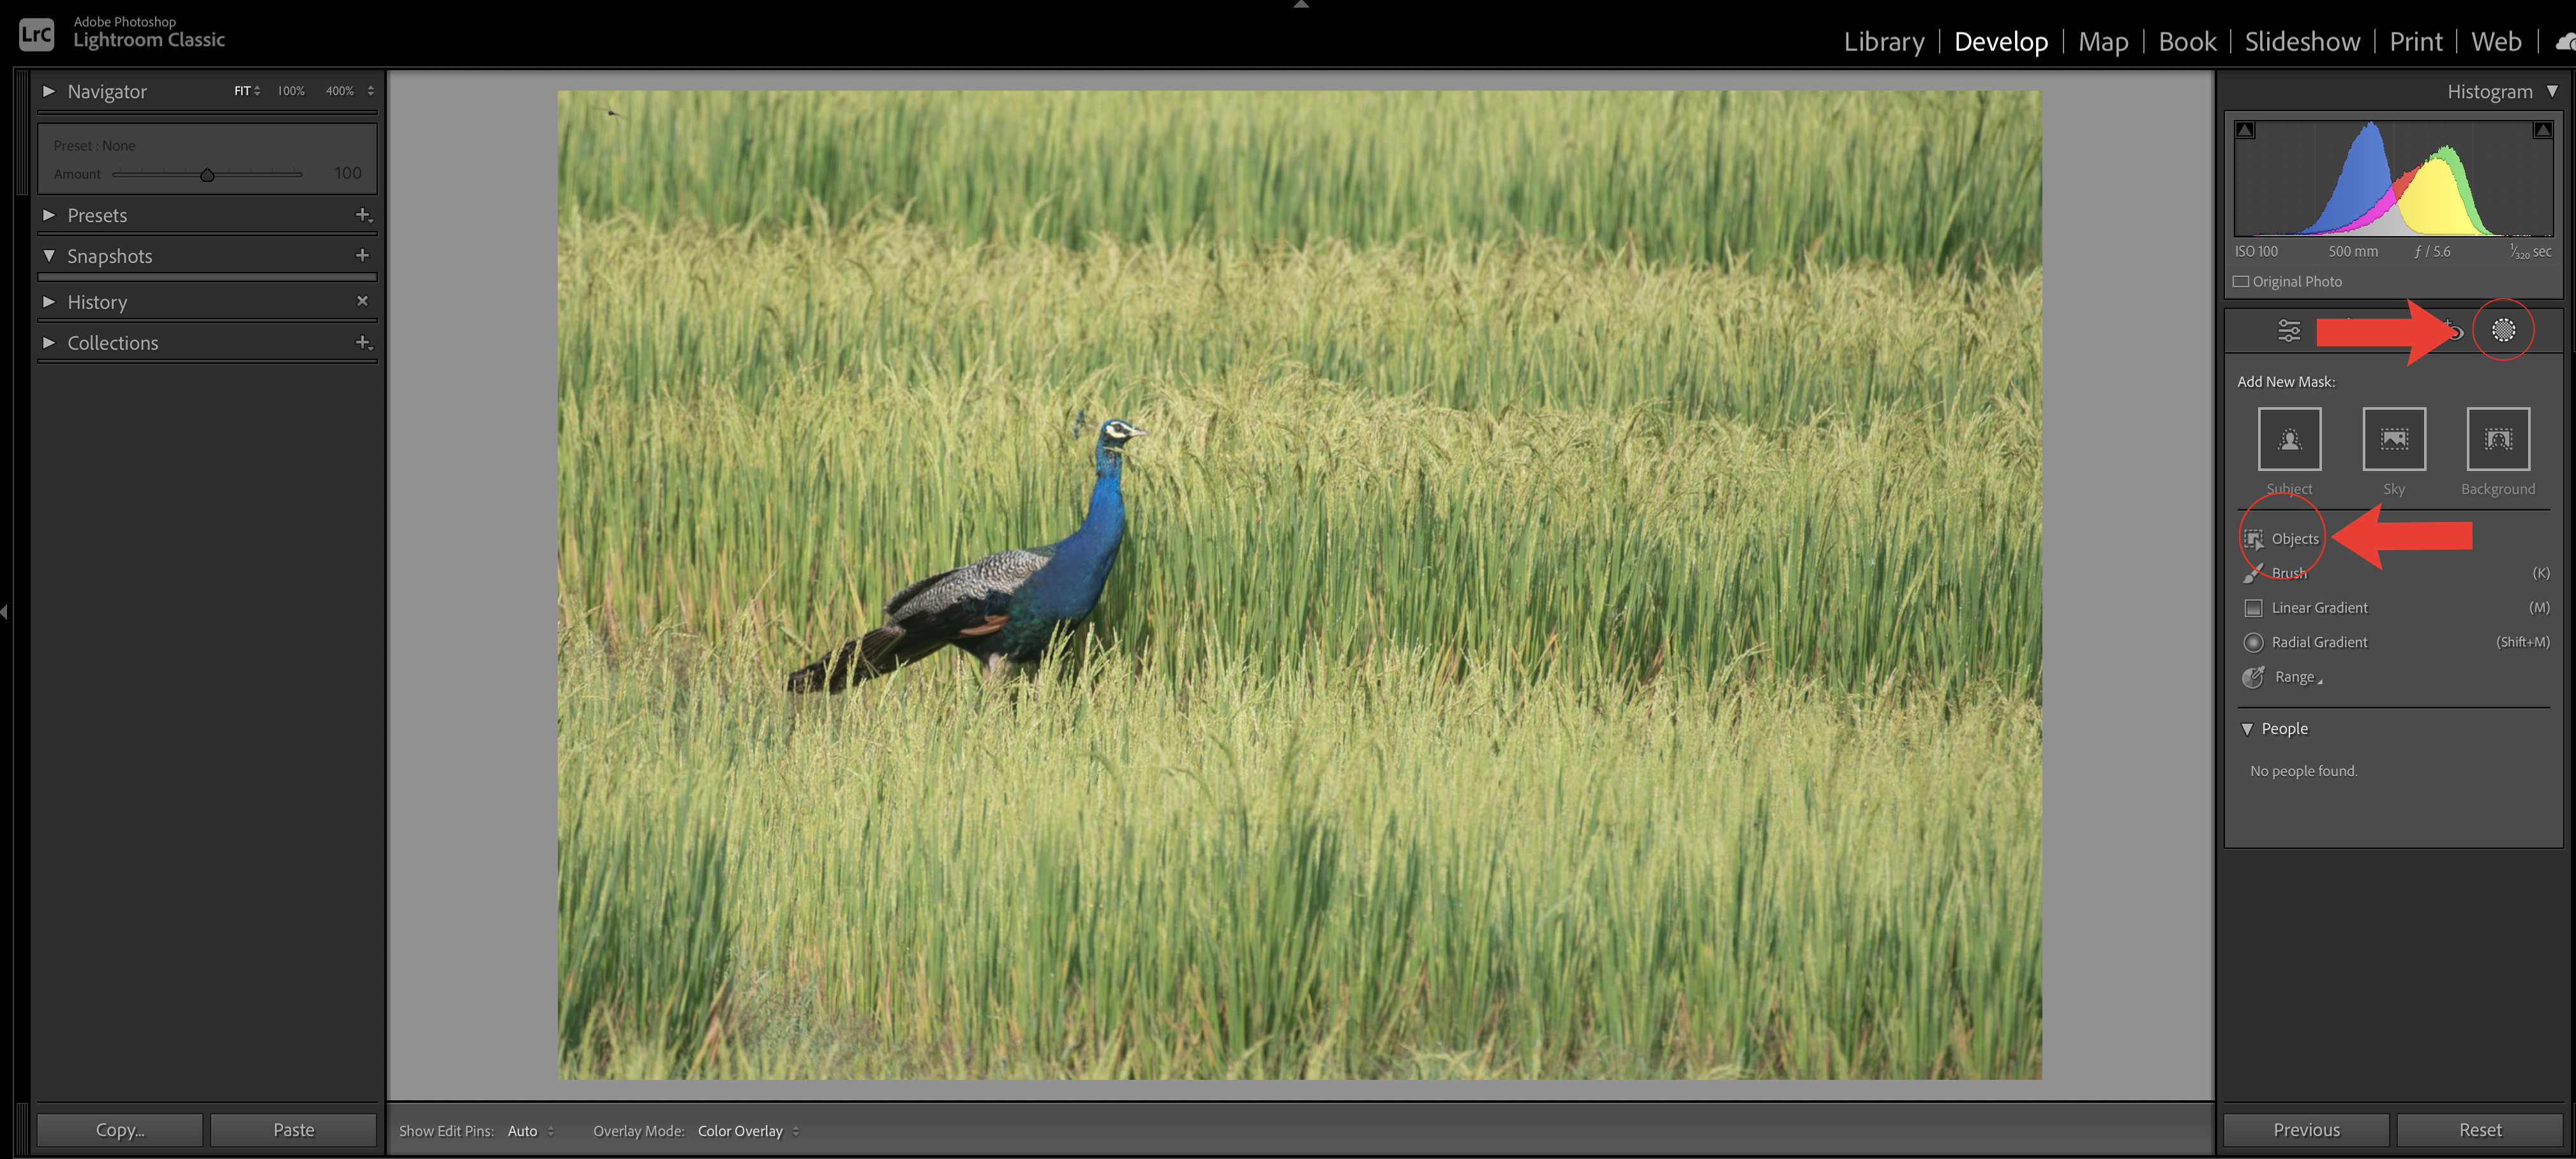
1) First, open your image in Adobe Lightroom and select the Develop module. Click on Masking to the right of the main panel, or press Shift + W. Then select ‘Objects’.

2) In the new panel that appears, Select the Brush symbol for the Mode and adjust the size of the Brush via the sliding panel below. To mask this peacock, a small brush is all that’s needed, so I choose 3. Now, using the mouse, ‘paint’ over the object you want to select.
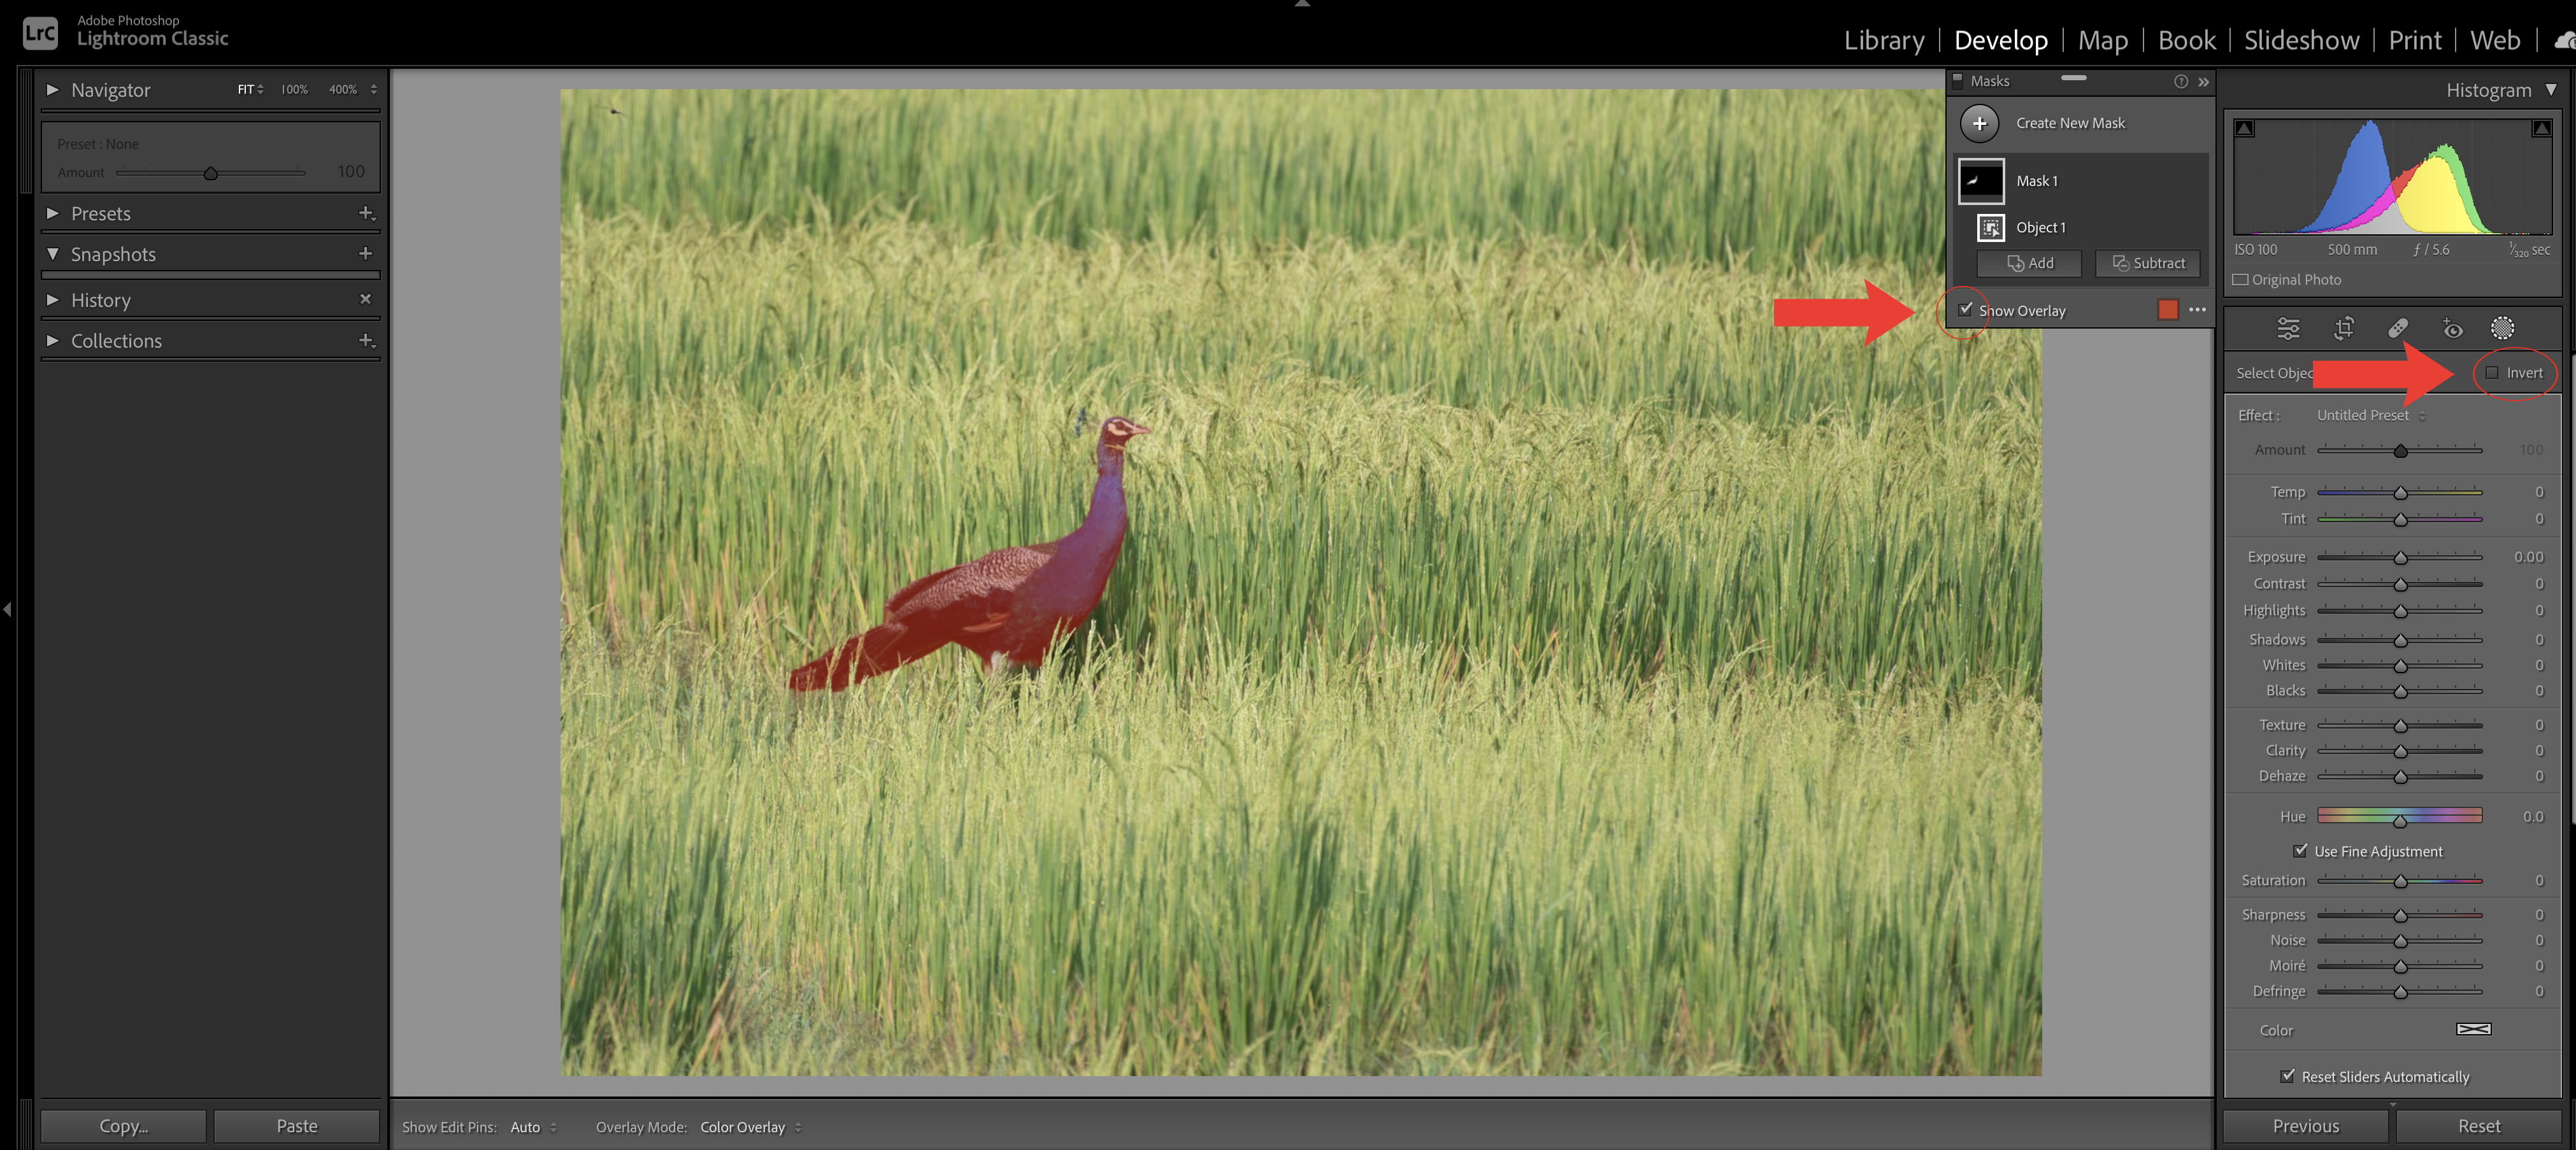
3) You’ll find that the tool identifies edges quite precisely – this is the AI kicking in. You can also check the Select Overlay box to view the selection. With your selection now made, you have two choices. One is to make edits to your subject with Lightroom’s usual tools via the Develop module, or select ‘Invert’ (You’ll find it on the righthand side as a checkbox) to make changes to everything BUT the selection.
Rectangle Select
Rectangle Select works in a similar way to Brush select, but can be slightly less accurate as it relies on AI to identify the edges of the subject.

1) As with Brush select, first open your image in Adobe Lightroom and select the Develop module. Click on Masking to the right of the main panel. We’ll also again select Objects for our masking method.
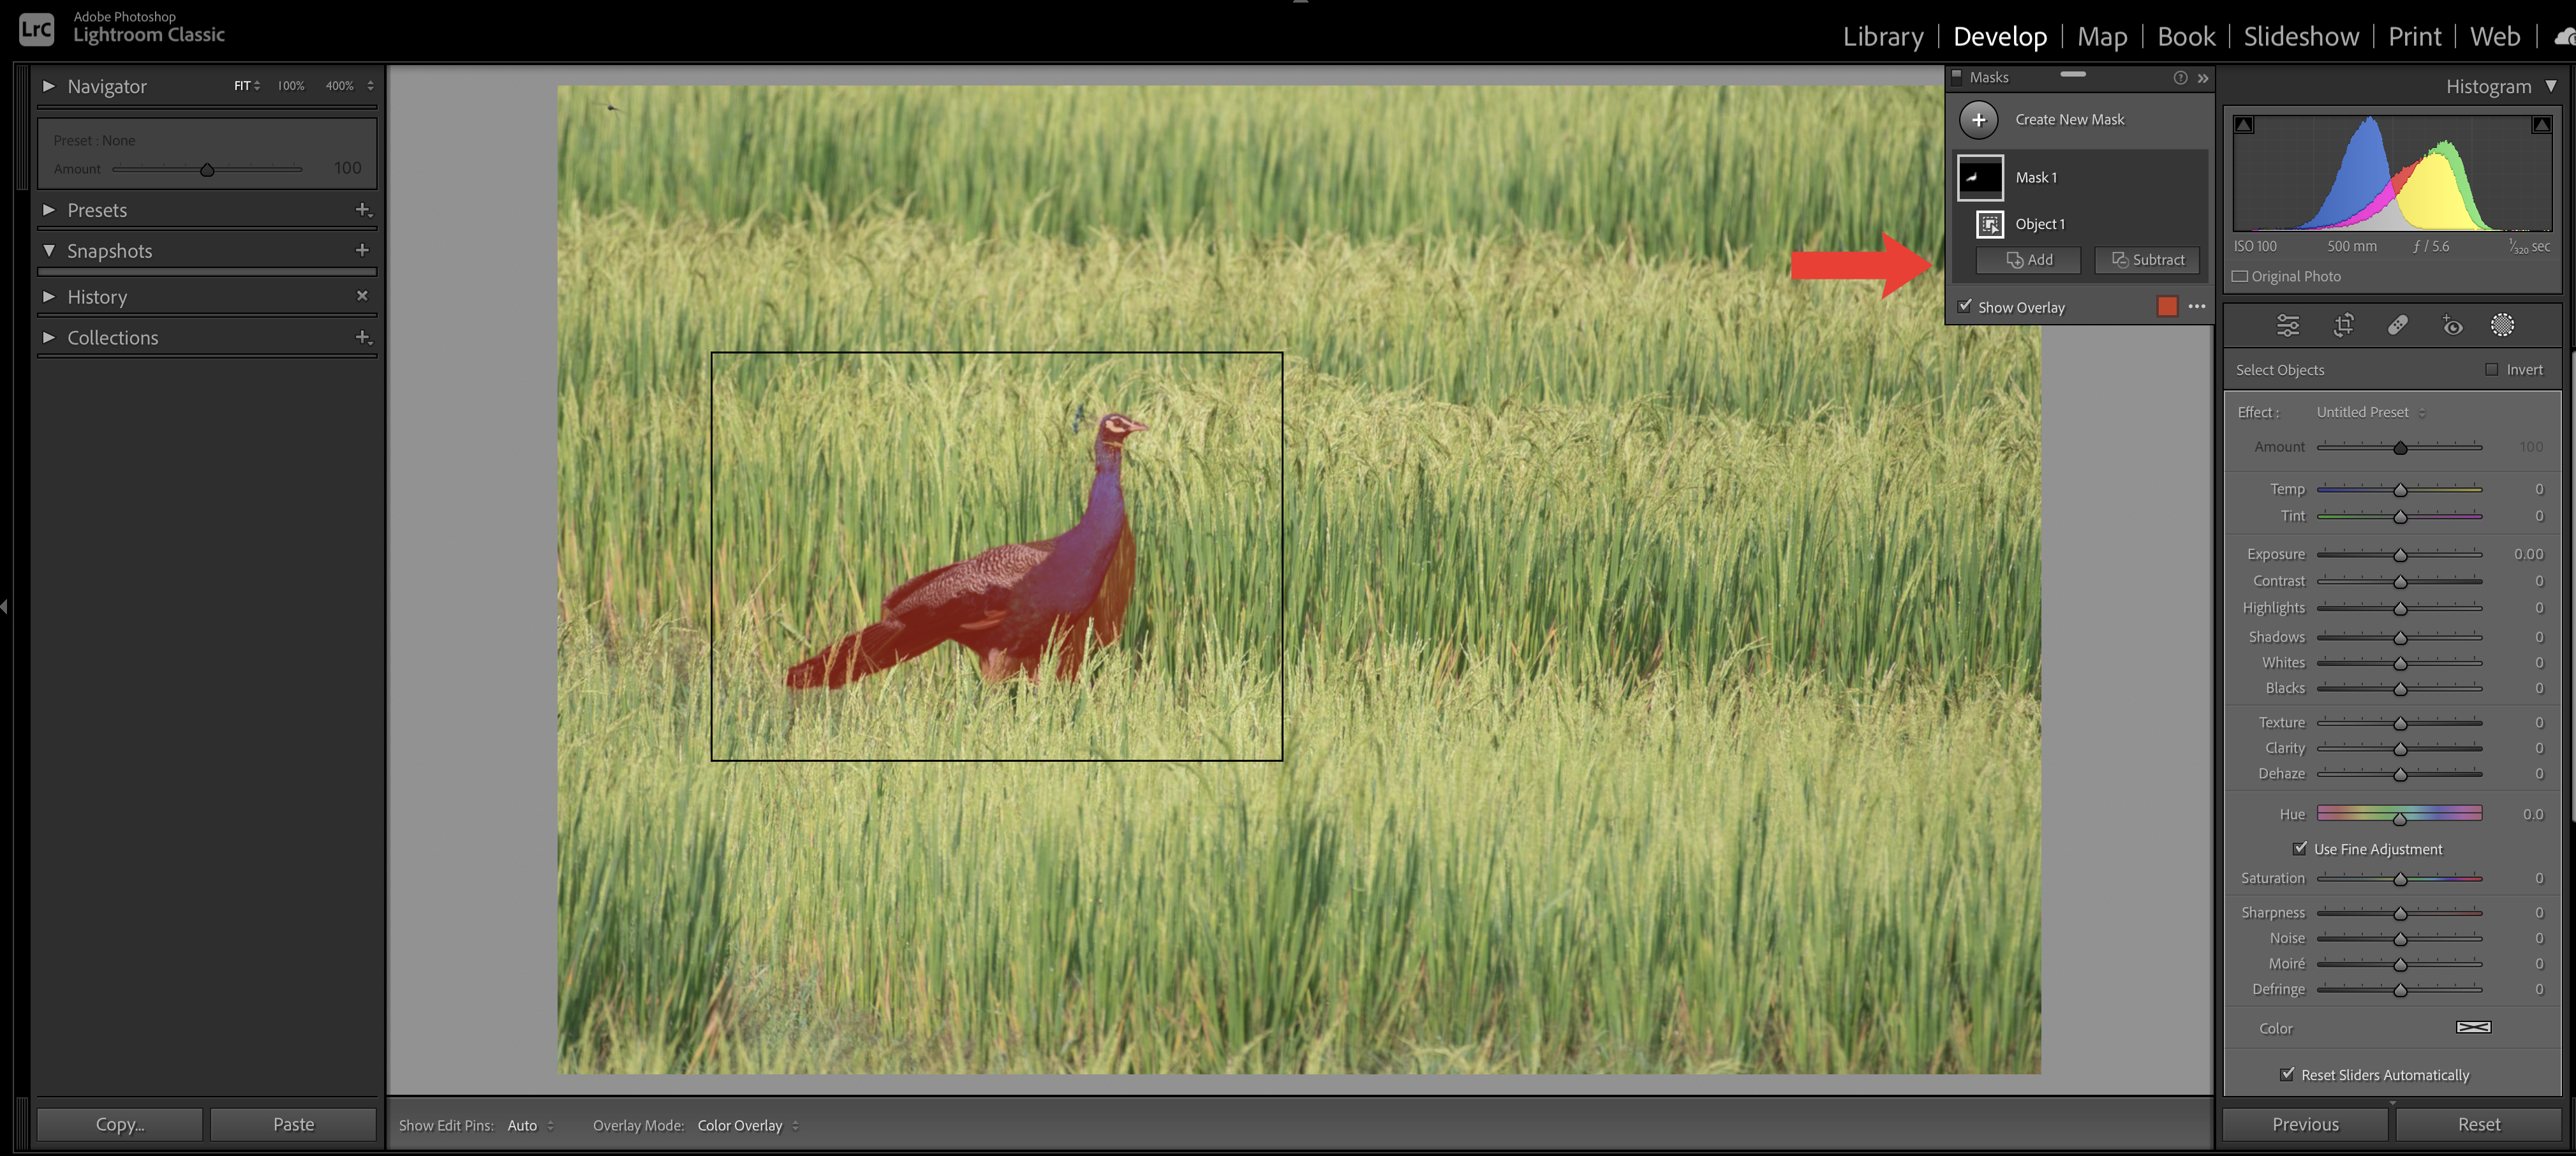
2) Under Modes we’ll now choose the Rectangle symbol. Next, drag a rectangle around your subject you want to mask. Lightroom will detect the subject and then in most instances make a fairly accurate selection.
At any point you can turn the red overlay on and off (this shows you the masked and unmasked areas) by unticking the tick at the bottom of the narrow dropdown menu on the right.
If you find the selection is not as accurate as you’d like, you can either add to or subtract from the mask via the + and – options on the same menu, or undo the mask entirely and start again.
Background select
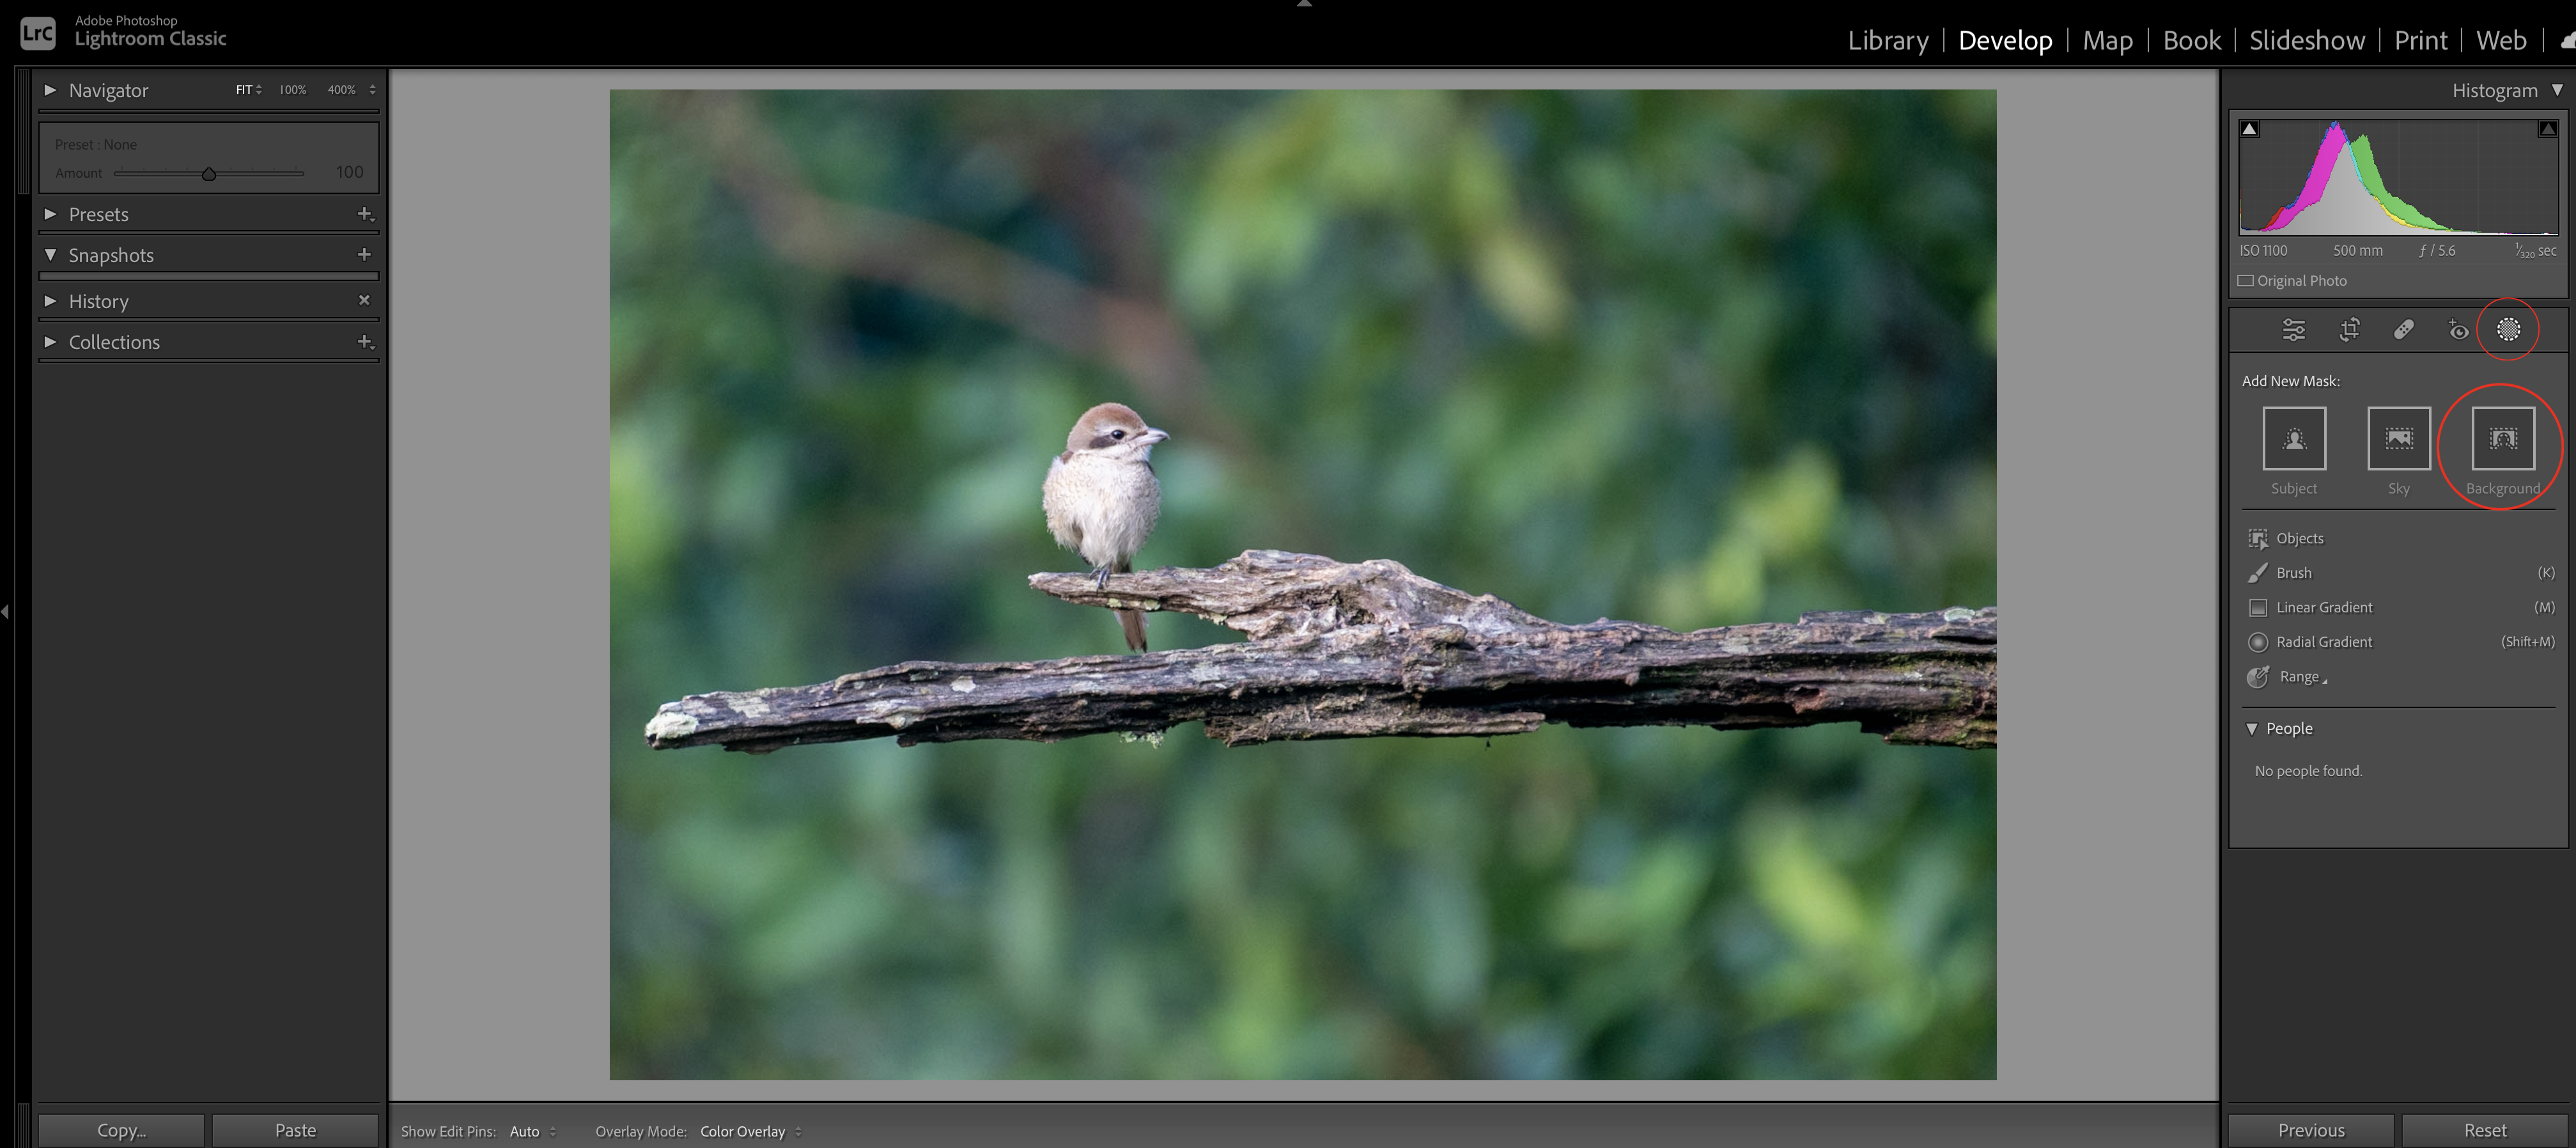
1) I’ll briefly touch on Background select as this is relatively simple and works in much the same way as selecting a subject, and can also be done fairly accurately by inverting the object selection as explained above. To do it, create a new mask and this time select ‘Background’. Lightroom will immediately select the background.
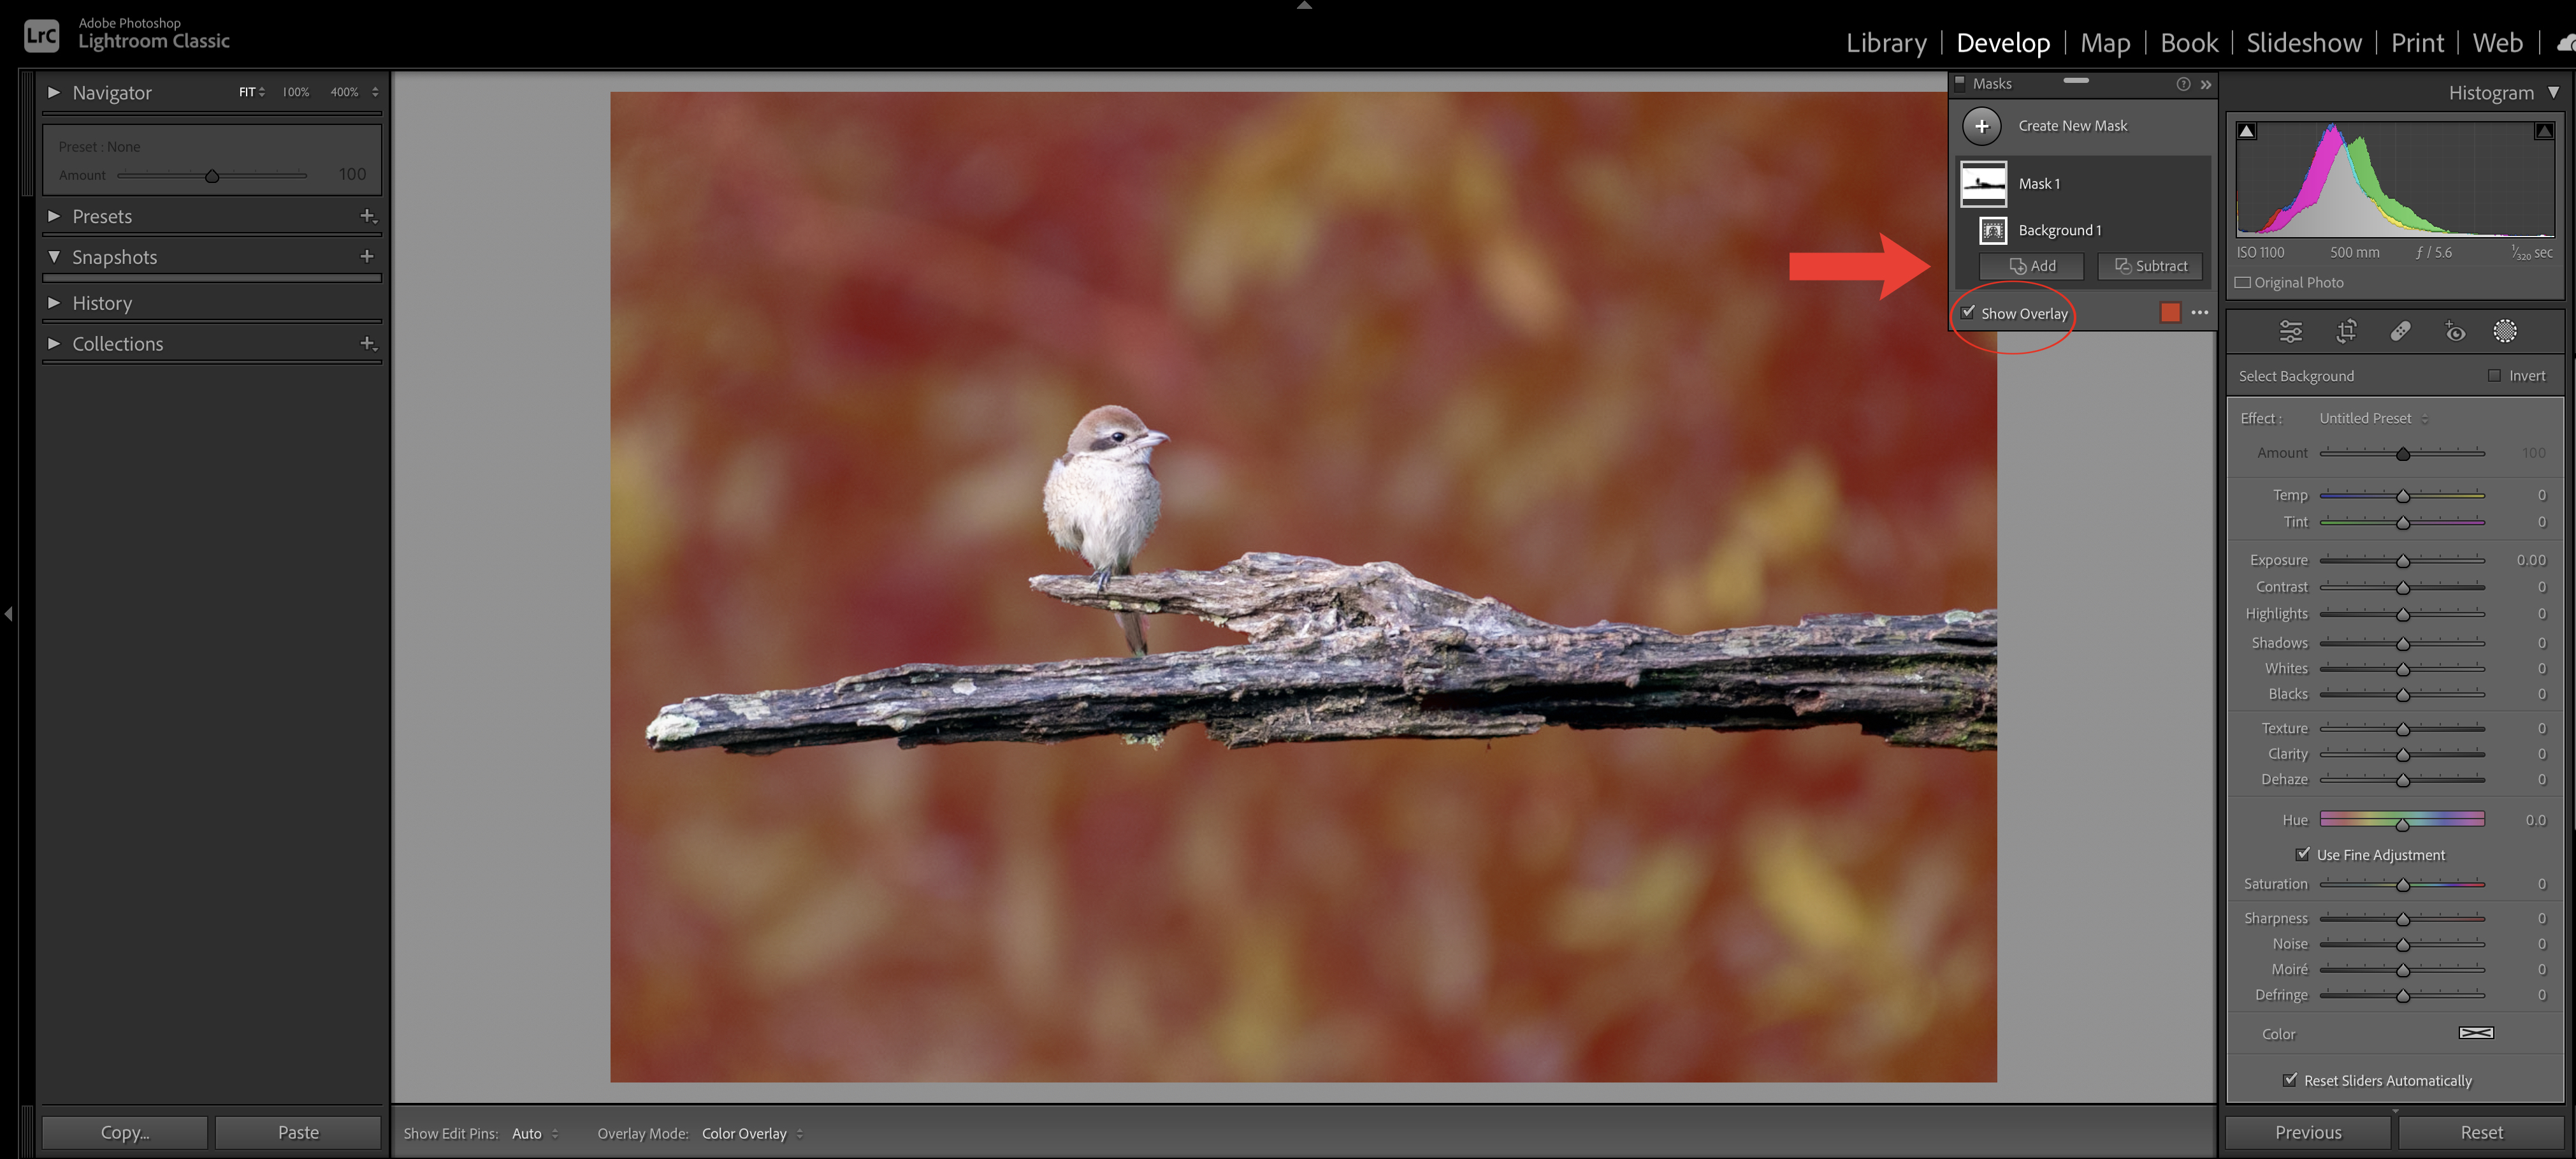
2) As before you can select the Show or hide the Overlay checkbox to visualise the background selection. And, also as before, If you want to then adjust or fine-tune the background selection you can use the Add / Subtract option.
Look out for more tips next week.