
Image Doctor: The critiques!
A regular part of Australian Photography magazine for more than a decade, the Image Doctor, professional photographer Anthony McKee, can give constructive feedback on your images, with a selection of his favourite submissions appearing in print in AP mag every month.
If you want feedback on your images (it's free!), you can find out the details for submission here.
This month's winner
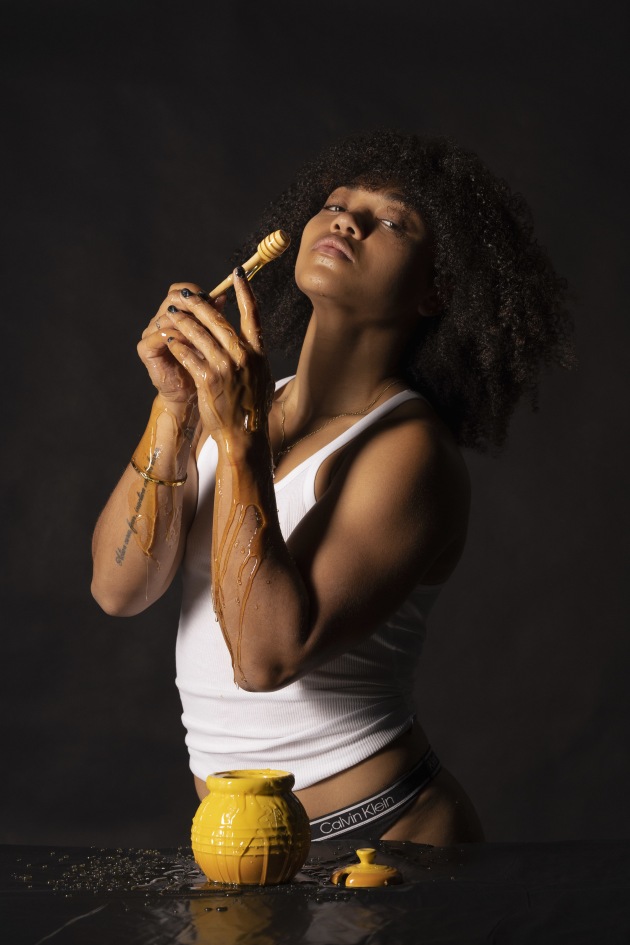
TITLE: Honey
PHOTOGRAPHER: Daniel Cook
DETAILS: Sony A7 III, 70-200mm lens @ 70mm. 1/125s @ f6.3, ISO 100.
“I am a Diploma of Photography student at Sydney's Ultimo TAFE. My concept was to feature the human form interacting with liquids. I chose to use honey due to its viscosity, interesting random shapes and how it interacts with light. Honey has been a feature of many famous portraits in the past, and I was particularly influenced by Fabrizio Ferri's photos of actress Monica Bellucci.”
Anthony’s Tip: Hi Daniel, given you are studying photography (probably to go professional) I’m going to be a little more critical with my comments, even though you are the winner this month! If this image was being judged at a professional photography competition it would probably score about 65/100 - a “professional standard”.
What I will say is this appears to be a simple one light set-up, but you haven’t challenged our expectations in any way. And there are too many distractions in this image, from the wrinkles in the singlet top, the branding on the pants, the black fingernails and the jewellery; this is all competing with whatever you are trying to tell us about honey and the human form.
I would consider reshooting this image, but this time do what Fabrizio Ferri did with his portrait of Monica Bellucci - get in closer, but then use strong light and design technique to really explore the idea.
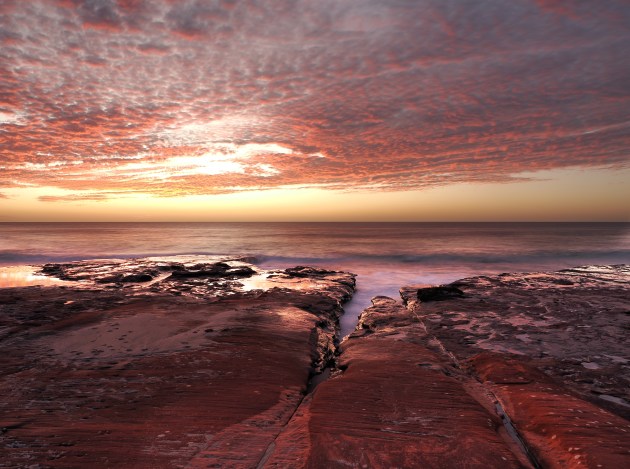
TITLE: Jakes Point
PHOTOGRAPHER: Ron Alexander
DETAILS: OM System OM-1, 12-40mm lens @ 12mm. 4s @ f5.6, ISO 100.
“I have taken up photography late in life and after some years practicing with a Panasonic G85 I recently purchased an OM System OM-1. I made this photo whilst taking a break in Kalbarri WA and decided to try out the Live ND feature of the OM-1.
The location is near Jakes Point as I found the rock formation interesting particularly at sunset. I edited the out of camera JPEG in Affinity Photo to open up the shadow as the foreground was on the dark side”.
Anthony’s Tip: Hi Ron, and can I say it is never too late in life to start exploring photography (unlike gymnastics, full contact rugby, the harp, etc). While you may not have been doing photography for long, you seem like you are already getting a good feel for landscape photography.
My main advice for you is to start working in RAW mode. Yes, JPEGs are convenient but RAW mode gives you so much more opportunity to control the tones within a scene. More importantly, exposing for the highlights and then opening up the shadows in RAW will let you bring so much more colour and detail into the highlights of your photographs. Give it a go - I think it will take your photography to the next level.

TITLE: Swan River Panorama
PHOTOGRAPHER: Kev Chambers
DETAILS: Canon 200D Mark II, 18-55mm f/4-5.6 lens @ 55mm. 1/250s @ f5.6, ISO 500.
“I’ve recently begun stitching landscape panoramas and would really appreciate your help. I’m trying to establish a ratio that works well digitally and when printed. My first attempts seem to remove any focus point. The attached pano is 4 images stitched in Lightroom taken across the Swan River towards The WACA Ground and including the Matagarup Bridge.”
Anthony’s Tip: Hi Kev, I don’t think there is any “perfect” ratio for creating panoramas. Although 16:9 is often considered the “standard” ratio for a panorama image, I recently had a friend exhibiting panoramas at a 10:1 aspect ratio! There are no rules, in fact, you don’t need a central point of focus. What is important with a panorama is that you keep things interesting and engaging across the majority of the frame.
The problem we have with this image is that although there is some detail within the scene, it has mostly been lost in the shadows against the brightness of the sky and the water. I would have waited closer to 30-minutes after sunset to capture the city lights as they started to emerge against the glow of dusk. Also, try shooting in RAW mode, and then manually control the White Balance and saturation so that you get strong colours in the sky. Keep at it!
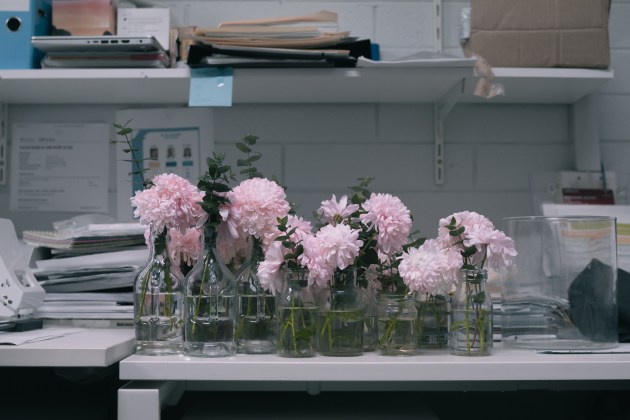
TITLE: Standard Issue
PHOTOGRAPHER: Robert Brens
DETAILS: Sony A6400, Sony FE 35mm f1.4 lens. 1/640s @ f2.5, ISO 640.
“I took this image in an office that was doubling as a green room for a concert I was a part of. I was initially using these flowers as a depth of field exercise but I was also struck by how these natural elements were stored in the same way the stationery was – more like instruments than decoration. I graded the photo to retain the colour and life in the flowers but to also make it commensurate with its sterile, bureaucratic surrounds.”
Anthony’s Tip: Hi Robert, the art of the juxtaposition is as old as photography itself, but like any art, the success of a work usually lies just as much in the execution as the idea itself. This image qualifies as a record photograph of these flowers, but from an art perspective you need to be working a little harder.
In reality, good photographers can make interesting photos from almost any situation, including this opportunity. The challenge though, is to see this situation in a way that others might not. Personally, I might have tried holding the camera against the wall and shooting outwards over the top of the flowers, or positioning the camera down in amongst these flowers and shooting upwards, as if looking up through a jungle canopy. I would be looking for the interesting perspectives.
As for depth of field - while we often get excited about shallow depth of field (especially with f1.4 lenses), a deep depth-of-field (using f11 and a tripod) can actually challenge our sense of depth in these sorts of photos. Keep exploring!

TITLE: First time in the Puddles
PHOTOGRAPHER: Caroline Scott
DETAILS: Nikon D750, 50mm lens. 1/160s @ f9, ISO 100.
My two granddaughters had their first time in the puddles at my parent’s farm in Western Australia.
I loved taking these and was happy with the reflections. The day was cloudy and overcast with the sun poking through at times.
Anthony’s Tip: Hi Caroline, if you want photographers to have fun, let kids loose in puddles! Of course, photography is actually serious business and we have decisions to make - do you get low and include more of the horizon, or do you stay high to capture the reflections in the water? And what is the best lens, exposure settings and moment to be capture the photo? It's complicated.
I like your decision to stay high because it does let us see the ripples in the water, but as we look at this scene we can see our eyes getting distracted by the highlights on the left and right of the frame and also the details of those fences posts in the top. Personally, I would be cropping this image to square and in the process I would crop the top of the picture just below the shadow of that tree.
The blown out highlights on the youngest child’s top is rather distracting, but that is more to do with your exposure control. As I always say, if you can, shoot RAW and use the extra tonal range to manage your highlights and shadows. Otherwise, good effort!