
Photo tip of the week: how to plan a landscape photography shoot
In late October last year, my wife Marianne and I had the opportunity to visit and photograph the Canadian Rockies for two weeks. We had never been to this part of the world before and in planning we utilised multiple resources to help us fulfil our vision.
We used Photopills and the Photographers Ephemeris to plan for lighting conditions while aurora watching was done through a website. We brought outer garments to keep out wind, rain and snow. We also planned to meet up with local Banff photographer Dani Lefrancois and had been talking to her in detail ahead of time regarding which hikes and locations were off limits for a hiker with no snow experience.
But things never quite go according to plan, do they? Here's our best advice on how you can maximise your opportunities to come away with the shots you want.
1. To adapt or not?
When you're shooting a location for the first time, it can be difficult to choose between adapting at the scene or staying true to what you anticipate based on research alone.
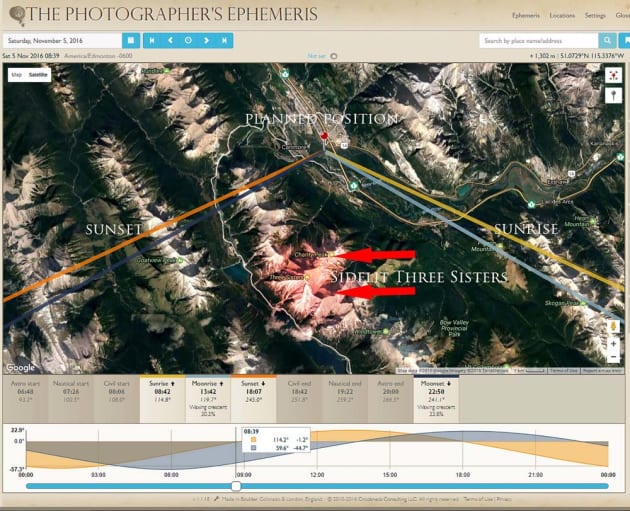
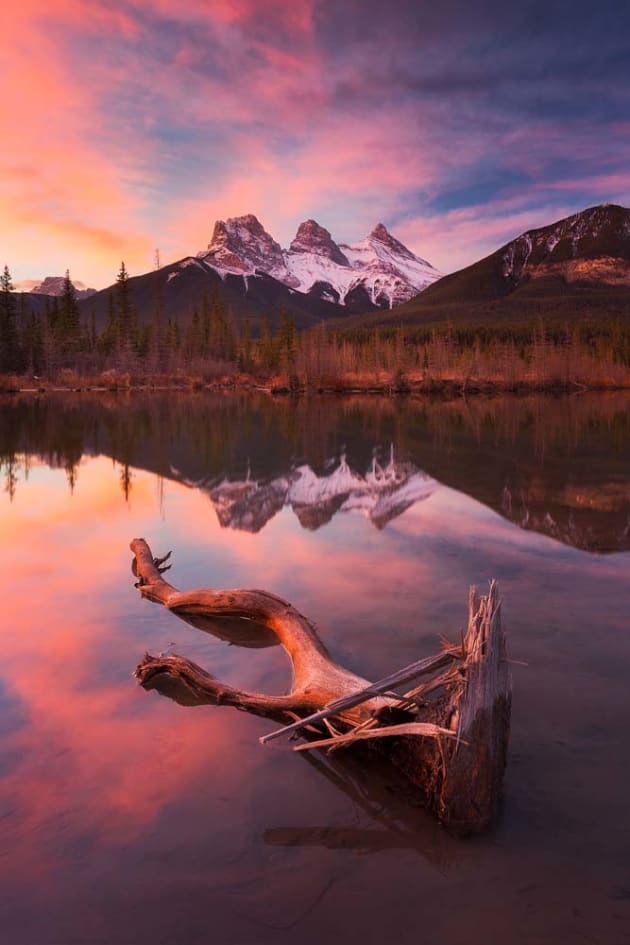
Part of our trip was spent in the beautiful town of Canmore which sits in the shadow of the Three Sisters, Grassi Peak and Ha Ling Peak. One of the common compositions from the area was a reflection image of any of those peaks shot from the still waters of Policeman's Creek. From prior research, I knew that good light on the Three Sisters would require a reasonably clear dawn as I would be shooting 90 degrees to the sunrise. I had found interesting foreground elements and set up a composition in the dark while watching the incredible light evolve.
A strong temptation would have been to move away and shoot at the best light itself but compositions in those directions were much more limited. Instead, I waited until the light peaked on the mountains and stayed true to the original plan.
2. Think about it
Landscape photographers depend on light and we are often at the mercy of Mother Nature. In Alberta however, there was some predictability to the chaos. With the large mountains of British Columbia to the west and the flat plains to the east, it should have come as no surprise that sunrise produced more reliable lighting conditions than the sunsets. At the start of our trip we were wondering why many a promising sunset yielded colourless skies with no alpine glow on the mountains.
Once we had our explanation, we instead opted to shoot from late afternoon before the sun vanished below the shadow of the westerly mountains. A lack of light and colour however, doesn't make a good shoot impossible.
3. Talk to the locals
One of the most reliable methods of virtual-scouting an area before you arrive is to ask for assistance from local photographers who know the area well. I had been talking with Banff local Dani Lefrancois in the lead up to our trip. I have to say her extensive portfolio of the region was so good, it was almost intimidating!
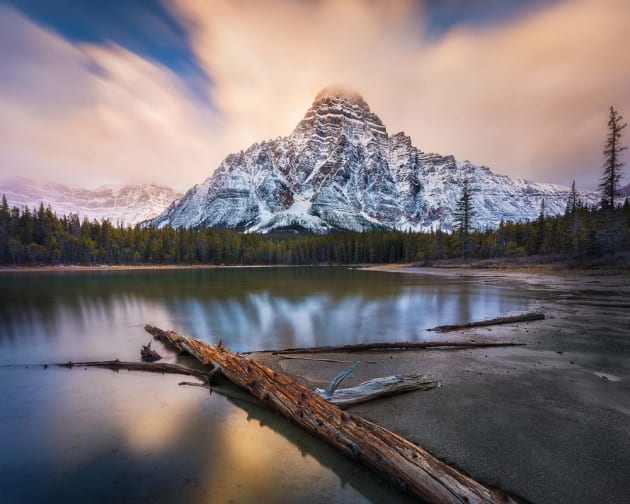
Given that she had practically visited every spot in the area, I wanted to offer a shoot that would benefit the two of us. As a result, we chose Mount Chephren from a viewpoint she had not yet photographed. This mountain is located beside Waterfowl Lakes from which amazing roadside views are readily available.
We found a pull-out from the highway which led to a trail to our desired perspective. Unfortunately, we were met with a grey, overcast morning. It was only on the way back to the car that some golden morning light struck the top of Mount Chephren. Suddenly I was scrambling for a rushed composition. From that morning, I did not give up on the morning light until well after dawn.
4. Use applications
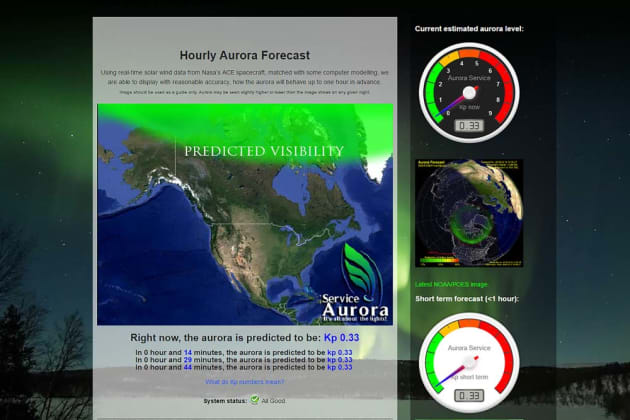
It's no secret that apps make landscape photography a somewhat more predictable experience. During our trip, there was plenty of opportunity for Aurora Borealis sightings. On nights that were clear, we used a combination of Aurora prediction sites and weather apps to help us plan accordingly.
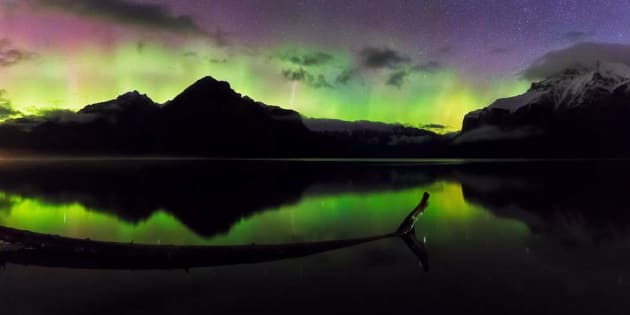
Before arriving, we had scouted a few north-facing locations that would be our potential go to spots. Unfortunately, we only had one night where clear skies coincided with a high KP rating. (KP ratings are an estimate of an Aurora's strength. From Banff, we needed a KP rating of five or more for the Aurora to be visible to the naked eye).
Even while we were in Banff, it wasn't as simple as heading to a location and shooting. When I arrived at the shores of Lake Minnewanka, there was almost no parking – clearly local photographers keep just as close an eye on such forecasts as visiting photographers! When a location is busy, car headlights play havoc with high-ISO, long-exposure images so I ended up driving to two other locations but both were covered in mist with no visibility. In the end, I joined the long row of photographers along the shores of Lake Minnewanka and experienced a memorable evening.
5. Surf the web
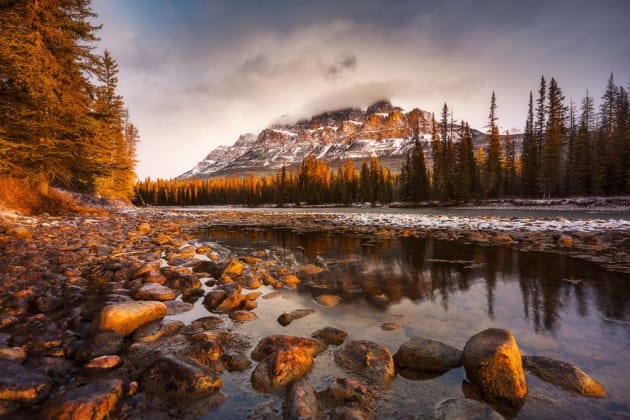
I had seen numerous images of Castle Mountain, which lies between Lake Louise and Banff. Sites such as 500px gave some glorious fine art renditions while Google image searches perhaps gave a more realistic impression of what the surrounding terrain consisted of. This gave me a week's worth of opportunities to shoot this imposing mountain given that we were spending three nights in each location.
Using Google Maps I planned two main locations from which to shoot this mountain. The first was from the Bow Valley Parkway where I planned to take some long focal length images of the mountain dominating the roadside. The second was a reflection of the mountain which I planned to shoot from the shores of the Bow River.
Lighting would be side lit at dawn and due to our early experiences of sunsets, I did not want to rely on rare sunset light to shoot this location. Unfortunately, for the most part, this mountain remained shrouded in mist but when it did come into view, it gave us photo opportunities quite different to the glowing mountain I was expecting. While the skies were clear one hour before sunrise, the clouds then blew in from the north and at one stage, completely hid Castle Mountain. Thankfully, after dawn, the clouds cleared, revealing a beautifully lit mountain and treetops.
6. Mange your expectations
Having expectations for a location can sometimes be a distraction. Many times during this trip, I simply felt like standing back and enjoying the remarkable scenery rather than focusing on what kind of 'original' image I could capture. During these moments it was important for me to allow myself the time to enjoy what I was seeing.
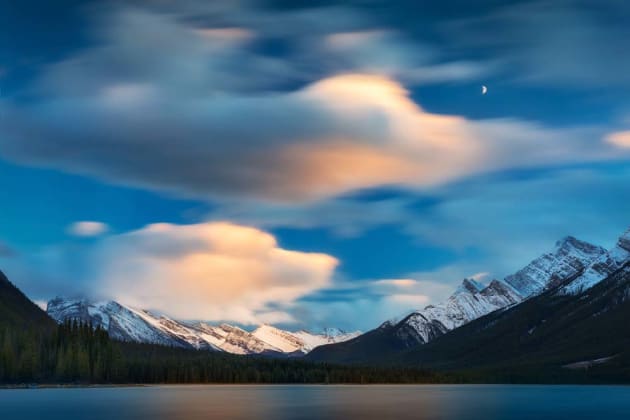
One particular example of this was on our last morning when, an hour before dawn, bizarre cloud formations began to catch the dawn light. I spent much of that time traveling to and from two locations around Banff deciding which would end up with the better light, which would give me more composition opportunities. In the final washup of mad indecision, I ended up at Two Jack Lake overlooking Mount Rundle. Despite the light evolving very quickly in all directions, I chose to largely watch the light show during long exposures rather than concentrate on photography itself.
I find that when I'm distracted by what's going on in the sky, my compositions are often compromised by attempting to be too inclusive of everything that is causing visual overload. Sometimes, watching and experiencing can trump photographing; particularly at the end of a photographic journey and particularly when you've been placing too many expectations upon yourself.

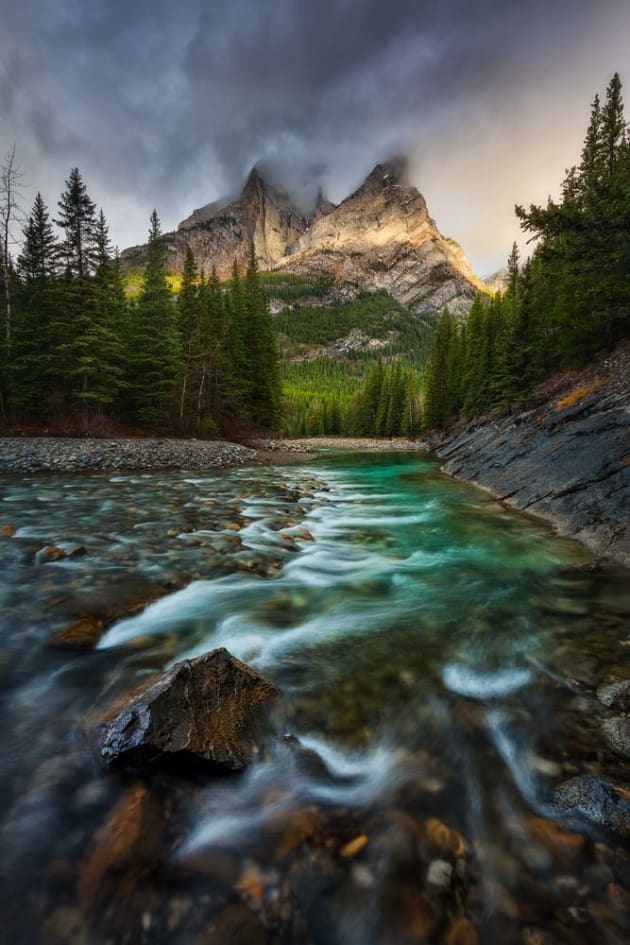
7. Improvise
Mount Kidd is another beautiful mountain of the Rockies that lies in Kananaskis Country (locals call it 'K country'). This was a photographic target of mine while we were based in Canmore. I had seen that most shots of this mountain were either taken from a still pond just off the highway called 'Wedge Pond', or from some appropriately named reflecting pools further south along the highway.
Like most locations on our journey, it was best shot at dawn and in the early morning light. On the morning of my visit, the weather forecast was for clear skies but a moderate breeze brought constant drizzle and poor visibility. For me, this eliminated Wedge Pond as an option as the strength of that location was the ability to shoot for reflections.
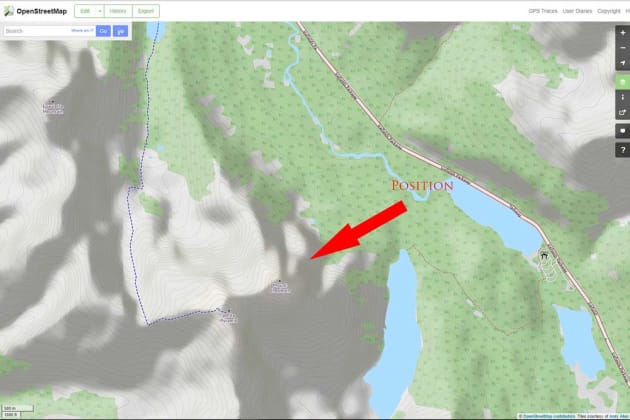
Dani Lefrancois had also told me the reflecting pools had been washed away during floods earlier in the year. I stayed true to my routine of arriving in the darkness well before dawn and sat in my car sifting through online maps to determine if there were any views of Mount Kidd with flowing water as a foreground element. There were indeed some aspects of the Kananaskis River that curled in the appropriate direction to face the mountain. Without my photographic equipment, I went for a quick jog along an established trail to Galatea Lakes. With my phone GPS at the ready I was able to find an appropriate bend in the river which was accessible and returned to the car with my equipment and set up for the dawn shoot. Again, true to our experience of the Canadian dawn, light did indeed pass over the mountain well after dawn.
I know this story is all about the benefits of planning, but sometimes you just have to accept that your plans aren't going to pan out. At this point, your best option is to relax and do the best you can with what you've got. Rather than focusing on what's gone wrong, take it as an opportunity to simply enjoy the experience free of preconceived notions – strange as it sounds your images will be much better for it!
Dylan Toh and Marianne Lim are landcape photographers based in Adelaide, SA. See more of their work at everlookphotography.com