
Lens Blur in Adobe Lightroom: A Step-By-Step Guide
This article originally appeared in Australian Photography's Feb-Mar issue.
A new update to Adobe Lightroom introduced in October 2023, Lens Blur (which is currently in ‘Early Access’ status as we go to print) can blur the background or foreground in your image by making a depth map of the image using Adobe’s AI Sensei technology.

The tool also lets you add bokeh to out of focus areas in your images.
And while the Lens Blur tool does automate the process considerably, you still have control over the final result.
So far, despite being only in Early Access, I’ve been impressed by the results and have found it’s saved me time in post processing, which means more time for the fun bit – photography!
It’s worth noting that this kind of editing will likely fall foul of many photo competition rules around image manipulation, such as our own Photographer of the Year, so keep this in mind if you plan to use it with a key image.
The tool is found in the Develop module under the Basic panel and has its own heading – ‘Lens blur’. So, with that out of the way, let’s dive right in.
How the lens blur tool works
According to Adobe, the Lens Blur tool analyses the image and creates a Depth map to distinguish between the foreground, the main subject, and the background.
Once the depth map detects different depth levels, the Lens blur tool can then apply a blur effect selectively to specific depth ranges.
Using the tool

Start the mapping
Once you open the drop down for lens Blur you’ll notice a tick box next to the word ‘apply’. Ticking this will start the depth mapping process on your image. It generally works best on images with a clear distinction between the foreground, subject, and the background, but you may be surprised how well it works on other images too.

Set the intensity
Next, we’ll select the Blur amount. This controls the intensity of the Lens Blur effect. The higher the amount, the more prominent the lens blur in your image. I would start with 50 (the default) and then adjust based on the image preview.
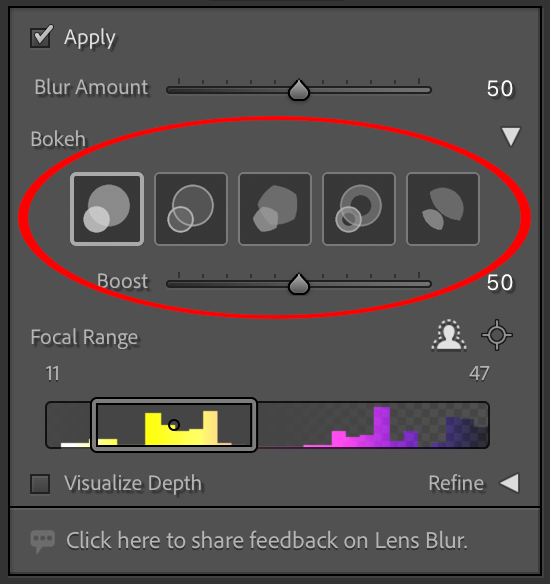
Choose the bokeh effect
Now, we’ll select our desired Bokeh Effect from the dropdown. There are five options; Circle, Bubble, 5-Blade, Ring, and Cat Eye. I find the circular and bubble bokeh effect the most useful for my images. Under the Bokeh effect you’ll see a Boost slider, which increases or decreases the intensity of the Bokeh Effect that you have selected.
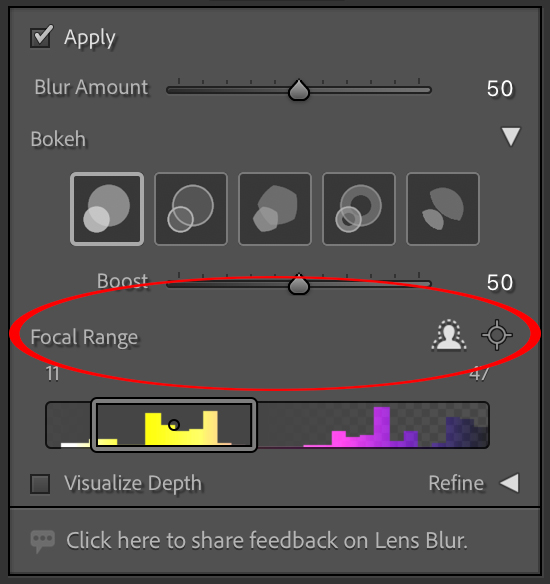
Set the focal range
Next up is where the real magic happens. We’ll now set the Focal Range, which defines different depth levels in the image and the areas that are in and out of focus. It is a graphical representation (like a bar chart).
You can choose to set the Focal range based on one of three options - Subject Focus, Point/Area Focus, or manually. The first two options are situated on the right side of the panel and marked by a symbol of a head and shoulders and a target symbol.
First up is Subject focus – the head and shoulders.
Selecting this uses AI to automate the focal range process by masking your subject and then applying the blur effect to areas around the subject. Next, Point/Area Focus (symbol: a target) allows you to select a specific point or area on the image, and then adjust the Focal range manually.
Finally, if you’d like to control it yourself, you can use the slider on the graph below to drag the focal range to your desired area.
By first ticking Visualise depth you’ll also get a visual reference to the areas being selected in different colours (these are displayed as warm and cool colour tones – see the breakout box at the bottom of the page for an explanation). This can help you to apply the lens blur effect more accurately.
I generally use Subject Focus in most cases and then Adjust the Focal range if needed.
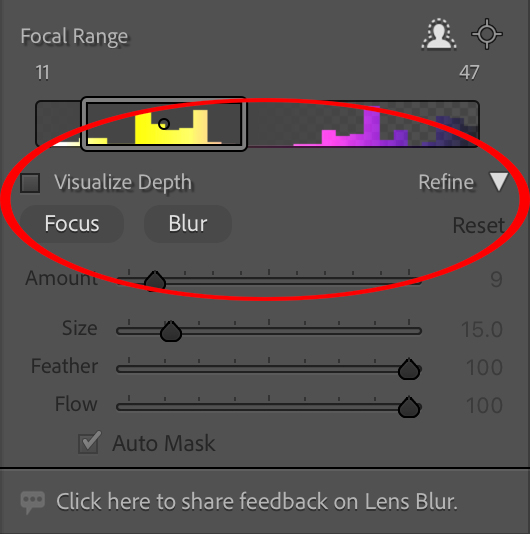
Refine the effect
Finally, we can also refine the effect. I find this is more useful in images where there is less distinction between the foreground, subject, and the background, as the tool does struggle with images like this on occasion.
Under the Refine dropdown next to the Visualise depth tickbox you have two options, Focus and Blur. If you select Focus, you can paint with a brush over the areas that you still want to keep in focus.
It’s worth adding that this option won’t recover areas that are out of focus in your original image, it will just exclude certain areas from the Lens Blur you’ve applied.

Warm or Yellow: Covers the area that has a near focal range.
Cool or Blue: Covers the area that has a far focal range.
White: Covers the area that is currently in focus if you're adjusting the Focal Range controls.
The second option is Blur - this works in the opposite way.
Like with Focus, you can paint with a brush over the areas in the image, but instead it’ll add in lens blur.
There are also additional sliders that will help you to fine-tune your brush, just like when you apply any other brush in Lightroom. These are Amount, Size, Feather, and Flow.
Also, I should add that there is an Auto Mask tickbox at the bottom of this window that was added recently – I haven’t been able to find any information from Adobe on what this does, or see any noticeable difference when editing my images with it applied or not.
Hopefully by the time you read this it’s been updated.
And one more thing before I go - if you want to see a before and after at any point, click and hold the cursor on the eyeball symbol. You can see it where you select the Lens blur dropdown. ❂