


Photographing architecture requires creative thinking and patience, says Thomas-Liam Ryan. In the first of a two-part series he shares six tips to help you improve your composition skills.
01 OBSERVE AND WALK
If you want to develop a better portfolio of architecture shots, start by leaving your camera at home and letting your imagination do the walking instead! Walking around your local neighbourhood provides a deeper connection with the built environment and allows you to begin thinking of creative ways to shoot the architecture that surrounds you.
Not taking your camera with you may seem counter intuitive, but taking the time to observe your surroundings without a camera means you’re free to explore the built environment in greater detail and to be more attentive to the subject matter. It’s important to observe a building from all perspectives to determine which viewpoints could provide images with the most creative impact.
Look for details like repeating lines, typeface, sculpture, textures and patterns which you can photograph close up, as well as positions from which you’ll be able to shoot at wider angles to capture the entire building and surrounding streetscapes. Locations can be busy or quiet, depending on the time of day and whether you shoot on a weekday or weekend. Early mornings and weekends are usually the best times to avoid the constant shuffle of cars in front of your lens. There are also fewer people around so you can set up on footpaths without feeling like you’re in the way. Of course, some buildings may suit being shot at busier times – it really depends on the mood you’re trying to capture.

Walking around your local neighbourhood allows you to begin thinking of creative ways to shoot the architecture that surrounds you.
Canon 350D, 10-22mm lens @ 10mm, 1/200s @ f8, 100 ISO. Curves and levels adjustment, vignetting, sharpening in Photoshop CS5.
02 DIFFERENT VANTAGE POINTS
By changing your vantage point you can create diverse interpretations of the same building. Buildings are sculptural so walk around them and look for angles that capture the building in a unique way. Ascending roads, lookouts, public parks and car parks are all places which can provide effective opportunities for different viewpoints.
It’s important to locate vantage points that maintain a clear view of the building. Be prepared to take the time to reposition yourself to get rid of objects like bins, power lines and other obstructions before you press the shutter button. You can always “Photoshop” the distractions out, but you should at least try to get it right in-camera from the beginning.
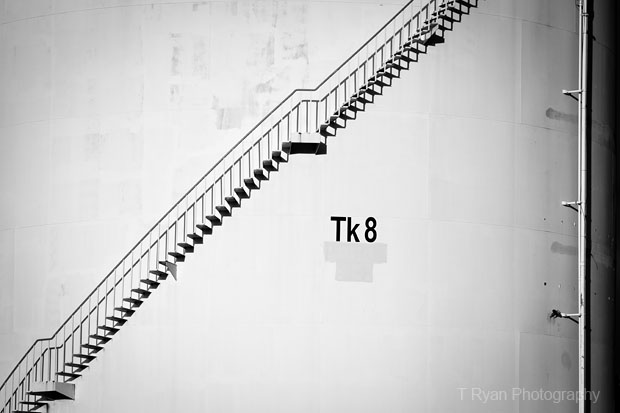
There were several foreground objects in the way such as fences and trees, so I used my zoom lens to capture details of this storage tank. Canon 7D, 70-200mm lens @ 109mm, 1/1000s @ f8, 100 ISO. Monotone conversion, curves and levels adjustment, sharpening in Photoshop CS5.
03 PERSPECTIVE
When you’re shooting with a wide-angle lens there’s a tendency for an optical illusion to occur, where buildings look as if they’re leaning backwards. To minimise this (and the need to edit in post processing) move back to create more space to photograph. The use of an ultra wide-angle lens here is an advantage because you’re able to incorporate more of the scene than by using a standard focal length lens. Conversely, getting up close to a building and positioning your camera directly upwards can create interesting results with maximum impact, and really give the building a powerful aura.
04 FOREGROUND INTEREST
When using an ultra wide-angle lens it’s critical to have foreground interest, otherwise you’ll have a lot of “negative” space in the foreground without it holding any interest. Use anything you can find which will lead the viewer’s eye from the foreground interest and into the main architectural subject. Road markings, shadows, dirt tracks, fences, rocks and so on are all foreground elements which can be used.
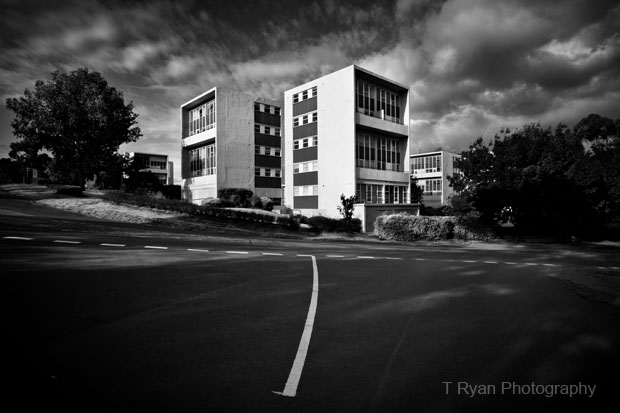
The road marking in this image adds foreground interest and leads our eyes to the subject. Canon EOS 7D, 10-22mm lens @ 13mm, 1/400s @ f/8, ISO 100. Image converted to black-and-white and vignette added in post production. Photo by Thomas-Liam Ryan.
05 LINES, SHAPES, TEXTURES AND PATTERNS
When you’re searching for details of buildings to shoot, look for strong repetitive lines, shapes textures and patterns. These elements can help to emphasise the structure of the building and draw the viewer into the photograph. Experiment by zooming in on textures and using a shallow depth of field to create out-of-focus areas.

The old footpath acts as a leading line to draw viewers’ eyes towards this former boiler room. Canon EOS 7D, 10-22mm lens @ 10mm, 1/250s @ f/11, ISO 200, desaturation and vignetting in post processing. Photo by Thomas-Liam Ryan.
06 TELL A STORY
One of the most powerful things you can achieve with architecture photography is to tell a story through a series of photos. A photo essay on a particular building or streetscape will not only provide a visual record of the subject, but hopefully reveal something of its story. The possibilities and themes for projects are only limited by your imagination. You might consider an abandoned building, the redevelopment of a site, or a period or style of architecture. While some stories can be planned, I find the best projects come from visiting and taking photos of the subject over several weeks. In doing so you build up an emotional connection and this can assist in clearly defining what it is you want to portray in your story. Researching a building’s history can be useful too and may provide insights that change the way you approach the project. Above all, be creative, experiment and take plenty of photos. Do that and you’re sure to end up with a satisfying portfolio of architecture images.
Next week, in part two, Thomas-Liam Ryan delves into the technical aspects of photographing architecture, from lens choice to camera settings.
Article first published in the December 2013 issue of Australian Photography + digital magazine.