


Photography presents a unique combination of technical and practical elements. It’s an activity you need to practice, and practice well, says Robert Keeley.
There’s an old saying in sport that practice doesn’t make perfect – perfect practice makes perfect. Like many aphorisms it’s easy to repeat, but it can be harder to implement. In sport (and a lot of other activities) there are those who practice a lot, yet never make any real progress.
The key to correcting that trajectory is to make sure every time you practice you’re putting a premium on getting it right, or at least better. That requires a combination practical expertise, but also an inquiring mind over how to improve every element of your craft. These days you can do that through extensive reading (including via the pages of Australian Photography + digital), by checking out various websites, and even by searching through the almost endless array of YouTube videos which cover everything from lens assessments to how to shoot star trails.
But the key to all these intellectual pursuits is to then practise them in the field. This week we’ll look at a recent example I pursued. Though I’d often passed kite surfers along my local foreshore, I hadn’t photographed any kite-surfing action before. So late one afternoon, as the sun was easing towards the horizon, I took the opportunity to head to Port Phillip Bay’s shoreline, just south of Melbourne at St.Kilda. This is a prime location for kite surfing when the wind is steady.
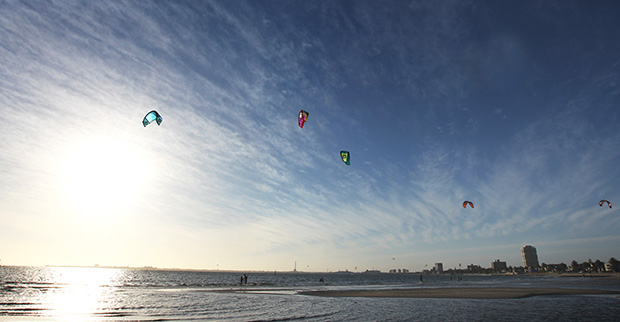
As I walked along the foreshore I noticed this different combination of elements. I shot it with a telephoto lens to compress the various forms.
01 PREPARATION
As I hadn’t shot kite surfing before I took my SLR and my standard 70-200mm f/2.8 zoom lens to capture action on the water, and a 16-35mm wide-angle zoom for any shore-based images. It was a fairly standard kit designed to cover a range of contingencies, but light enough so that I could be mobile and move along the foreshore if necessary. When you’re approaching a new subject make sure you have a range of shooting options available to you. If the work is important you should even be prepared with a spare camera, but given the beach setting I was operating in I was reluctant to have too many lenses and bodies simply because on a wind-blown beach it can be precarious to change lenses, allowing the chance for sand to get onto a camera’s sensor.
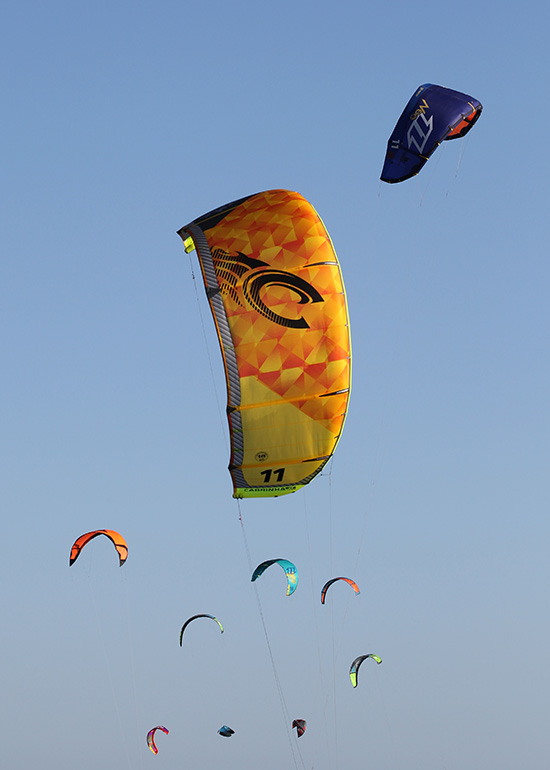
Here I used my wide-angle lens to create a pattern against the setting sun. Later I cropped a portion of the sky so there was more focus on the kites.
02 INITIAL SHOOTING
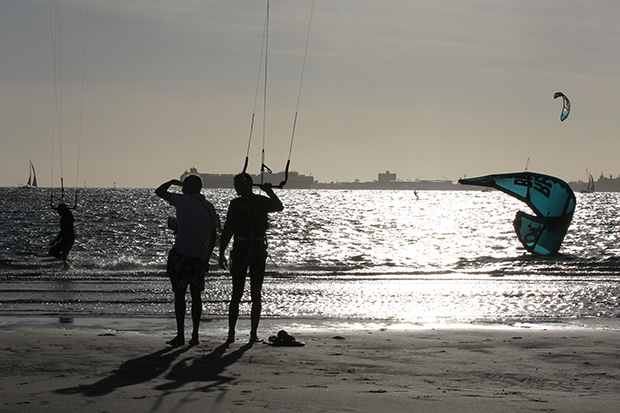
As the sun lowered in the late afternoon sky I found a rock groin jutting out into the sea from the beach around 30 metres and positioned myself at the end. This gained me precious proximity to the surfers as they zoomed up and down in a sea breeze. Their sailing angle and their shallow draft (the boards have very small fins underneath) allowed them to come quite close to the rock groin on occasion, and it provided a stable platform for me to shoot from. It also allowed me to shoot both into the late sunlight, but also to turn at 90 degrees and shoot along the shore line where dozens of kite sails were airborne.
In pursuing any sporting or outdoor event it pays to reconnoitre the location well beforehand for the best spots to shoot from, and to make sure you have good access. I was lucky this rock groin was empty, but at bigger events you may have to arrive very early to check out your best shooting location. Prior preparation will mean allow you to produce images at a higher standard from the beginning of your shoot.
I liked the semi-abstract look of this combination of kites in the late afternoon light. While many images were ideal for silhouettes, by looking in another direction I found this composition. Explore your subject for its full potential.
03 BROADEN YOUR THEME
Later in the day, as the sunk was sinking, I walked along the beach and shot with both the telephoto lens and also the 16-35mm wide angle when the action was close. I looked for patterns and people to broaden the theme I was aiming to cover. When I assessed the images afterwards at home on the computer I had some interesting shots, but I felt I could extend the work a bit further with a 300mm lens I own but use only on rare occasions. In this type of work it would prove to be very effective.
The following week I returned to the rock groin late in the day in bright sunshine with the 300mm lens already fitted. I was able to create some very distinct silhouette style images and the extra reach of the lens really helped me. As the sun headed to the horizon I decided to change lenses. As mentioned before, this can be a very tricky operation in difficult terrain, and there is no more challenging situation than changing lenses on a windy beach!
I decided to stand on the shoreline where the sand was still wet to minimise the chance of sand whipping up. Then I placed the big lens in its own bag before detaching the lens, and quickly put its cap on and grabbed my wide-angle to fit it. Just as I positioned it a beachgoer strolled by, and her big, bounding, hairy, and shaking dog stuck its nose right over my camera bag to see what was happening, before losing interest. It then shook itself hard and bounded off once again. Sometimes every bit of preparation can’t cover all the potential bases for trouble!
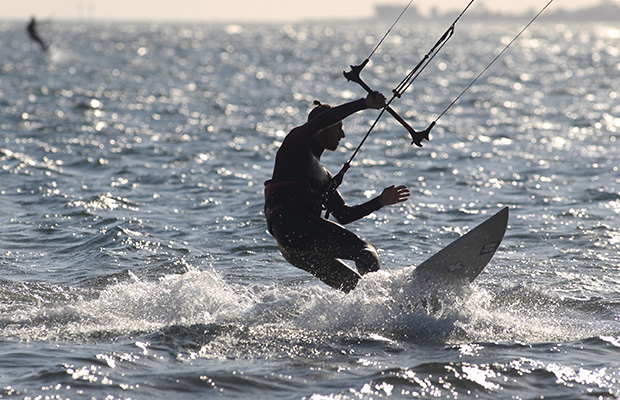
On a second trip to this location I shot with a 300mm lens and I was able to capture close-up action with the kite surfers. I cropped marginally on this scene, mainly to straighten the horizon.
04 ON THE COMPUTER
After two afternoons of shooting I had a reasonable stockpile of shots. Shooting in JPEG format, the options for post-production were limited. I had planned to shoot JPEG images so I aimed to get the images as close to what I wanted ‘in camera’ as possible – which is a sound principle to follow whatever format you shoot in. However, I still had room for some minor adjustments in contrast and some creative cropping.
In some of the images here you’ll see the various options I worked with on one particular frame. The key point to bear in mind when cropping images, especially with tight crops, is to remember that you will lose pixels. When shooting JPEG format I use the biggest file size setting available. This allows me a fair amount of latitude to crop and still print images to at least a snapshot size (125 x 175mm). You might like some of my crops and not others, but the critical concept is that with digital images it’s very easy to search out various compositions.
Keep your eye open for these shots, as the right one will really add impact to your portfolio. Practice makes perfect, but perfect practice is better.

Even using a telephoto lens this jump was a fair distance offshore. When I got this scene back to a computer I initially cropped simply to straighten the horizon as I had been shooting hand held.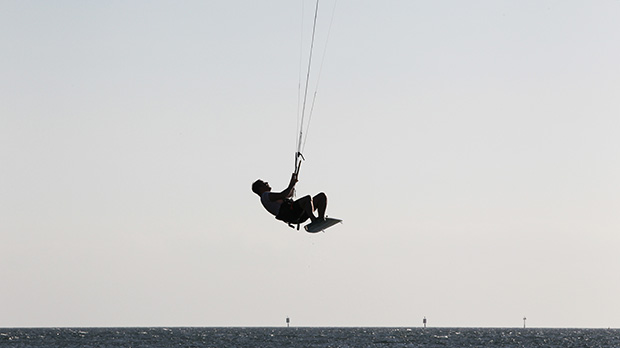
On the next frame I experimented with a more horizontal crop, which I thought improved the scene. But I still felt there was more potential there.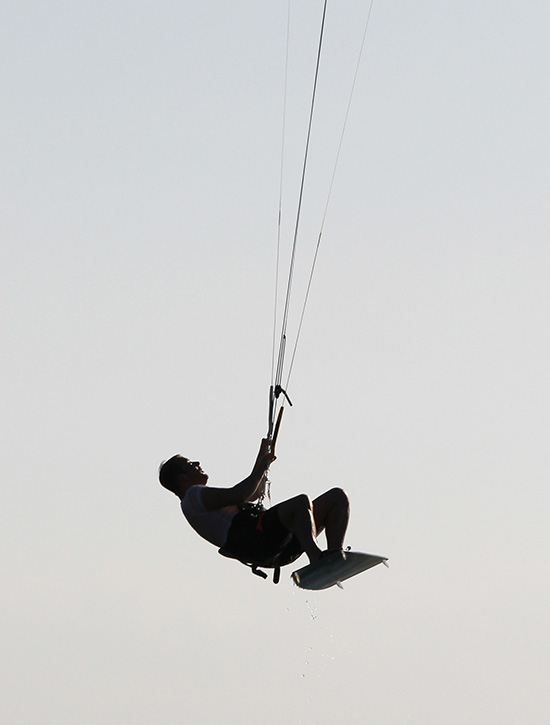
As a final adjustment I thought I would try cropping in very tight to remove any hint of context. I like the effect, but the point is to keep exploring your options. Even though this action was well offshore, I shot large JPEG files so there was still plenty of room to crop in tight.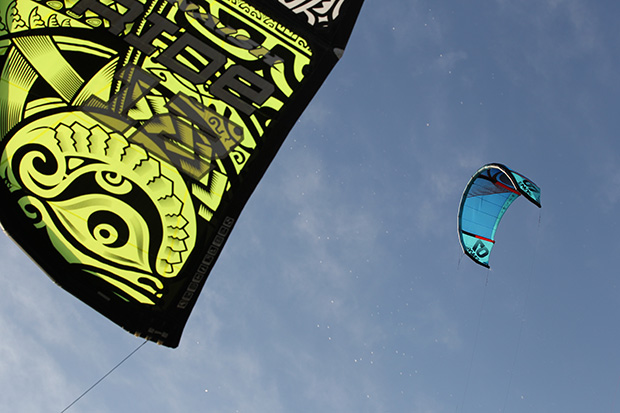
As I worked the subject more I explored more abstract combinations. I captured these kites near the shoreline as the wind blew them over me.