


Pro shooter Adam Monk shares some clever tips for anyone hoping to take their landscape photography to the next level. Story by Rob Ditessa.
Adam Monk began taking landscapes while travelling around the Australian Outback. He saw light change environments into magical places, and he wanted to capture and share these transformations. Being there is the point of it all, he explains. The images are the bonus he takes home if he gets all his ducks in a row and everything works out. Here, he shares his top tips on camera settings, lighting, composition, gear and more to help you shoot better landscapes.
SETTINGS
01 THE RIGHT QUESTIONS
There are no magic numbers for camera settings for landscape photography because each shot is different. Ask a few questions and the answers will set the numbers. Do you have a tripod? If you do, you can use slower shutter speeds. Is the subject or the elements moving? If so, do you want to freeze that movement or capture it? These answers will define a range of shutter speeds that will work. The next question is probably the most important one for landscape shoots. How much depth of field do you want? That will determine your aperture, and when you combine it with the other information it will give you shutter speeds. Keep your ISO as low as possible.
02 FOCUS
Determine where you are actually focusing. Never leave that up to your camera because certain elements in your shot must absolutely be sharp, especially the foreground. Choose your focus point carefully then make sure it fits with your depth of field requirements.
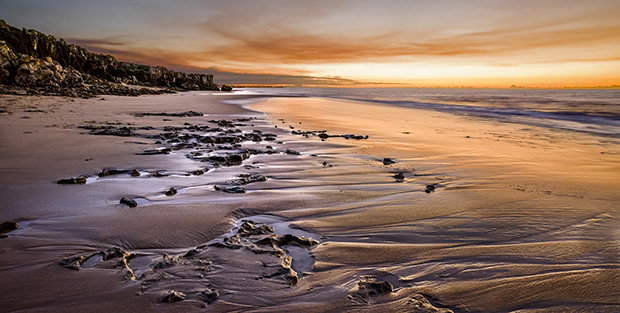
Halls Head Beach, Mandurah, WA. Shot at twilight after sunset. The light covering of high cloud picked up the colours of the fading sun and reflected it onto the beach. Hasselblad H4D-60, 28mm f/4 lens (18mm equivalent), 8s@ f/27, ISO 100.
LIGHTING
03 AVOID HIGH CONTRAST SCENES
High contrast is one of the big challenges in landscape photography. It’s something you just get used to looking for. Big areas of dark shadows are ugly and ruin shots, as do big areas of excessive brightness, especially around the edges of your shot. The best way to deal with these two extremes is to re-frame your shot to exclude them. Think of another composition that works. Also shooting at the two ends of the day, sunset and sunrise, will help because the light is much softer and shadows aren’t so dense.
04 LIGHT IS EVERYTHING
You need to understand light and shadows. Light creates your image, shadows add depth. Lighting is everything in landscape photography, but it either works or it doesn’t. It's important to be in the right place at the right time.
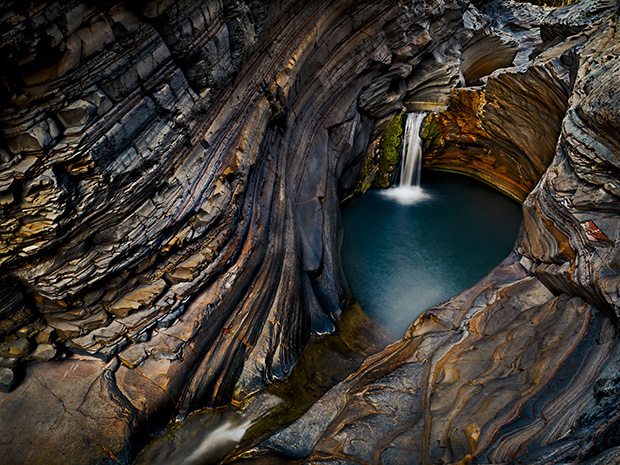
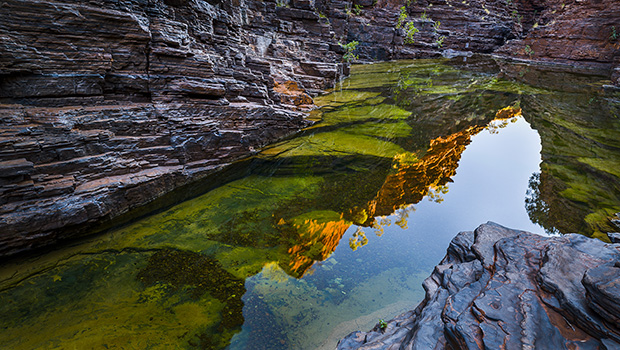
Spa Pool, Hamersley Gorge, Karijini National Park, Pilbara Region, WA. Shot in the hour before sunrise with lovely soft light and no direct sunlight. The soft shadows are from the lightening quadrant of the sky providing some lighting direction which gives the image depth. Hasselblad H5D-50, 28mm f4 lens (18mm equivalent), 6.3s @ f/25, ISO 50.
COMPOSITION
05 LEADING LINES
Look for leading lines which draw the viewer into your image, particularly curved ones, and carefully use the focus point and depth of field to ensure the viewer’s eye goes to the subject.
06 AVOID DISTRACTIONS
The eye is naturally attracted to bright shiny things, so avoid putting bright areas on the edge of your frame or having elements in your image which are brighter than your primary subject.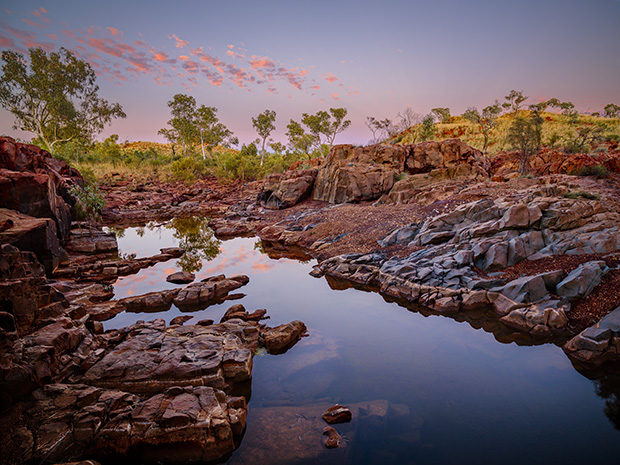
Eagle Rock Pool, Newman, Pilbara, WA. The main pool is actually behind me, so this is the small river that exits the pool. The shot was taken before sunrise and the brighter part of the sky is over my left shoulder where the sun will rise. This image is a composite focus stack, hence the f/5 aperture. It’s a series of 6 images shot at identical exposure varying the focus with each image from front to back. The series was then blended using a program called Helicon Focus. Because the clouds moved between shots I re-blended the sky from the last exposure (shot at infinity) later. Otherwise the program blurs the clouds, ruining the effect. Hasselblad H5D-50, 28mm lens (19mm equivalent), 1/4s @ f/5, ISO 50, tripod.
GEAR
07 KEEP IT SIMPLE
You don't have to spend a fortune to get started in landscape photography. Any camera will do depending on what you want to do with the final results. You don’t need superfast auto focus and a manual focus lens works equally well. The most effective zoom lens you can use are your own two feet. For most people 12-16 megapixels is more than enough.
08 TRIPOD
Don’t scrimp on a good sturdy tripod and fit it with a ball head. A short tripod with a long centre pole is no compensation because extending your camera to the right height on the centre pole is inviting vibration and ruined images. Photographers are better off with a taller tripod with a short centre pole, or none at all.
09 FILTERS
Filters are useful for landscape photography and a slide-in-adaptor will let you use your filters with multiple lens diameters. Start out with graduated ND filters (in one- and two-stop versions), and perhaps a three-stop (non-graduated), and a polariser. He cautions amateur shooters to be aware that the polariser can produce unwelcome effects such as uneven darkening of the sky, especially with wide-angle lenses.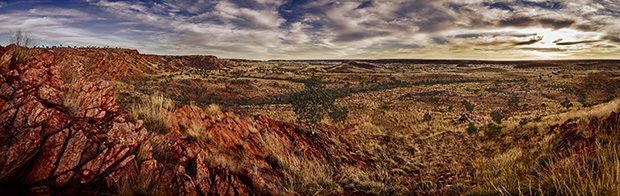
Rudall River National Park, Central Pilbara, WA. Shot from the ridge above Desert Queen Baths at sunrise. This image is a 26-image stitch, shot using a Pano head on a tripod. Sony A7R, 24-70mm f4 lens @ 24mm, 1/20s @ f/16, ISO 100, tripod. Twenty-six exposures stitched together in post.
GENERAL ADVICE
10 BEAUTY IS ALL AROUND
Almost any natural place can be beautiful in the right light and shot from the right angle.
11 JOIN A TOUR
Joining a bushwalking club or photo tour can be a great way to find interesting new locations.
Hasselblad H5D-50, 28mm lens (19mm equivalent), 0.3s @ f/16, ISO 50.
Edited excerpt from 'Learning Landscapes' by Rob Ditessa (First published in Australian Photography + digital, January 2015.)