
Behind the lens: How I captured diving flying foxes during Sydney's heatwave
In January, wildlife photographer Ákos Lumnitzer was able to capture remarkable images of flying foxes swooping and diving to cool down during Sydney's heat wave. We asked him about how he did it.
There are a number of things that are vital to successfully photograph wild animals. You need to know your equipment, be confident in changing settings on the fly, be aware of your safety at all times since getting the best point of view means standing in water that’s quite deep.

But none of those mean anything if you don’t know anything about animal behaviour. You don’t have to be an expert, but spending time just observing wildlife will teach you a lot about how to read animals’ body language and what to anticipate with regards to action.
For example; if you see a bird on a perch and it has just defecated, chances are it will fly off shortly. Little cues about things most of us would not normally notice will become the exact cues successful wildlife photographers employ every time they shoot in the field. Strive to be a good naturalist as you are honing your photographic skills.
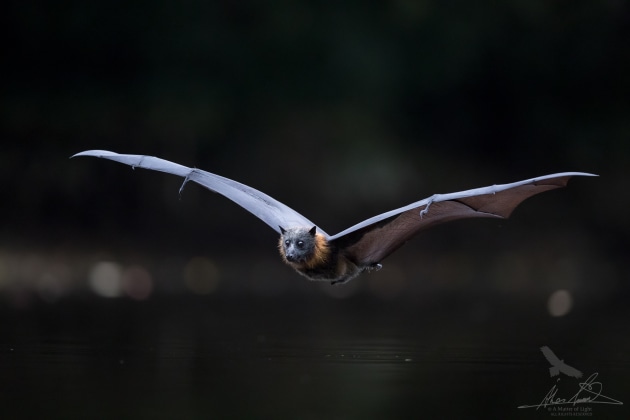
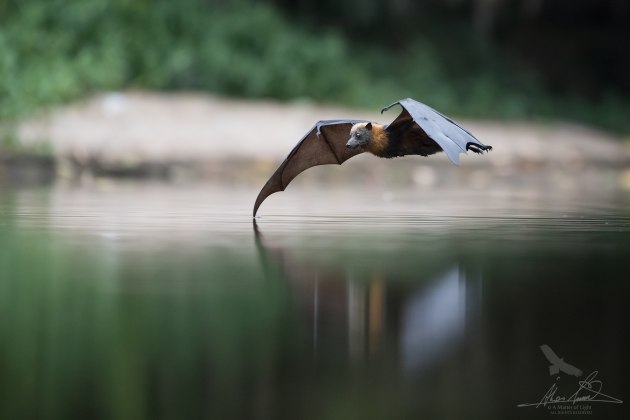
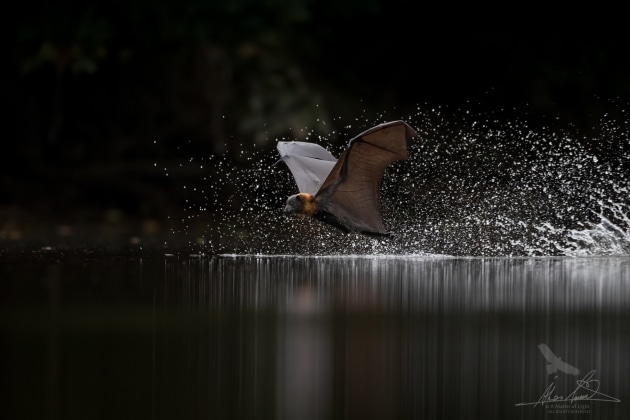
Once the temperature gets into the high 30s the flying foxes (I’ll refer to them as bats) will start to cool themselves by flying over the water, skimming the surface, then licking the water from their fur, often even as they fly back to their roost tree.
The first time I saw this type of on the wing drinking behaviour in late 2010 or early 2011 near the Nepean Weir in Sydney. I was walking my dogs right on dusk and I was immediately astounded when I saw the bats dipping into the water to cool off. I wanted to photograph this behaviour since that day. However, life had other ideas and I focused much more on bird photography for many years after seeing the behaviour.

You really need a long lens, so you can stay well away from the bats for their own welfare and also to be able to pan with your lens as you follow their path over the water. It is not easy though, but being further away makes things easier. With any flying subject, the closer they get to you the more difficult it becomes to capture a sharp frame as panning is much more difficult if not impossible due to the speed at which the subject travels closer to you.
A camera with good high ISO capability, a solid AF system and a very fast frame rate is best so you can shoot a burst of images and pick out the one with the best pose of your subject. I have a very particular taste for flight images that I had developed over time with mentoring by some of the world’s best bird photographers so having the right equipment is important to achieve the best possible results to meet my expectations.
In the ideal flight shot, the subject should be as close to eye level as possible, it would be slightly angled towards the camera and the wings would be in the full up or down stroke positions, or held about as level as can be.

Knowing the equipment is essential, and learning to use the camera in full manual mode is even more important. Spot metering, for example, is completely useless for flight photography as are aperture priority or shutter priority modes. Simply put, understanding the histogram, how to shoot to the the right, and staying fully manual (except the focus of course) is the best way to approach photographing flying subjects.
Light is at a premium due to tall trees blocking the late afternoon sun at this location and also a lot of activity may take place in the middle of the day, during which, under normal circumstances I would be snoozing under a tree or in the aircon at home, because the light is not so nice. But to me, nature photography is the essence of capturing wildlife when they are being wild and I’ll gladly take a chance under not so ideal conditions if the situation requires it.
In a perfect world, everything would be bathed in the stunning golden hues of the setting sun. On this particular day, it was stormy and horribly overcast, forcing me to shoot at up to ISO 10,000 to get a half decent shutter speed and that was with the lens wide open at f/4.
Safety is also important. Being immersed in a river up to my shoulders while I squat is not easy. Also, I am a hand held shooter, meaning I cannot stand using a tripod, as for me they are cumbersome and just get in the way. In this situation, it was a necessary evil though. I missed many opportunities, as I did not have the liberty of holding my gear in the hand like on a normal photography outing, because I wanted the lowest possible perspective just above the river’s surface.
Having camera equipment a mere 6 inches above the waterline is enough to give most photographers a coronary. One slip in any direction and I could knock my tripod, which in turn could fall into the water with nearly 20 thousand dollars worth of kit on it.
I approach every shooting situation with the same sort of preparation I learned from my teenage years rockfishing along Sydney’s eastern beaches. Check the location, assess the water flow (if any), check depth by first walking in slowly without my gear, let my loved ones know where I am and when I am expected to finish.
Once I know that there are no big holes or other submerged surprises waiting I will lock down my gimbal head and walk carefully, slowly placing one foot at a time. There is no point rushing at all.

Another thing to be aware of is possibly pollution in the water and whether you have any cuts on your skin, which could become infected. I have heard of photographers using waders, which is a good piece of equipment, but when it is hot, the last thing I want is to have my body encased in a plastic suit that would boil me alive.
I prefer to be in board shorts and a long-sleeved rashie and a hat. I ensure I apply sunscreen to my face and exposed parts as well. Cannot take the risk of burning lightly, even though I am slightly olive skinned.

Akos' tips
- Learn how to operate your camera in full manual mode and try to stick with just one metering pattern. I have never used anything other than evaluative (matrix for Nikonians) metering. Once you understand how the camera records the scene and the tonalities you will be able to quickly assess a shooting scenario based on your experience. You will apply learned logic and start getting results rather than fumble around trying to work out what this button or that button does.
- Don’t be afraid of shooting high ISOs either and always shoot in RAW file format to get the best possible image files. If you learn the basics of digital exposure you will quickly realise, that shooting to the right is a fantastic way to manage dreaded digital noise in images. That means, overexpose to the point where you just about start to get blinkies on the LCD when you review the images. Then you pull back the exposure during post processing. You will see yourself how effective this method is to control digital noise. At the higher ISOs you will still need to manage the noise with noise reduction software, but you can get very good images with good exposure skills and careful post processing methods.
- Get out there and shoot lots and use pretty fast shutter speeds. I recommend using a shutter speed of 1/2000th of a second as a minimum to create pin sharp images. Once you gain experience, you can drop shutter speeds and get away with less. If your lens has focus limiter switches, use them now. I set the Sigma 500mm f/4 lens to 10m-infinity, which means it would not focus closer than 10 meters, but save me heaps of time by not trying to focus closer if I lost the focus off the bat.
- Spend countless hours at your local duck pond to master your skills to learn about flight photography. Use common birds as your subjects and when the day comes to shoot something unusual, you will do everything by instinct rather than trial and error. Buy the best camera body and lens you can afford and don’t be afraid of buying second hand gear. However, also work on your naturalist skills, they become invaluable as you develop your photography skills too. Naturally, be safe and apply common sense to any situation around water and wilderness areas. Just because a park is in the city, you could have hidden dangers in the way of unseen objects in the water, venomous creatures on land (snakes) and other unexpected surprises.
The gear
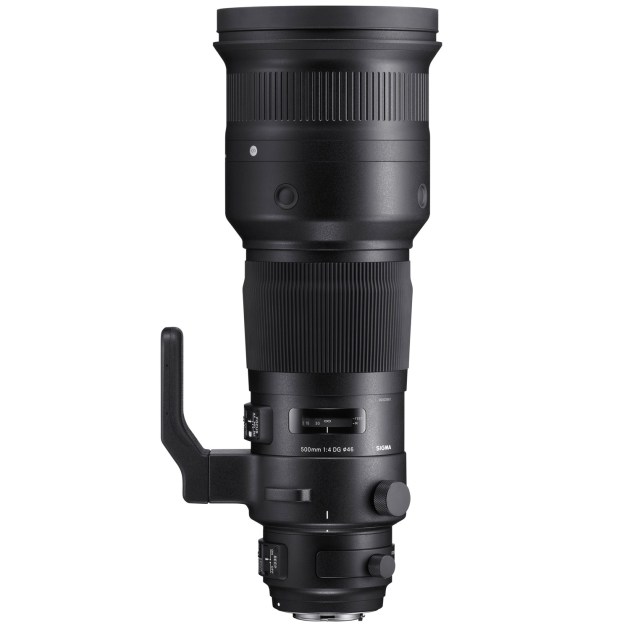
I used a Canon EOS 1Dx MkII camera body and the new Sigma 500mm f/4 DG OS HSM Sport lens for this session.
The camera body is simply incredibly fast in every possible way from focus acquisition to frame rate and everything in between. It is a real beast of a body. To be able to shoot at ISOs as high as 10,000 and more is just incredible.
I have seen photos from some of my European wildlife photographer friends taken at up to ISO 51,200 and it is remarkable that one can capture usable images. At the end of the day, always use as low an ISO as you can get away with. I could have gone home once I went to ISO 3,200 on this day, or stay and up the ISO. I chose to stay and up the ISO.
However, the star of the session was the Sigma 500mm. While Sigma have always been a third-party lens manufacturer with somewhat of a so-so reputation with their older lenses, their new stuff is amazing. They have introduced some beautiful glass in the last six years starting with their ART series lenses in 2012.
As I am writing this, I can see this lens available on E-bay for $5,799.00. That is half of what the Canon equivalent costs and even less than half of Nikons latest FL version, which retails around the $13k mark.
The Sigma weighs in at 3,310g so it is not light by any means. However, compared to my Canon EF 500mm f/4L IS USM lens (3,870g) it is 560g lighter. That is over half a kilo in weight reduction. Hence why I immediately notice the lightness of it. It is a blessing indeed!
How is the lens’ autofocus capability? In one word: excellent! I love to photograph flying birds or bats in this instance! Those are arguably the most challenging types of photos to get out of any bird photography and it will test your camera and lens’ AF ability and your photography skills.
To me, the best judge of image quality, is to be out in the field shooting with the lens. While lens tests may have some uses, I am not one to put it into a sterile environment where everything is controlled. Once I customised the lens via the Sigma USB dock, I found it to be very responsive in the field and that is even with the focus limiter at full range (3.5m to infinity).
I found that before customising the lens to my needs a burst of 32 frames on a flying swamp hen contained 7 very sharp, 1 almost very sharp and 24 not very sharp images. That was a hit rate of 25% sharp images. Mind you, the bird was fast flying and it flew across a mixed tonality background and water as well, which is never an easy feat even with the best Canon EOS AF system.
After I have calibrated the lens, I found an immediate improvement of flying bird keeper rate. My sharp images have gone up to 60-70% sharp in a burst of shots. In fact, most of the misses have been my own doing, as with Single Point Spot AF it is difficult to be on the exact area at once, so at times the AF point slipped off the subject. The camera’s AF system grabbed the background or some other element in that instance.
We do have some forms of control when it comes to shooting wildlife/birds in the field of course. We can use certain aids, such as tripods and tripod heads for support to add some elements of control and gain maximum sharpness.
However, with my style of shooting, if I find that a piece of equipment works well with my personal style (that is mostly hand held photography) then I will expect that the lens will work and perform as well with other bits of aids, such as a tripod and tripod head.