Photo tip of the week: master backlighting with your wildlife images
Pick up a camera for the first time and chances are the first bit of advice you’ll receive is to take photographs with the sun coming over your shoulder. Nothing wrong with that – except in a world flooded with conventional, front-lit images of animals and birds it’s probably also the worst piece of advice to cling on to, particularly if you’re keen to take your wildlife photography to the next level.
If you want your pictures to beat the crowd it pays to be a bit contrary. Capturing images in the time-honoured way is perfectly okay, but our eyes have got so accustomed to viewing front-lit wildlife images it’s much harder to make them stand out. Which is why we’re encouraging you to pivot from your traditional shooting position, with your back to the light, next time you’re out with your camera when the sweet light comes. Do your ‘hunting’ into the sun instead. Shooting into the light has the potential to produce some stunning and dramatic results, totally transforming wildlife subjects, whether common or exotic.
It’s one of our favourite ways to photograph - producing some of our most arresting and successful shots. But you need to get it right. Which is why we’re giving you some tips and guidelines for success. This is what works well for us…
Reading the light –what’s best for backlighting?
Like everything in photography recognising the right time to shoot into the light only becomes second nature with practice. So, if you haven’t dabbled with backlighting before now’s the time to start. You’ll quickly appreciate the possibilities it offers for manipulating mood in your images. The ability it offers to crank up the volume, or delicately tone it down, according to what time of day you photograph, how you frame your shot and your creative control of exposure will quickly make you a complete convert to shooting contre jour.
The simplest way to tackle backlit shots is go out when the sun is really low, around sun-up or sundown. At these times the gorgeous effects of backlighting will be most pronounced due to the greater contrast between your subject and the sunlight behind it. You can photograph against the light at any time of day – even when the sun is high - but they work best, and there are fewer pitfalls, when the light is at its lowest angle and is most intense in relation to your subject.

Selecting suitable subjects
Wildlife subjects are automatically underexposed when photographed against the light if you have your camera set to evaluative metering and don’t make any adjustments to the exposure settings. This isn’t necessarily a problem since you want to exploit this strong contrast between light and dark in your picture to make your backlit image work. Inevitably, however, this underexposure of your subject reduces fine detail to a minimum, sometimes altogether, cutting down helpful visual information for the viewer.
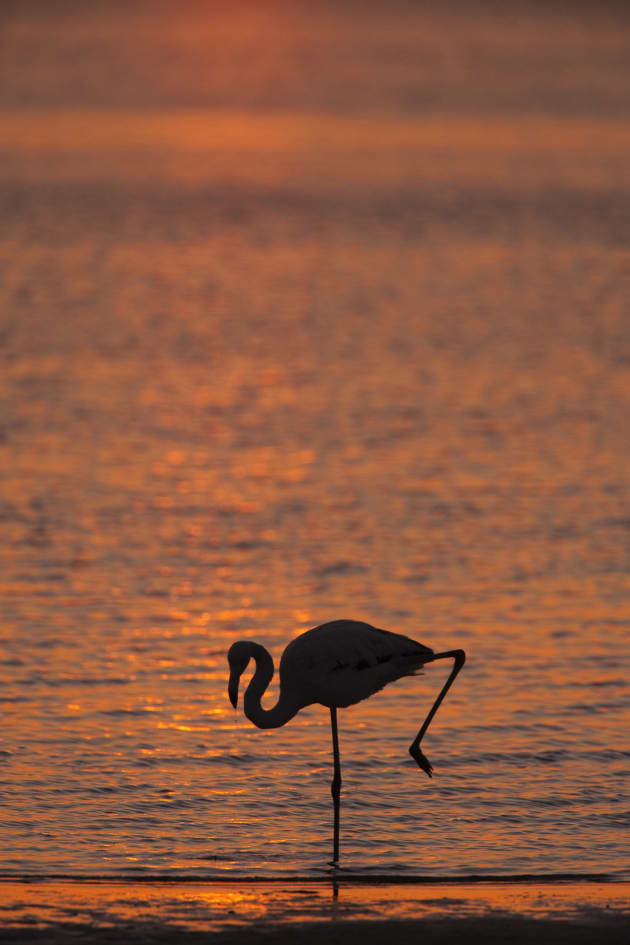
You’re relying mainly on shape and form to communicate with the viewer so it’s important to keep things clean and simple. Just like a shadow puppeteer your ideal subjects will be those with characteristic and iconic features and profiles – big horns, large bills, spines, long-snouts, a pronounced plume or crest of feathers, long necks and so on. The same applies for backgrounds – stuff that’s distinctive and sharply-defined will work, anything overly fussy will detract from the power of the shot. Dead trees are good news for backgrounds, for example, because their distinct ‘architectural’ shape isn’t softened or broken up by foliage.
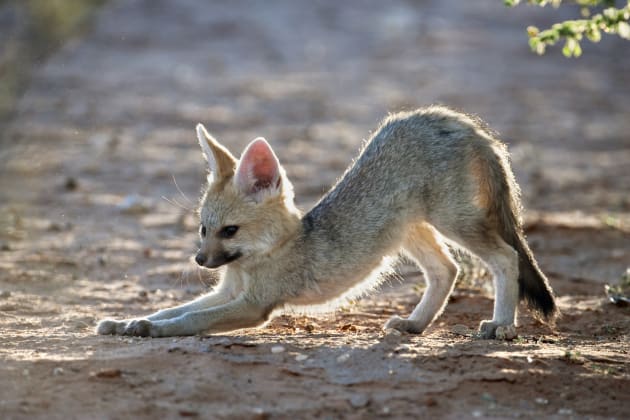
Hairy, furry and feathery subjects get a big tick for backlit treatment too because the small gaps between hair and fur let the light through, creating a wonderful rim of gold around subjects. Look out as well for subjects with features that will let the light shine through completely, for example, the almost transparent skin on the ear membranes of a rabbit or a bird’s wing feathers fanned out during flight.
There’s a couple of other things to keep an eye out for that will give your backlit shots extra wow factor. Subjects photographed contre jour amongst wispy grasses, fine-petalled flowers or feathery seedheads are a boon for ‘backlighters’ because the near translucence of the surrounding vegetation gives your shots even more of that golden sparkle.
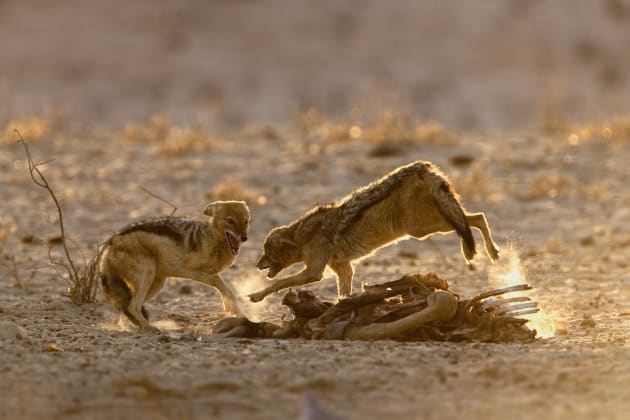
And photographing mist, dust or water droplets, with the sweet light shining through them is like throwing a veil of gold over your subjects or sprinkling them with extra magic glitter. Make a beeline for water-points where birds and animals go to bathe or splash about or dry plains where subjects kick up clouds of dust when they interact or chase around. Backlit shots made like this have a real sense of dynamic beauty and movement.
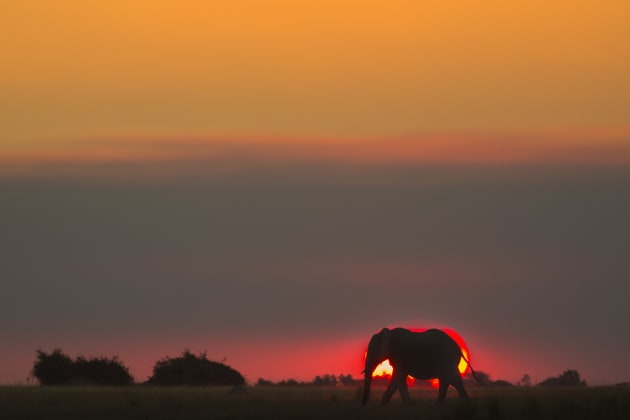
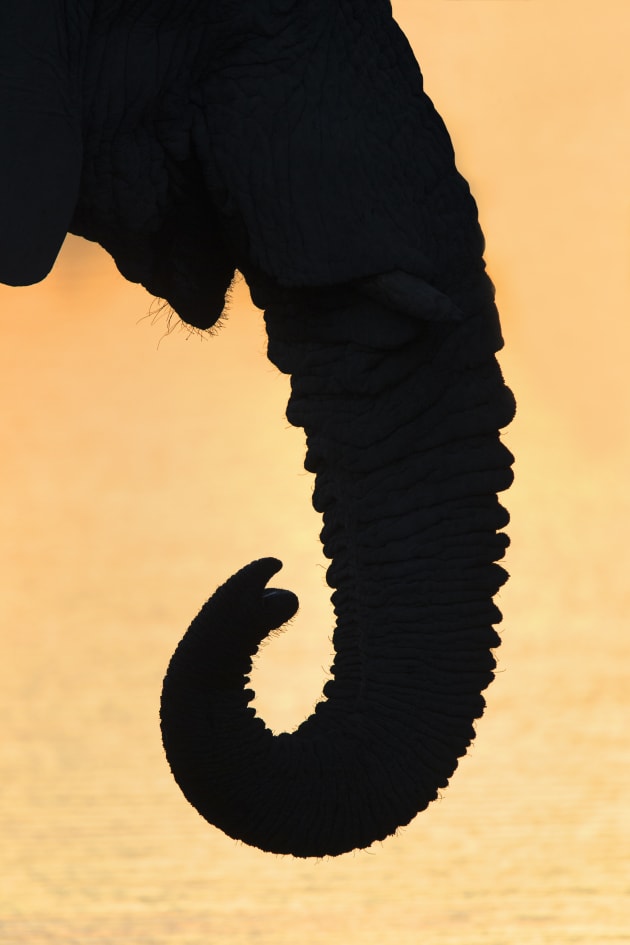
Subjects with distinct and recognizable outlines like this close up of an elephant’s trunk are ideal candidates for backlit images.
Composition concerns – pitfalls to avoid
The best backlit shots work because they clearly define the subject’s shape against richly-saturated golden light. If your subject isn’t distinct and clear of any confusing background, it’s not going to work. So even where you’ve selected a great subject you can still fail to produce a pleasing shot if your subject’s shape is partially obscured due to poor positioning in the frame. Always make sure the outline of your subject isn’t lost against a similarly dark foreground and that it stands proud of anything around it.
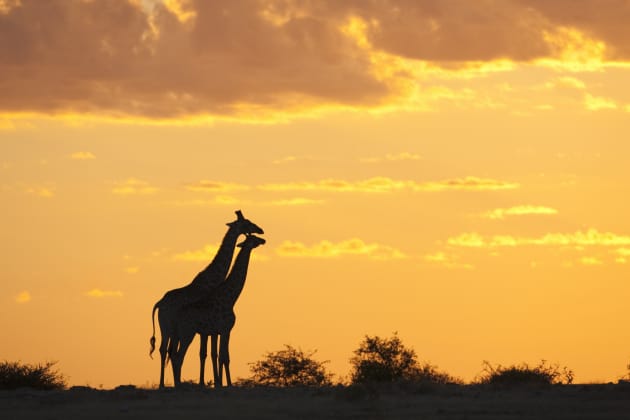
Group wildlife shots, backlit, can be very rewarding when you pull them off, but are tricky because individuals in the group can get completely lost where their shapes overlap - making it confusing for the viewer. School yourself when photographing more than one subject to wait for ‘isolation’ in the frame between at least some, if not all, the subjects in the group. Put simply it’s like making a paper chain of cut-outs where you’d be aiming to make each individual shape completely distinct from the other – or as near as damn it.

Strategy for perfecting silhouettes
All the above holds true for shooting silhouettes too, but shapes need to be even bolder and compositions more graphic because to create silhouettes, you need to intensify the contrast between light and dark areas in your image as much as possible and remove the detail in your subject completely.
To achieve this easily when photographing wildlife subjects that won’t hold a pose for very long we quickly dial in more underexposure, routinely as much as one f/stop, sometimes more, to achieve true silhouettes and to saturate the rich warm colours of the sun at dawn and dusk. Alternatively, you could take a meter reading off the brightest part of the picture, usually the sky, and your subject will be rendered darker, but with wildlife we find it’s often easier to simply dial down exposure settings on the negative side.
If our subject hangs around long enough, we’ll try some captures at different exposures. Each has a slightly different mood and we can then select the image that resonates most at the editing stage.
You need to work swiftly, not simply because your subjects won’t stay put, but because the light changes extremely quickly at dawn and dusk. So don’t get sidetracked reviewing shots on your LED screen in situ; just keep shooting until all available light has gone.
Getting rimlit pictures right
There isn’t a ‘correct’ way of exposing for any backlit shot mainly because backlighting is a creative approach to shooting wildlife and at the end of the day it’s quite subjective. What works and what doesn’t is often a matter of taste. Armed with the knowledge that additional underexposure of your backlit images will enhance the overall effect, but at the expense of detail in your subject you can start to play around – as creative controller of your camera’s exposure settings – to achieve different effects – subtle or dramatic.
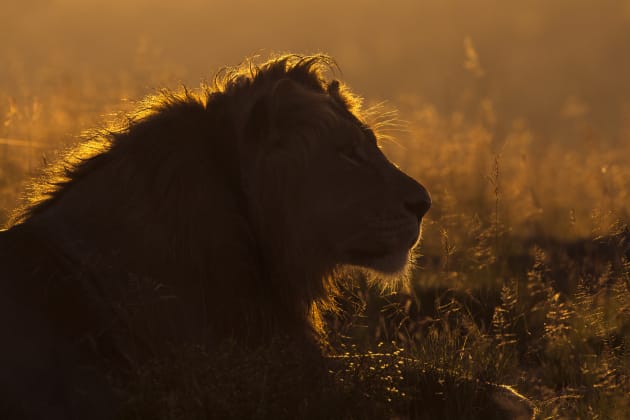
With rimlighting, for example, where you’re aiming to capture and heighten the glow of a golden ‘halo’ around soft-edged subjects photographed against the light it’s possible to use your exposure setting creatively to convey a range of moods: from the pale, rimlit fur of a young animal suggesting it’s vulnerability, for example, to a darker, quite low-key shot of a predator on the prowl suggesting danger. You’ll want less negative exposure compensation for the former and more for the latter.
So if you want to create a quite graphic shot where the image is solely about your subject’s rimlit outline, you’ll need to dial in extra underexposure to really exaggerate it. If you want to retain more detail in the subject you might even want to overexpose a little, or use spot metering, to ensure the subject’s well-exposed. Take care when setting out to do the latter that highlights in the rimlit areas of your picture are not blown out. If your subject is close enough, you could try a bit of fill flash set with at least one stop negative flash exposure compensation.
Mastering backlighting techniques in wildlife is all about learning to judge how much exposure compensation to opt for, if at all, in any given setting. There are just two key things to consider - the mood you want to create in the finished image and how much, if any detail, you want, or require, in the dark areas of your image to achieve it.
Overcoming problems
It’s always wise to bracket shots when backlighting so you have a range of options at the processing stage. Don’t worry if you don’t get things just as you want ‘in camera’ every time - you can make minor tweaks to raw files by adjusting the exposure sliders in your digital darkroom at a later date. A subtle increase of temperature can help at this stage for some backlit shots and, used sparingly, can give a helpful bit of extra punch and warmth.
Once you’ve overcome any little exposure concerns your only real bugbear when shooting into the sun is flare. It can be a real headache, but you do have solutions at hand. Your first defence against flare is your lens hood - so don’t leave it at home. If that doesn’t do it, try eliminating the sky from your image altogether or adjusting your position so the sun is behind your subject and not falling directly on the lens. Finally use a card or even your arm to cast a shadow over the lens to shield it from the light.
Take extra care with camera equipment when doing backlit shots in very dusty conditions –a perfect situation for the technique. Avoid changing lenses if at all possible, and where you can’t, change them inside your camera bag or use an old pillow case to minimise the risk of getting dust on the sensor.
Remember shooting wildlife into the light is more an art than a science so don’t get too hung up about getting it perfect first time at the expense of simply having a go and creating your own stunning light show!