


Seven tips for better drone photos
Sure, drone flying is addictive, but there’s much more to amazing aerials than just getting up high and firing off that shutter. Pro droner Petra Leary counts down her seven top tips for new pilots.

7. Know your camera settings
Learn the basics of photography first. Before you even take to the air, set the camera to shoot manual and RAW. Sure, you can pull your drone right out the box and get a great image, but learning how shutter speeds work with aperture and ISO is key to developing your style and improving your photography.
Shooting images in RAW is very important. While shooting JPEG gives you an easy fix, it also means you lose the quality, size and capability to edit your images as you would like. RAW images are uncompressed and unprocessed meaning you have much greater flexibility to adjust exposure within the image yourself later.
RAW files are also super handy if you plan on printing work as you capture all the quality of the sensor and can print a larger image overall.
Even if you’re just a hobby user who really likes to shoot JPEG, it can be useful to keep your settings to either RAW or RAW + JPEG just in case you ever decide to edit your images.
Once you understand the basics of how everything works, you then want to think about what you are shooting, where you are shooting, and the conditions you are flying in.
I tend not to use a shutter speed lower than 1/100s if possible in most situations, but in circumstances where the weather is very calm with little wind or you are shooting indoors with still subjects you can get away with having a slower shutter speed without losing focus.
In a situation where the drone will easily be drifting or being pushed around by wind you need to keep your shutter speed higher to make sure your photo doesn’t become blurred from the movement, as even slight movement can cause blurring.
I very rarely shoot at an ISO higher then 200 as I have found that because of the camera’s small sensor, images become pretty grainy pushing above ISO 400. I have found this in particular with drones like the DJI Mavic Pro and the older Phantom models.

Although DJI drones offers the selection between Auto and Manual Focus, the autofocus may not necessarily work straight away (or at all) especially in lower light environments. Make sure you tap your screen on the subject you want your focus to hit. If you don’t do this it’s likely your photos will come out blurry.
I’ve found occasionally the manual focus setting can work in a pinch, although I tend to stick to autofocus and tap my subject prior to shooting.
Finally keep an eye on the light meter or the EV. bar in the DJI app. This gives you an overview of your exposure levels in real time, indicating whether your image is over or underexposed. I like to keep this at around -0.7 as it is always easier to adjust an image with slight under exposure then to fix overexposure.
6. Think about composition
Height isn’t everything. Although super high drone shots might have the ‘wow’ factor, sometimes you need to think about what you are trying to capture. Does your framing require everything you can see or do you get a more effective shot by framing just the necessary elements?
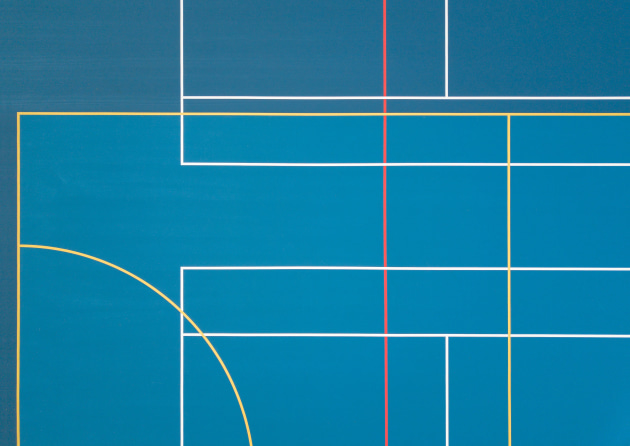
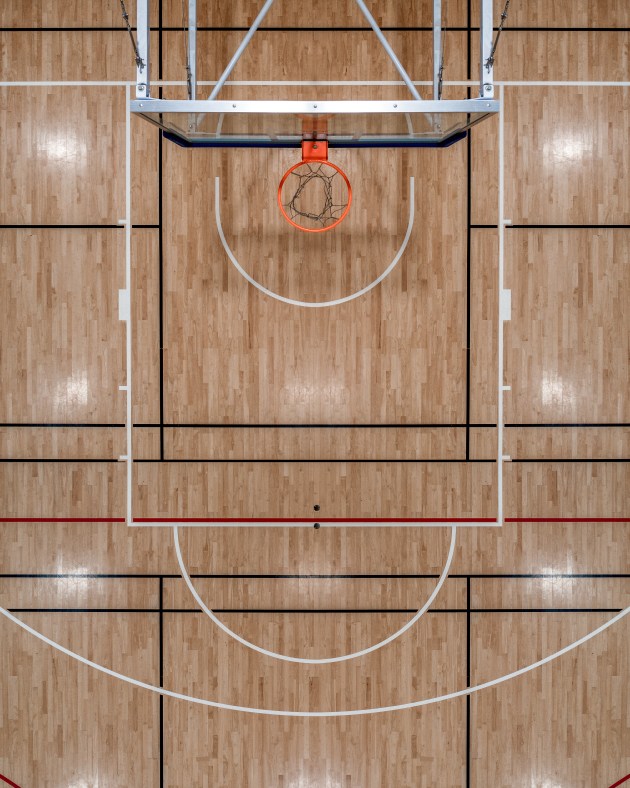
It really bugs me in a strange OCD way when I see one crooked angle amongst a bunch of straight lines.
I always try to create a super straight image when it comes to architecture, road markings, courts, or anything that involves lines. I recommend using the crosshair grid overlay as it is very useful to help align the frame.

5) Make use of Intelligent Flight Modes
Tripod mode is your best friend! It removes camera shake and helps steady your frame by making the controls less sensitive, allowing you to frame the image exactly how you want it. I use this mode about 80 per cent of the time while photographing.
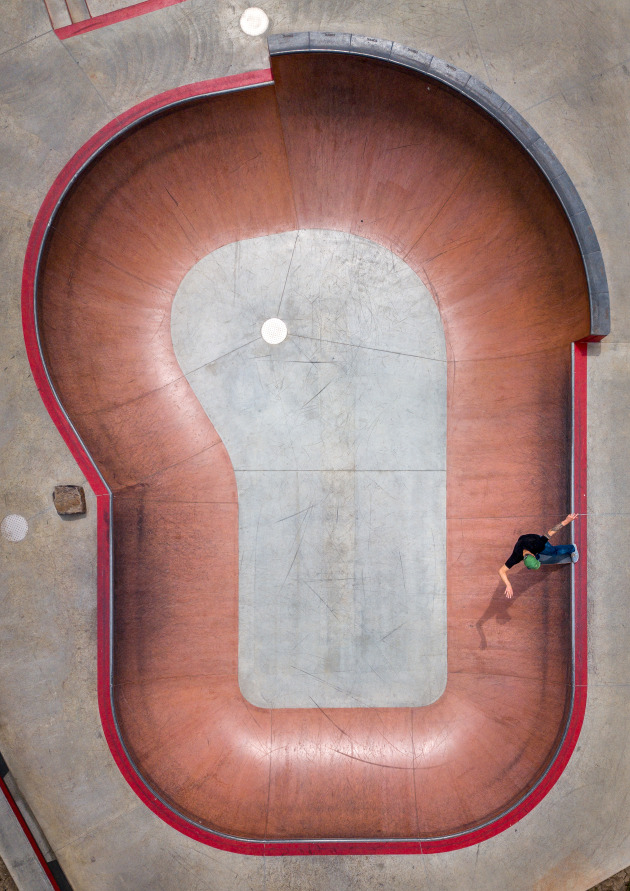
The same thing goes with multiple shot mode. I find this useful when shooting action or any subject with motion. This allows me to select the best moment, something useful while shooting a subject like skateboarding. I can then select the image that best displays the trick and flexed-out style of the rider.

4. Look for great lighting
Like in every type of photography, lighting is key. Learn about how the effects of the sun at different times of day effect your shot, as well as how shadows and objects change with light. My favorite times of day to shoot are during the first 2 -3 hours of sunlight and again during the last couple of hours before sunset.
When the sun is low in the sky, colours become a lot more vibrant, contrasting against the darker shaded areas. I find this is really important especially when shooting environments with greenery and plants as greens can often become blown out and lose detail as the sunlight gets higher and harsher.
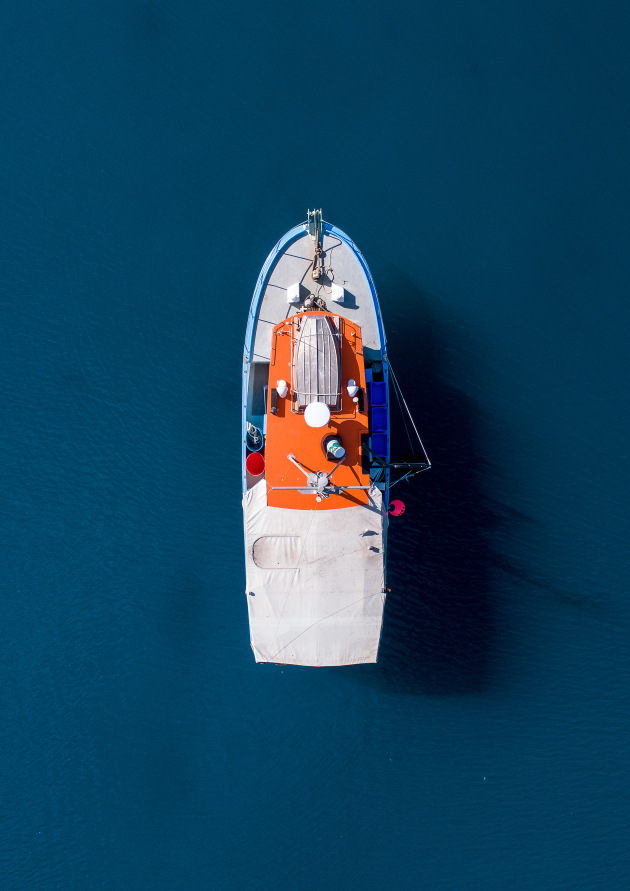
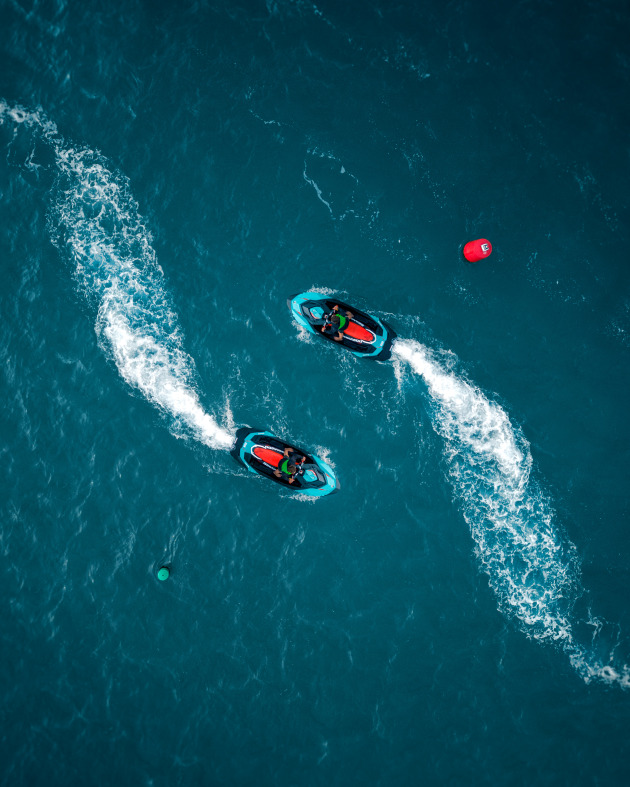
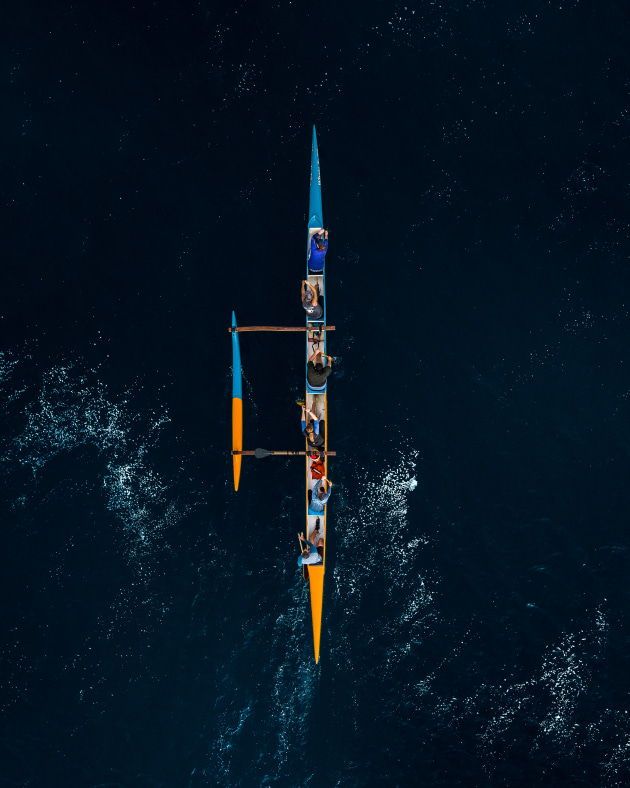
Water is also something I will try to shoot while the sun is low. I find when shooting top-down aerials over water that I am able to capture the detail of the waters movement while still being able to pick up objects and textures below the water’s surface.
However, once the sun becomes higher in the sky this can be very difficult as the light bouncing creates glare off the surface. In situations where you are not able to avoid the harsh lights there are some great filters available that can help.
I use PolarPro filters often, with my go to the CP polarizer as this reduces glare and reflection and gives the colours a more vibrant look. If It is extremely bright I will use one of the PolarPro ND filters to give a bit more room for correcting my exposure. These can also be used to create daytime long exposures which can be a really cool effect.
3) Don't be afraid to find your own style
Be original. This is something that I think can be hard with such a large influence from social media and the internet in general. I see so many photos that are almost identical, and it’s not that they are bad photos at all, but they definitely get boring fast.
I’ve always had a real love for video games as well as Lego and skateboarding, three things which definitely cross over to my photography. I also studied graphic design which I think is why I have an obsession with angles and lines being perfectly straight and balanced.
Think about your interests, the things you enjoy doing or seeing, not just in photography but looking at all mediums and how you can take influence from these and develop them into your own unique style.
Be creative in the ways you choose to process your images too. This might be something that some people don’t agree with as it ‘breaks’ the rules of traditional photography, but for me it can become an art form in itself. Seeing different ideas, effects and compositions executed correctly can really make a photo stand out from the rest.
2) Location, location, location
This is something I spend a lot of time on. I love walking or skateboarding, so a lot of the time if I don’t have work to do I’ll spend the whole day just walking my city looking for interesting objects and locations.
If I’m not out and about I find I spend a lot of time browsing Google Maps looking at strange shapes and patterns across the landscape. Making use of the Google Maps marker system is great but a word of advice: keep it organised and don’t make the same mistake I did, as once you go crazy with markers everywhere it’s hard to find anything!
I’m always looking at buildings and objects with a mindset of ‘would that look interesting from above?’ It might just be an old building with some ugly (but awesome) dated architecture, or an interesting coloured road crossing.
I think this is a way of thinking that becomes ingrained in your head once you start aerial photography, and you will begin to look at everything with a different perspective.
If you have an idea in mind for a specific location, I recommend visiting beforehand at the same time of day you’re thinking of shooting. Look at the angles the light hits from. You can also plan where you will takeoff and pilot without being in the frame.

1) Oh yea, the gear
Once you’ve got a drone, I would recommend purchasing a good quality bag that’s designed for transporting a drone. It’s taken me years to find bags that are comfortable, good quality, fit all my gear, and don’t scream that I’m carrying 1000s of dollars’ worth of stuff. My go-to bags are the Incase Drone Pro bag for the DJI Phantom 4 Pro and the Incase DSLR pro pack for my Mavic Pro and camera, lens and extras.
Lightning Cables have a tendency to get damaged over time, especially the standard white iPhone cables. I recommend shorter cables and ones designed especially for use with drones. Polarpro make some great DJI remote lightning cables, the cords are shorter than a standard cable with a tough meshing around them that allows the bending to connect between your remote and screen without becoming damaged.
One of the best pieces of advice I’ve heard in a long time is using a lanyard on your controller. This allows you to have both hands free without having to put down your controller and monitor.
Last but not least, use a screen hood. Being able to see exactly what is displayed on your screen is so helpful when it comes to getting your exposure correct. ❂
About the author: Based in Auckland, New Zealand, Petra Leary is an award winning photographer whose work is distinguished by her travels. Petra's work captures a view out of the ordinary - whether through symmetry and motion in architecture or through patterns only discovered from above.
Her work has been featured in various publications and sites around the world. Instead of creating a monotonous perception, Petra creates scenes from heights and places not for the faint-hearted to tell you a story from a different perspective.