
Photographer vs Wild: How to plan a wilderness adventure
Heading off into the great outdoors for several days is a great way to discover new and beautiful landscape locations. It’s not hard to do, but you need to plan carefully and be prepared for changing conditions. Just back from a thrilling week-long expedition to Tasmania’s Western Arthur Range, Dylan Toh shares his top seven tips to help you plan your own wilderness adventure.
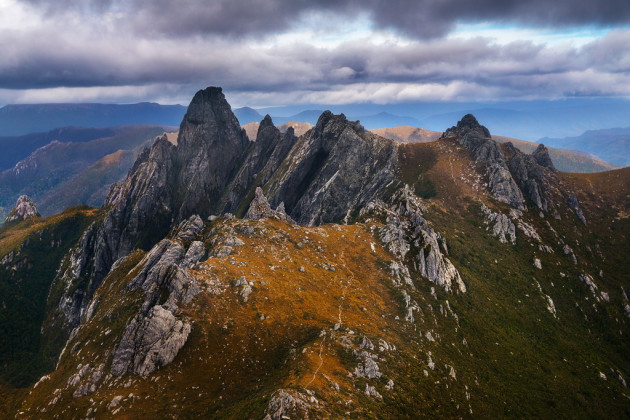
In January this year, I had the opportunity to travel to Tasmania for one week with three other talented photographers. Our original plan was to hike the Western Arthurs as far as Lake Oberon, one of the many wilderness locations immortalised by the late Peter Dombrovskis.
In order to prepare for a seven-day wilderness trip with no support but ourselves, we started planning the trip months out from our departure date. Foremost in our minds was the variable weather of the Tasmanian wilderness.
We were accordingly planning for the worst, but little did we know that we would not even be able to access the trailhead. At the time of our visit, devastating bushfires were raging through the pristine wilderness and threatened many World Heritage areas. Our trip became one of changing plans on a daily basis but our overall preparation meant we would at least be fully prepared for whatever we chose to do.
Here are some of the considerations I took into account for this trip. If you are planning a similar expedition, these are some of the things you need to nail down before you go.
01 Lighten up
Plans for hiking into the wilderness must include good quality hiking equipment and contingencies for a safe journey. With the inclusion of photographic equipment, pack weight and capacity become a major limiting factor.
I used an 80-litre One Planet Strezlecki backpack which is waterproof even without a raincover. Carabiners were used to hang a smaller waterproof camera bag (AquaPac Stormproof) as a front pouch for easy access to my camera while walking.
The packed weight of my setup was 26kg, which lies within my comfort zone for long hikes. In the preceding months I had practiced hiking with this setup to get used to the unusual weight distribution of the front pack. It is important to feel comfortable with the pack weight and to develop a fitness base that will allow enough energy to venture out for a photographic outing after setting up camp for the evening. Otherwise, you might find the allure of a warm sleeping bag too much to resist as fatigue sets in toward the end of the day!

02 Camera and lens choices
One of the major dilemmas of such an outing is just how much camera gear to bring. For this trip I had set a photographic target weight of 6kg. I was using a Sony A7R II with a Metabones adapter and Canon lenses. The A7R II suffers from poor battery life. As a result, I packed 7 batteries as well as a power bank. SD cards contribute so little space and weight that I brought 256GB worth of storage, far more than I would need.
On previous hikes, I found that I was either shooting very wide at 16mm or attempting to zoom into distant mountain peaks. The longer focal lengths help give a degree of compression to allow the peaks to loom larger than life.
The problem with my preferred long lens is that the 70-200mm f2.8 II lens weighs 1.5kg itself. As a result, I borrowed a 70-200mm f4, which weighs a mere 800g and the image quality is just as good.
Despite the 24-70mm f2.8 II being an excellent lens, I elected to leave this out of the kit initially as its focal length would probably be the least used. Keep in mind that if hiking is your primary objective – not photography – you can save a heap of weight by packing a good compact camera.

03 The burden of accessories
I brought a 1kg carbon fibre tripod without a centre column for added manoeuvrability and the lighter of my two ball-heads, a Sirui K30x. Since I do a lot of long-exposure photography, I elected to bring a Nisi filter system with two graduated Neutral Density (ND) filters (a three-stop soft edge, and a three-stop hard edge), a six- and a 10-stop ND filter.
In order to keep the filters safe, I packed a hard filter case. To have easy access to the filters, I also packed a waist belt to hang the filter case and other accessories from, including a cable release, Kimwipes and a garbage bag with rubber bands doubling as a rain cover.
I packed my 70-200mm lens in a lens wrap, which also served as a ‘tarp’ to throw on the ground and lay out my camera gear for easy access when out in the field. I also brought a GoPro Hero3 to record quick video footage while we were walking.

04 Lost and found
Safety aspects of the trip included reliable navigation gear and a personal locator beacon. If you don’t hike very frequently into remote areas, personal locator beacons can be hired from Service Tasmania prior to your hike. These are compact and add little to your pack weight.
I had a compass and a paper map wrapped in a waterproof cover to serve as a ‘hard copy’ for navigation but relied mainly on a GPS app on my android phone. There are several apps available that don’t rely on mobile phone reception but the one I am most familiar with is ‘View Ranger’. This version is best for New Zealand locations as topographical maps can be downloaded for a small cost. Wherever you plan on hiking, open street maps can be downloaded and fortunately, most of the well-known tracks in Tasmania had been mapped on this site. (https://www.openstreetmap.org/).
The disadvantage of using a mobile phone as a navigational tool is its power consumption. It was another reason to pack a power bank – I used the ‘Mi’ 16000mA power bank (http://www.mi.com/en/powerbank/). This unit weighs approximate 350g and was able to charge the Sony batteries four times, the GoPro twice and my phone once whilst only consuming 50% of its charge.
05 Hiking kit
In order to compensate for the additional weight of electronics and camera equipment, the right compromises had to be made in terms of other equipment. Essential items included a good set of waterproof outers, a spare set of clean inner clothes, dry sacks for items within my backpack, a three- or four-season tent and adequate nutrition.
Meal times can be as fancy or as basic as you like but bear in mind that the ‘fancy stuff’ tends to weigh more and take up more pack room. For that reason, I went entirely with freeze-dried meals. This meant fuel was only consumed for boiling water and that no additional implements were needed at meal times. All of my meals were purchased online from Snowys (https://www.snowys.com.au/), which has a wide range of meals to choose from.
Our group of four allowed us to share two, two-man tents. Both tents were top-end Hilleberg tents which are very comfortable and importantly, kept out the moisture even when you’re pitching in steady rain.

Into the wild
Plans sometimes change and we had to modify our's several times due to changing conditions. Only 24 hours before our arrival, the access road to the West Arthurs was closed.
After some debate, we chose to explore the area around the Southern Overland trail called The Labyrinth. This hike was not as arduous as the Western Arthurs and we allowed ourselves five days to explore the area thoroughly. Since this reduced our food supply requirement by two days, I opted to bring the 24-70mm lens with me on this hike in addition to the photographic gear I had already packed.
On an overcast drizzly day, we departed Lake St Clair by ferry to start our walk at Narcissus Hut, located at the southern end of the Overland Track. We hauled our 25-30kg packs over 15km and up one particularly steep ridge leading to the Labyrinth’s entrance.
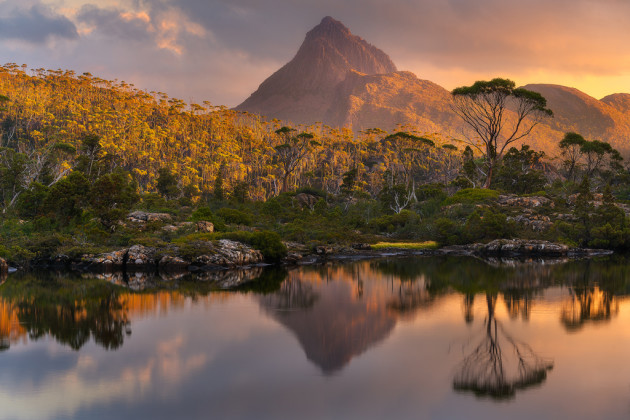
Six hours later, we arrived at the Pool of Memories, wet from the afternoon drizzle and set up camp for the next two nights. During our time here, the conditions were clear and there was no hint of any bushfire haze. We were struck by the primitive nature of the landscape, which was dominated by beautiful Pandani plants (Richea pandanifolia).

The skies were particularly clear on our second afternoon and evening as we explored several other alpine lakes in the area. We approached photography in this area with the thought that the weather conditions could change at any stage and hence tried to maximise our opportunities while the weather was good. From our campsite, the rugged Mount Geryon dominated the landscape from every vantage point.
The morning of the third day started clearly enough as we headed a short distance back toward Lake Elysia to set up camp for the night. For the rest of the day, we explored some of the lesser-known trails in the area leading to a myriad of named and unnamed tarns.
On our third afternoon however, conditions turned hazy and we could smell the smoke approaching due to a change in wind direction. Not knowing if the fires were approaching and threatening our exit route, we took the safe option to hike out on the fourth day.
This turned out to be a good decision since the Overland Track was simultaneously being closed from the North due to the advancing fire threat. Our plans to spend a night camped near the plateau of the nearby Acropolis were put on hold as we ventured only as far as the beautiful but dry Cephissus Creek near Pine Valley hut. The forecast for the rest of our trip was for storms and heavy rain, which boded well for the fires, but not for good photographic conditions.
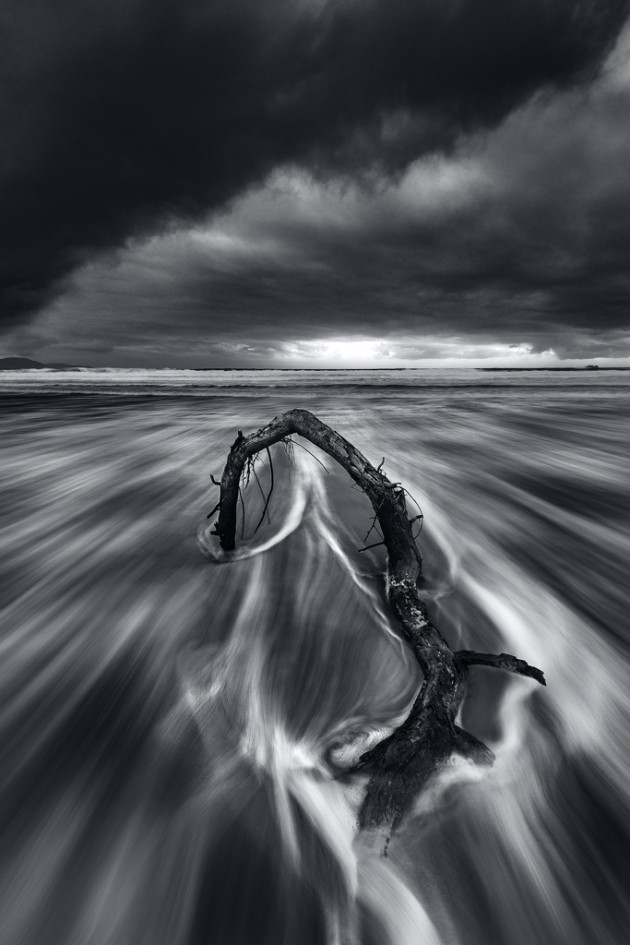
Due to the rain, we switched our focus to locations within reach of Hobart. Our emphasis would ultimately be on waterfalls due to the heavy rain and storms. We made several forays to the south-east coast along the Tasman peninsula for dawn and were blessed with some dramatic conditions.
At the Tessellated Pavement adjacent to Eaglehawk Neck, we experienced a clearing sunrise. Heading south in the early morning, Fossil Bay was home to big surf. We even experienced some blue-sky summer weather as we ventured down to Crescent Bay. This location is a pristine beach flanked by dunes with views of Cape Pillar and Tasman Island to the south.
Since the entire trip was supposed to be a backpacking trip, I found it difficult to shoot without a dedicated photographic daypack as the AquaPac was not suited to carry more than one body and one lens.
We visited some of the waterfalls around Mount Wellington while making a few unsuccessful trips to the summit, which remained shrouded in cloud during our visits. On a rainy evening, we also photographed the iconic waterfalls of Mount Field National Park. Russell Falls and Horseshoe Falls were barely trickling at the start of our trip but after two days of steady rain, the usual forest greenery and water flow had been restored.
To round out the trip, we were fortunate enough to have a flight arranged for us through Tourism Tasmania to view the Western Arthurs from above. During the flight, widespread damage to the vegetation could be seen as well as the low levels of the Gordon dam, indicative of the dry conditions which allowed the fires to burn out of control in the first place.
If you plan on spending time in the wilderness, safety should always be the primary consideration. Decisions about what photographic equipment to bring should be secondary but I hope these general tips will help you to experience a safe and productive photographic wilderness adventure of your own. ❂