
Photo tip of the week: How to take pin sharp wildlife photos
Pro-shooters Steve and Ann Toon of Toon Photo give you the low-down on how to get pin-sharp shots with long lenses.
You might be within reach of all those characterful critters you’ve been chasing without much success when you purchase your first telephoto lens, but will your results be keepers, let alone pictures you’d be proud to hang on the wall? It can be soul-destroying when you suddenly find you can finally frame a subject up close, but you can’t seem to capture crisp images of it. Handling heavy lenses requires skill, but with a bit of practice, and some insider knowledge, you should soon be seeing sharp images every time.

1 Stop breathing
Catching focus correctly, eliminating camera shake and freezing a moving subject while trying to balance and support a long lens can feel a bit like juggling a basket of eels. Make the art of getting ultra-sharp images simpler by getting the best quality lens your budget will allow before you start. Next you’ll need to develop a truly obsessive mindset about holding everything as firm and still as possible – and that means you, as well as your camera setup.
Developing a rock-steady, ‘ready’ stance for yourself, and a firm camera grip that’s comfortable for all your various shooting positions is critical. Camera shake is the main cause of soft wildlife images when shooting stationary subjects. Root yourself to the ground and experiment to find a stance that works for you bearing in mind you need to keep your feet squarely planted and slightly apart – when not lying prone – and your elbows firmly tucked in while securely cradling the lens.
Being this obsessive applies every time you use a long lens, not simply when you’re hand-holding. Don’t assume because your camera has built-in vibration reduction technology and you’re using a tripod that everything’s taken care of. Truly crisp images require a belt and braces approach. Often on safari you’ll hear one of us directing the other not to breathe when we’re using long telephoto lenses even though they’re well-supported. And we’ll always kill the engine before photographing so no vibrations from it travel through our lenses while we squeeze the shutter release as gently as if our lives depended on it.
Being this paranoid is the first step towards pin-sharp pictures. It might sound obvious, but you’ll be surprised how easy you forget to brace properly when you’re excited about the subject in front of your lens and your heart starts racing.
2 No great shakes
However hard you try to achieve ‘steady state’ when hand-holding with a long lens – as long as you’ve still got a pulse – you’ll never completely succeed. Our hands make tiny, imperceptible movements even when at rest so for pin sharp shots you’ll need to select a shutter speed that’s fast enough to counter these jitters. Handily there’s a long-standing, rough rule of thumb that says you should be able to avoid camera shake when hand-holding if your shutter speed is at least the same as the length of your lens. For example if you’re using a 300mm lens then the slowest you should risk shooting at would be 1/300sec. While this is a helpful guide when you’re using mid-range telephotos up to the 400mm mark, we’d advise not to rely on it if you’re hand-holding a cumbersome, 500mm lens or longer. Here we’d suggest doubling things up; shooting at speeds of no-lower than 1,000 of a second with a 500mm and so on. At the end of the day– just how ‘slow’ you can go will depend on your individual skills at bracing well.
Even with image stabilising, which in theory should allow you to shoot a couple of stops or so slower than this rule, we still prefer to harness as much speed as we can muster when using our biggest lenses. Super telephoto lenses are extremely sensitive to the tiniest of movements and will magnify their effects so it’s always a gamble hand-holding them.
We’re happier to work without tripods when stalking our subjects in the age of image stabilisation, especially now we can get good results with a high ISO, but we rarely use our 500mm lens handheld. We know we’ll get consistently sharper results hand-holding with our mid-range telephotos. We’d rather use our field skills to get closer with a 100-400mm zoom (adding a quality 1.4x converter if we need it) than run the risk of camera shake by waving our longer lenses around. The same applies when we’re hand-holding and panning with birds in flight – it’s so much easier to operate and get sharp results with medium range telephotos and crop. A frame filling flight shot is no good to anyone if it’s soft.
Keep a lookout for useful stuff you can brace on when you’re hand-holding on the move, such as trees, rocks, fence posts and so on. We’ve even been known to lean on each other when shooting if we need an extra bit of support.
3 Supporting cast
The ‘freeze and squeeze’ approach might help enormously for medium length lenses in good light, but for low light conditions, and when using a 500mm or 600mm lens, we rely on a supporting cast of devices to secure sharpness in our pictures. This support ‘crew’ will help you reduce the minimum shutter speeds you need on those you’d require when hand-holding considerably.
You might be pleased to learn our best friends here are not high price options. The homemade, budget bean bags we’ve been using for years allow us to to use a 500mm IS lens successfully as slow as an 1/8 second where we need to, provided we brace properly. Made from the thigh section of old trousers, the ends sewn up and filled with rice, these make handy, portable supports on which to nestle a long lens. We keep them in our vehicle at all times (on safari we carry them out empty, fill at our destination and donate the leftover rice when we leave). We like to have four on hand so we can stack them if we need a bit of extra height when shooting birds from a vehicle for example and for working at low angles on the ground. Of course you can buy ready-made versions that work well and look much prettier, but we find the process of filling our DIY bags at the start of a photo trip is a great way to get into the photographic mindset.
We did splash out on a decent tripod however. There’s nothing more scary than seeing an expensive long lens teetering on a flimsy tripod. When shopping for a tripod make sure it will support the combined weight of your longest lens and camera. If you can’t afford carbon fibre then you’re looking for something heavy enough, but flexible, that can be used at low level. Remember you’ll have to lug it around all day when considering what’s the right weight. We use ours with a gimbal head that’s great for smooth panning with a long telephoto and allows us to pivot big lenses easily in horizontal and vertical planes. In situations when a tripod might be too cumbersome or when space is tight we’ll pack a monopod. While this doesn’t offer the support of a tripod it’s better than nothing and gives our arms a welcome break in long sessions.
Remember to check the manual of your telephoto as to whether you need to switch the vibration technology off when using it on a tripod which used to be the case on certain lenses. This shouldn’t be an issue on newer versions but is probably worth checking out.
04 Pick up speed
Given your chosen subject is wildlife not still life, your main sharpness issues will often switch from cutting out camera shake to freezing motion. Even if you’re steady as a rock your subjects won’t be. Unlike with a landscape, if you don’t get a sharp picture first time round there’s no going back. Which is why we like to select aperture priority mode and keep our cameras routinely set to a reasonably wide f-stop in the field – around f6.3 or f7.1 so we have lots of speed available for a crisp shot at our fingertips. If we need to make considered adjustments for exposure compensation or stopping down further for greater depth of field we can do so later once we’ve got a sharp shot in the bag.
We’ve become quite the speed freaks in recent years because we now regularly work at fairly high ISOs when using long lenses to increase our chances of a sharp result. Our cameras produce very little noise at high ISOs in many situations and we want to use everything possible in our armoury to nail the required sharpness. Once again we’ll adjust ISO downwards aiming for greater image quality on subsequent shots if our subject hangs around long enough for us to try.
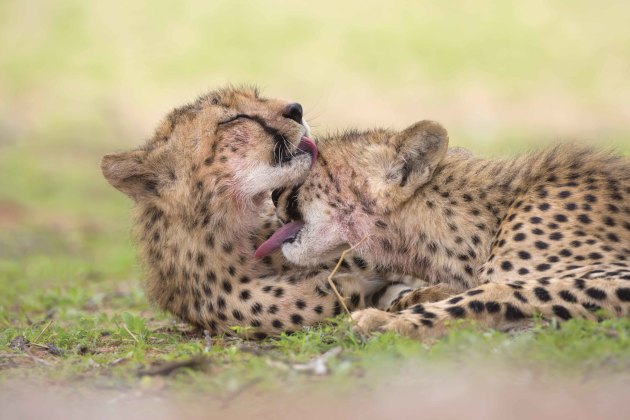
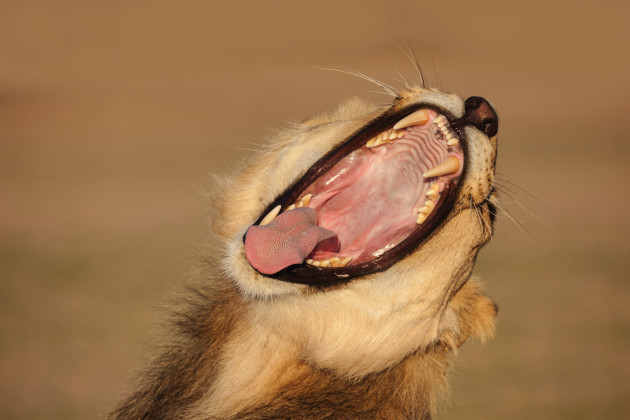
The safe speed you’ll need for ultra-sharp action will depend on how fast your subject’s moving. A huge raptor gently riding the thermals may be sharp at 1/500 second while a speeding cheetah or fast-flapping small bird may require 1/5000 second. We tend to photograph fast moving wildlife with long lenses at no lower than 1/1000sec. Whatever you do don’t skimp on speed if you want your hit rate to improve and bear in mind that the closer the moving subject is to your lens the more speed you’ll need.
If there’s not enough light to get fast enough shutter speeds for pin-sharp action don’t flog it. You can dump the requirement for sharpness completely by going for creative motion blur instead.
05 Sharp points
So now you’ve got a solid foundation on which to begin shooting wildlife with a long telephoto, but you still need to bear in mind that how well you focus when composing your shot will also have a crucial impact on the sharpness of your pictures.
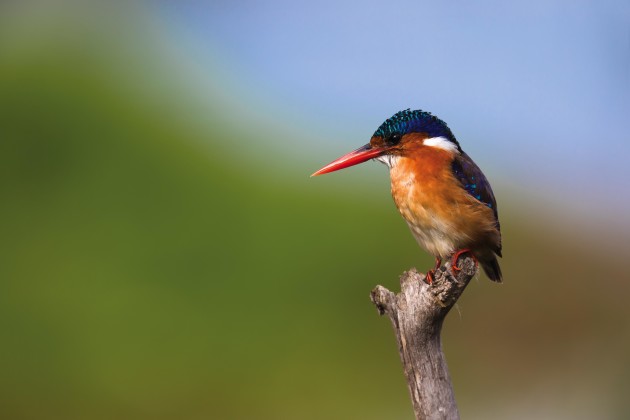
When using long telephotos to photograph close subjects available depth of field will be very narrow so you’ll need to be quite precise in selecting where in the frame you focus.
Don’t leave it up to your camera to decide where to focus but instead lock focus deliberately on where you want to hold the viewer’s gaze and recompose. With wildlife this usually means focusing on the subject’s eye when you’re shooting close-ups and portraits, then the head and next the body and so on the further you are from the subject. Practise using the different focus points on your camera until you’re familiar with them and remember that even where sharpness falls away in your picture you might just still be able to pull it off as long as the eye of your subject is sharp.