


In the first of a new two-part series on photographing wildlife, award-winning shooters Steve and Ann Toon share four great photo tips to put you ahead of the herd.
After years of travelling with heavy camera bags in pursuit of great wildlife photos we can confirm there’s no hidden secret, silver bullet, or magic formula that’ll guarantee a great shot every time. But there are some simple things you can do to improve your success rate when you are photographing animals. Thinking about where you position yourself in relation to the sun, using different lenses and taking a graphic approach to the subject are just some of the approaches that pay dividends if you want your wildlife pictures to pack a punch and pop with instant eye-appeal.
01 SHOOT INTO THE LIGHT
One of the best ways to give animal images extra pulling power is to turn around. Turning your back, quite literally, on the prevailing wisdom that recommends photographing with the sun at your back, opens up some really interesting lighting opportunities. A single 180-degree move immediately presents you with the opportunity to exploit the changing moods and magical effects of back lighting. Way more exciting than orthodox front lighting, back lighting is a boon when shooting wildlife because it allows you to focus more attention on your main subject. Distracting detail, and colour even, is held in check, or is almost non-existent in the shadow areas, so there’s nothing at all to detract the viewer’s eye.
Photographing into the light, at dawn or dusk, allows you to perfectly pick out the shape of your subject in a picture – whether that’s a stark silhouette of an iconic subject against a glowing sky or a subtly suggested outline, with a halo of sweet light shining through shaggy hair or ruffled fur. The trick is to keep compositions clean, ensure the outline of your chosen subject is recognisable and distinct from background clutter and to experiment with under-exposing shots a bit to further dampen down detail and saturate the golden light.
Look out for back lighting opportunities when photographing animals in water, when it’s cold, or in dry, dusty conditions. A golden spray of water droplets, a veil of condensing breath or a shimmering cloud of dust will really enhance your shots.
Shooting into the dawn light transforms this simple image of springboks into something interesting. Canon EOS 1n, 300mm f4 lens, 1/320s @ f/6.3, Fuji Velvia 50 ISO film. Photo: Steve and Ann Toon.
02 WHICH LENS?
Long lenses are the preferred choice for many wildlife photographers, and for good reason. It’s great to be able to harness their foreshortening effect to neatly throw backgrounds out of focus so subjects stand proud in pictures. And how else would we get close to photograph shy mammals and small birds? But there’s a downside. Long lenses above the 200mm mark iron-out perspective by appearing to bring backgrounds and foregrounds closer together. Sometimes images made this way can appear a bit flat and lifeless. If you always shoot this way, with no variety, there’s a chance your images could start to look a bit 'samey'.
So when you have the rare chance to get very close to a subject, which may happen when working with more habituated creatures in animal sanctuaries or subjects in controlled conditions, or can use a remote wireless release, switch to using a wide-angle lens. Because wildlife’s not frequently captured this way such images look refreshingly different and have bags of immediacy because they’re so ‘in your face’. Unlike long lenses, the broad angle of view when shooting wide gives these pictures a dynamic three-dimensional feel and allows you to include lots of in-focus background detail, too, telling a story about your subject’s habitat and immediately enriching your picture with context.
Wide-angle animal close-ups work best at eye level with your subject (or below) so you not only need to get very close, you need to get down low – often lying prone. Using short lenses is a great way to photograph tolerant large birds and mammals, characterful or comic critters and those with remarkable features such as super-sized beaks, extra long muzzles or goggle-eyes. Wide-angle lenses will exaggerate your subjects’ size and characteristics, making them appear to loom out of your picture straight towards the viewer.
If you can get close enough to use a short lens, subjects like these rhinos appear imposing and dynamic. Going wide also allows you to show their habitat. Canon EOS 5D Mark II, 24 -105mm f4 lens@ 50mm, 1/640s @f/8, ISO 250. Photo: Steve and Ann Toon.
03 SPECIALISE
Becoming a specialist is a great way to get the best out of your photography. Everything’s better with practise and the best pictures come when you’re passionate about your subject. So find a species, local reserve, habitat, location or conservation campaign you’re excited by and embrace it. Work the possibilities and become an expert.
We chose the wildlife of a whole country, South Africa, which is a bit ambitious, but we take the same approach to photographing wildlife in our own backyard, too. The more we look, and the more time we spend, the more rewards we get from familiar subjects, whether it’s behaviour we’ve not previously captured or a fresh way of framing shots.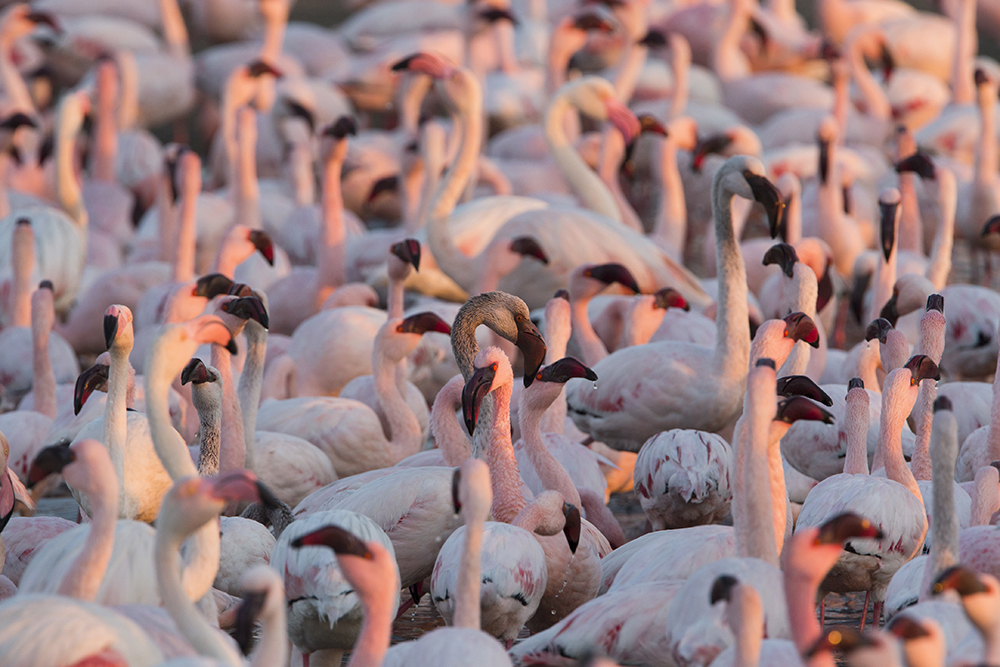
Work your subjects hard and specialise. We’ve visited this Namibian flamingo hot spot on several occasions, each time improving our coverage. Canon EOS 1DX, 500mm f4 lens plus 1.4x converter, 1/320s @ f/9, ISO 800. Photo: Steve and Ann Toon.
04 BE GRAPHIC
The best wildlife pictures are often quite simple. Their success boils down to just one or two elements. We always advise clients on our photographic workshops that less is more, to strip away the extraneous and to look for clean, bold compositions because anything overcomplicated or visually fussy will draw the eye away from the main focal point in a picture.
We’re always on the lookout for bold curves, strong diagonal lines, or pleasing repeat patterns in the natural (and sometimes man-made) world that we can harness to add a visual structure, or ‘design’ to our wildlife pictures. It might be a single, sloping tree branch across which a leopard is sprawled or a series of telegraph wires on which a flock of birds is perching. Look to utilise strong graphic shapes and you won’t go far wrong.
You can add more even emphasis when taking this ‘graphic’ approach by removing some or all colour. Desaturation, done well, can strengthen the impact of your image even further.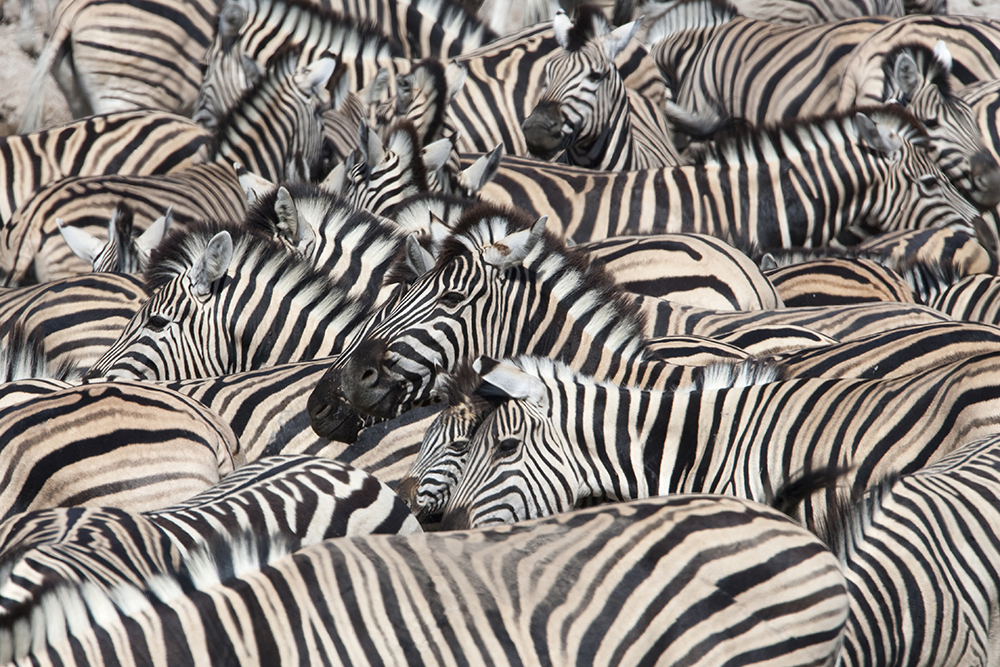
Look for bold graphic framing, as in this photo of a herd of zebras, which highlights their unique ‘barcode’ markings. Canon EOS 1Ds Mark II, 500mm f4 lens plus 1.4x converter, 1/320s @ f/16, ISO 250. Photo: Steve and Ann Toon.