


Landscape photographers don't have the freedom to add a flash or studio light here and there to change the way a scene is lit. But, as pro photographer Dean Cooper explains, landscape photographers do have one trick available to them that is often overlooked by new photographers. Filters! In this special feature he looks at what's available and explains how you can put a few clever filters to good use to modify light and create stronger images.
As Landscape photographers we have to deal with the quality of light Mother Nature throws at us. If the light is flat then landscape photography is pretty easy. We can confidently capture our scene. All of our tones fall within our histogram and we can tweak our image in post-production adding some contrast to add some more life to our images. But what do we do when there is vast contrast and our cameras cannot capture all the detail?
One option would be to take several shots, each exposed for the shadows and highlights, and blend them together to create an HDR Image. But the results can appear quite surreal and personally I do not like spending more than a couple of minutes editing my images. I would rather spend my time outdoors than sitting in front of a computer.
I shoot a lot of seascapes and one of the biggest issues I encounter is a bright sky and dark foreground. It can work the other way too, where their may be a dark stormy sky and bright sand in the foreground. To control this scene in camera I used a graduated neutral density (ND) filter.
A graduated ND is one that fades from dark to clear, graduating in the centre of the filter. There are different variations of the transition but the soft edge one being the most common as it provides a smooth transition from the ND side to the clear side. This style of filter is placed into a holder attached to your lens. You then simply slide the filter up or down to place the dark part of the filter into the brighter area of your scene.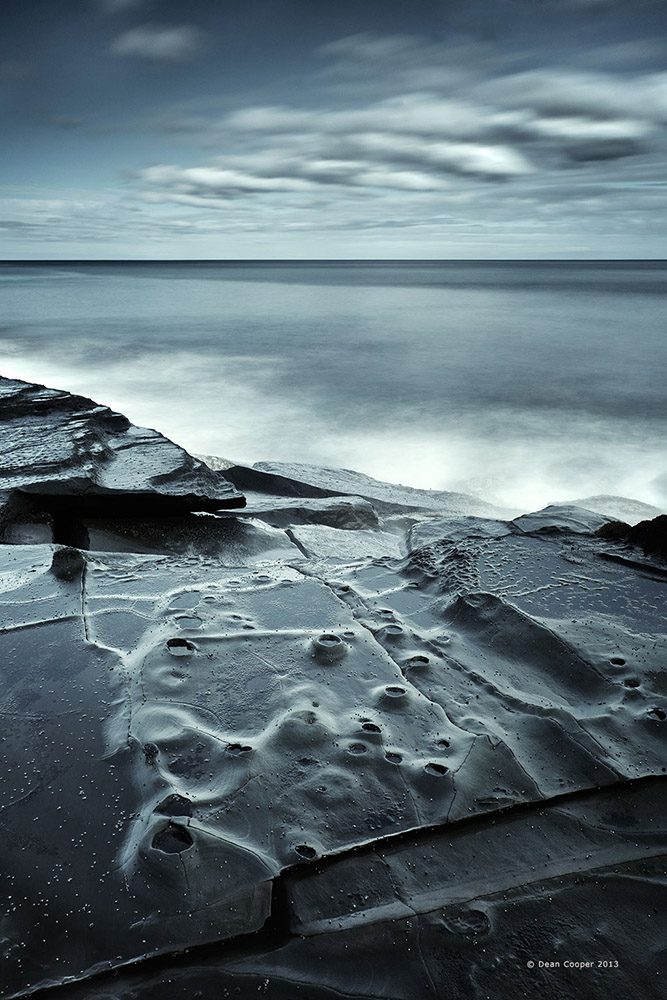
Photo by Dean Cooper.
One of the best times to shoot seascapes is at first and last light. Not only is the light at its optimum, it enables us to use slow shutter speeds blurring the water motion and in turn creating interest in our image. When the light increases in the scene and we cannot get our shutter speed slow enough to create this effect, this is where the Neutral Density (ND) filter comes into play. It's not a graduated filter but simply a very dark filter, designed to reduce or modify the intensity of light that hits the camera’s sensor or film without changing the colour rendition.
ND filters are available in various strengths. Personally, I use a three-stop, six-stop and 10-stop filter, and I love them all!
NDʼs are not only useful for seascapes, but are fantastic for photographing waterfalls. It allows you to shoot long exposures at f/8 or f/11 instead of f/22. Our lenses are much sharper at these larger apertures.
I also use NDʼs when photographing street scenes when I want to reduce the visibility of moving objects or obscure a person’s identity. Portrait photographers use them in bright sunny conditions to allow them to shoot wide open, thus creating a short depth of field effect in the image. Funnily enough, this is where NDʼs originated. They were made for the movie industry to allow them to shoot very short depth of field footage in bright or sunny conditions.
Another filter I use is a polariser. Like polarising sunglasses, polarising filters remove reflection and glare and enhance the saturation in blues and greens.
In the following example I have used a neutral density graduated filter to reduce the exposure in the sky, an ND to allow me to use a slower shutter speed and a polariser to enhance colour and reduce reflection. This image was taken in the mid morning. What I really love about using these filters is that it allows us to capture these images during the day, not first and last light – pretty cool!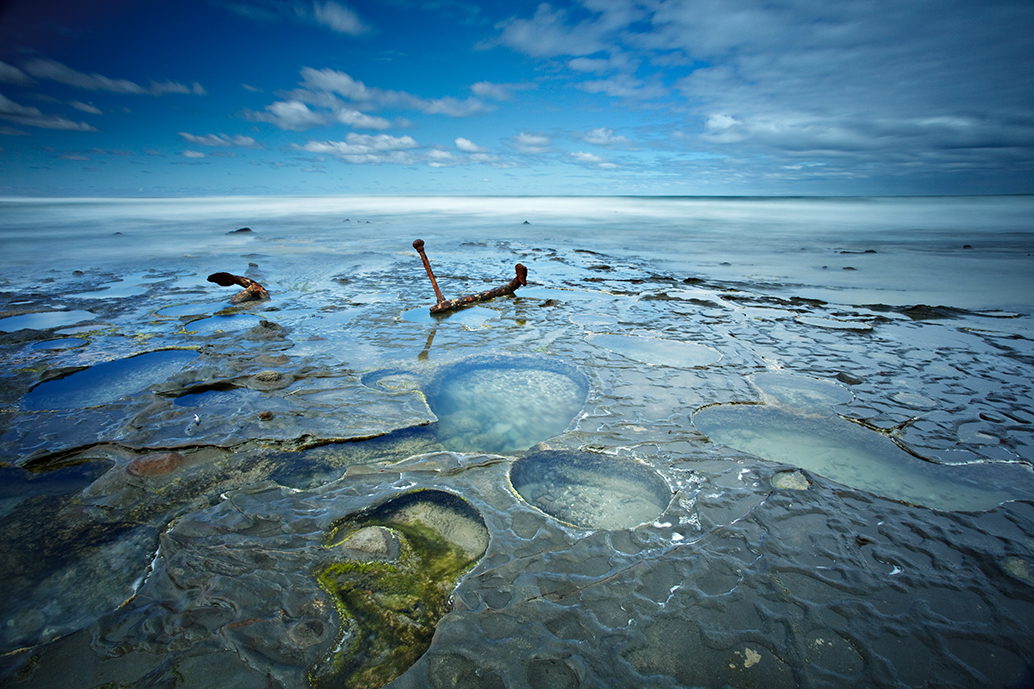
ND Graduated filter in the sky area, 10-stop Full ND and a Polariser. 60s @ f/16, ISO 100. Photo taken just after 10am.
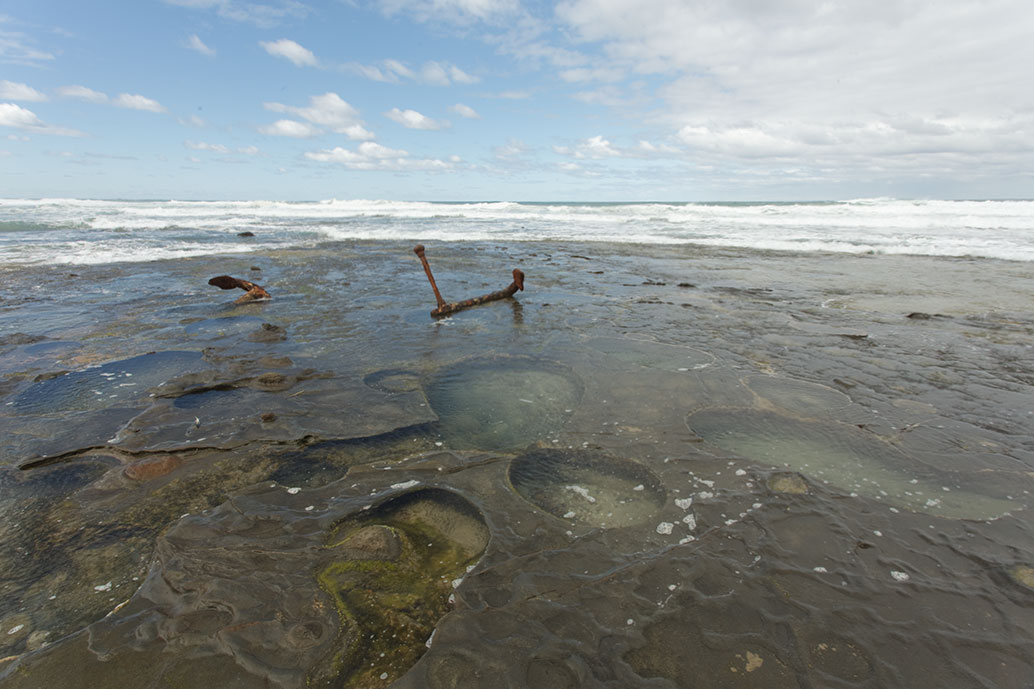
Straight shot with no filters. Photo taken just after 10am.
FILTER SYSTEMS
There are two different filter systems available: screw-on filters (round filters that screw on to the lens) and drop-in filters (square filters that drop into a holder attached to the front of your lens).
SCREW-ON FILTERS
Neutral Density filters are available as a screw-on filter. They come in different strengths and you screw them onto the front of your lens. Of course they need to match the filter thread size of your lens, so if you have lenses with different filter sizes you need one for each. It can become an expensive proposition using ND screw filters in various strengths for each diameter of lens carried.
There is such a thing as a Neutral Density fader, which is a single filter that can be adjusted to deliver block out more or less light. They screw onto your lens and rotate like a polariser. Most go from two to eight stops. It sounds ideal, but I have tried several and I am yet to find one that works across the full range. In my experience, they work okay up to the half-way point but after that you get a multitude of problems from banding to excessive vignetting. My advice is not to bother with them.
It's also possible to buy a graduated ND filter that screws onto your lens. The graduation is smack bang in the middle so it can be limiting when photographing a variety of scenes at various times of day.
Screw-in polarising filter.
DROP-IN FILTERS
The ultimate set up is the drop in system. Yes, it is more of an investment but the flexibility is well worth it. Lee, Hitech and Cokin are the main players here, and there are many different filters available to us. Make sure you buy the 100mm wide system if you are using a DSLR. If you are using a Micro Four Thirds system (Olympus and Panasonic) then Lee make a system to suit. (the RF75 – filters are 75mm wide) or you could try the Cokin P series, which are 85mm wide.
A point to consider is that the systems are partly compatible. The holder and adaptor ring must be matched by brand – that is, you cannot put a Lee holder onto a Hitech adaptor ring, but the filters are generally all the same. Lee, Hitech and Cokin all make filters 100mm wide so they will fit any of those three holders that are from the 100mm series. Make sure you check the thickness. Most are 2mm.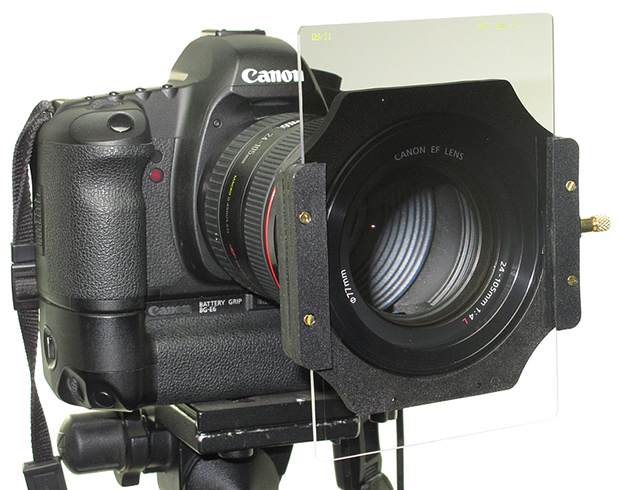
Drop-in filter system with graduated ND filter.
USING THE DROP-IN FILTER SYSTEM
Drop-in filter systems consist of three components: An adaptor ring that screws onto your lens (you'll need to take all other filters off first); a holder (most include three slots so you can use up to three filters at once); and the drop-in filters themselves.
First, you need an adaptor ring that screws onto the front of the lens. Some manufacturers offer a wide-angle adaptor. These recess back towards the camera body and reduce vignetting when using wide-angle lenses. Vignetting occurs when we start stacking filters in front of the lens, so these special adaptors are well worth having. I would recommend these for lenses 24mm and wider. If a few of your lenses have the same filter size then you can save money by buying just one adaptor ring.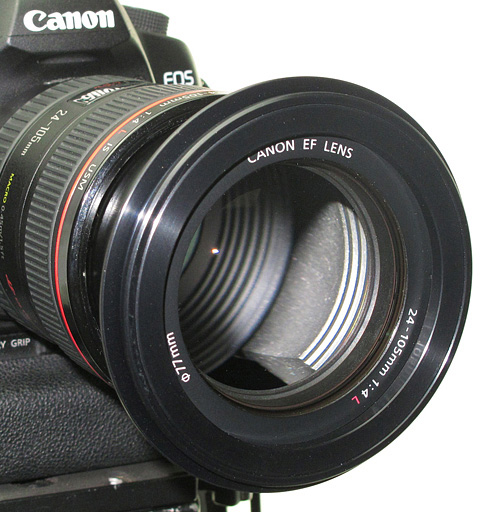
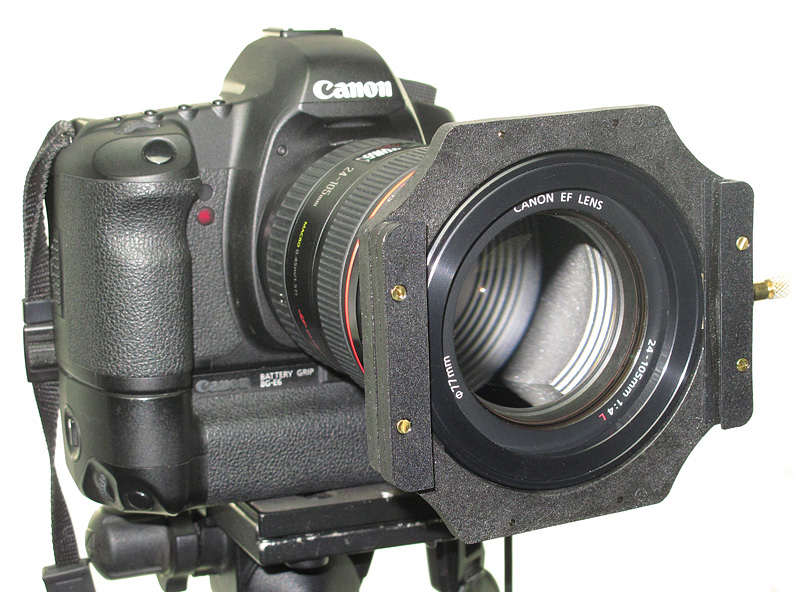
Camera with adapter ring (left) and filter holder (right).
Next, is the holder that slides or clips onto the adaptor ring. These generally come standard with three slots allowing you to use up to three filters at once. The holder also rotates on the adaptor ring, thus allowing you to use a graduated filter on an angle. This is the case a lot of the time, so it is a valued feature.
The third component is of course the filter. Full NDʼs tend to be 100mm x 100mm and the Grads are mainly 100mm x 150mm. The grads are larger as they need to be able to slide up and down.
If you have a few filters as I do, then I recommend that you keep them in a pouch and organise them so you know where each one is. This will save time and again make life easy.
SCREW-ON OR DROP-IN? WHICH IS BEST?
The screw-on system is great if you're just getting started. For minimal outlay, you can buy one filter and away you go.
The drop-in system is by far the superior choice. Once the holder is in place it is very quick to use and there are more options open to the photographer. It is also a system that enables us to quickly change filters by sliding them on and off, unlike the screw-on system which requires more time to change.
Also, you can easily combine filters in the drop system. I use a combination of three filters on a lot of my images. Because I use these filters regularly, I leave the adaptor rings on the lenses, thus saving a lot of time. Lee does a neat protection cap that clips onto the adaptor ring and acts as a lens cap for when your lenses are in your camera bag. To capture great images, you need to be organised!
The drop-in system can be a bit of an outlay but you will have it for life. The filters fit all your lenses and you do not need to buy new ones if you upgrade a lens.
A word of warning: with filters, the old adage 'you get what you pay for' is very true. The cheaper filters can throw magenta colour casts and some of the holders that students have had on my workshops are poorly made and painful to use. My advice is if you invest wisely you will have a system that is a joy to use and will not let you down when you are about to capture that once in a lifetime image!
Filters are an essential piece of kit for photographers who want to take control of the light when shooting outdoors. They can help you manage exposure, contrast and glare, save you hours in post-production and, best of all, help you create stronger images. Why not slip a few into your camera bag next time you head out into the great outdoors?
Dean Cooper has always had a deep passion for capturing the world around him. Since 2000, he has been working full-time as a landscape photographer, travelling an always-evolving path. After achieving success as a photographer Dean stumbled on another passion, sharing his talent and creative knowledge with others. He now teaches a range of photography workshops in some of the most beautiful areas of Australia. Based in a quiet seaside village in Victoria, Dean spends a lot of his time by the sea. It’s no surprise that his specialty is seascapes!