You don't always have the luxury of time or local knowledge when it comes to shooting landscapes. Adventure photographer Chris Bray shares his five best tips for shooting beautiful landscapes when you're in an unfamiliar location and you need to move fast.
Preparing to run photo safaris in new locations, I’m often faced with the same frantic needs as many other camera-wielding travellers: Where should I go to capture the best possible landscape photos and what’s the best way to make them look as good as possible? If you are a skilled local you’d already know these things – as well as have the luxury of being able to wait for the perfect sunset – but when you’re visiting with a deadline, there are a few tricks you can employ to give yourself a head start:
01 USE GOOGLE IMAGE SEARCH
Unless you’ve just arrived in some remote corner of the Arctic where no photographer’s ever been (in which case there’s unlikely to be internet reception either), the quickest way to discover some of the best photography vantage points to seek out is to simply type in “sunset [location]” into Google Image Search. You’ll instantly be presented with hundreds of inspiring examples of local images, perhaps revealing that there’s a convenient wharf nearby reaching out into the bay that makes for awesome evening reflections, or a certain grouping of lichen-covered rocks making for a colourful foreground at one end of the beach, or even a particularly charismatic tree to frame the otherwise the typical shot with…
Of course, we’re all looking for our own unique shots and don’t just want to copy someone else’s, but Google Image Search is a great way to fast track you to the right locations and give you some ideas, from where you can then let your own creativity flow. Similarly, I often use Google Maps and Google Earth to scout an area in advance, looking for certain requirements, such as a access to body of water facing a certain direction, wharves, hidden beaches etc which I can then head directly to when I arrive on a reccy trip.
Tip 1: A Google image search for the area you're visiting might also reveal other things worth photographing such as vibrant marketplaces, bridges, towers etc.
Tip 2: Don’t always believe photo captions: many sunrises are mislabeled as sunsets and many different towns have the same name!
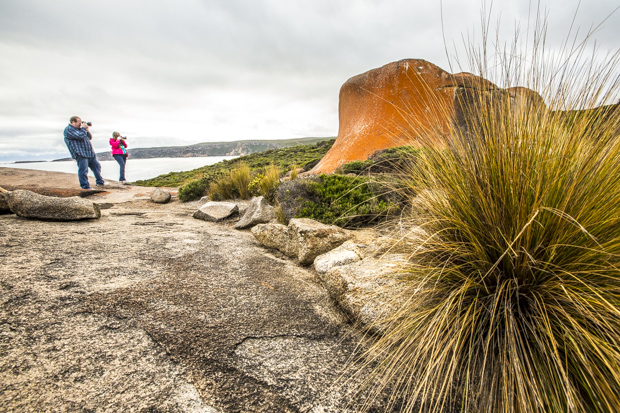
Photo by Chris Bray.
02 START SHOOTING BEFORE SUNRISE
Many people think sunrise or shortly after is the best time to start photographing landscapes, incorrectly assuming that before the sun comes up it’s too dark for photography. With a tripod and a suitably long exposure (which your camera will calculate for you anyway), it’s almost never too dark to take a photo, and in fact, the soft, indirect glow that faintly illuminates surroundings during the 30 or so minutes before sunrise is often some of the best lighting. With no shadows you have minimal contrast issues and the smoothing effect that slower shutter speeds have on flowing water on coastal scenes, waterfalls etc is almost magical. Not only will many of these pre-dawn photos look amazing, but it also gives you time to test out various locations so that you can be well settled in the best one, ready to catch that initial burst of sunlight spreading out across the scene.
Tip 1: When taking slow shutter speed photos on a tripod (or at least resting your camera of a rock) turn on your camera’s inbuilt 10- or 2-second countdown timer delay so you don’t accidentally blur you shots by wobbling the camera as you press the button.
Tip 2: Shoot with a high f-stop on a wide lens to create a theatrical star-burst flare radiating out from that first chink of sunlight.

Photo by Chris Bray.
03 ONLY ATTACH A TRIPOD AFTER YOU'VE FOUND THE BEST POSITION
If you start with your camera already attached to your tripod when seeking out new photos, you’re always going to limit yourself to convenient tripod placements and heights. Some of the best compositions are found from unusual angles, low-down shots or other non-standard camera placements. Peering through the viewfinder of a hand-held camera, you’re able to nimbly duck and weave around to find the perfect camera placement – only then should you dig out your tripod and work out how to assemble it beneath your camera to keep it steady in that perfect spot.
Tip 1: Each to their own, but I love using ball-head tripods, as they make positioning the camera so easy. None of this “Which handle do I twist which way to allow the camera to spin on what axis?” Just loosen, point the camera where you want and tighten.
Tip 2: Turn on your camera’s ‘Live View' screen to help visualise the shot you’d get from extra-awkward locations, such as if you set the camera right down directly on the ground, where it’d be too hard to get down and try and peer though the viewfinder yourself.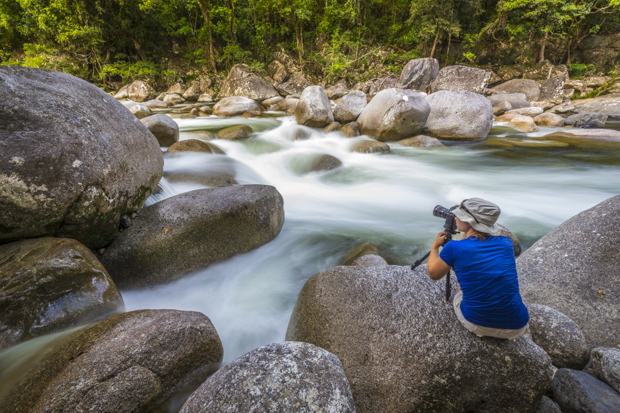
Photo by Chris Bray.
04 USE WHITE BALANCE CREATIVELY
White balance is usually about getting your camera to capture colours correctly, so that despite the ambient light perhaps being quite orange (as in the case of most indoor lighting) or vaguely blue-ish (in the shade or on a cloudy day) everything appears to have the correct colour cast and look normal in the photo. You can however deliberately interferer with this colour calibration to make your images appear warmer or colder for dramatic effect. Sunrises and sunsets for example, often look much more pleasing if you set your white balance to ‘shade’ which tricks the camera into applying a little extra red that would normally be needed to compensate for the slightly blue effect of shade light.
Tip 1: Unless you’re doing something creative, use Auto White Balance (AWB) normally. It’s honestly a recipe for disaster to try and remember to manually set your camera to the correct white balance every time you take a shot – not only will you forget more often than you’ll remember, but the camera knows the difference between types of light that you may not. “I’m sorry, is that tungsten or fluorescent lighting?"
Tip 2: White Balance only affects JPEG files (and RAW previews) but not the actual RAW. If you’re shooting RAW, then white balance really doesn’t matter – you can select it later in post processing and adjust it to be perfect – but I admit I still find myself setting it to shade to enhance sunrises etc, because let’s face it, it’s always encouraging to see a nice photo appear on the back of your camera at the time, rather than have to think, "That’ll probably look OK after I’ve fixed it later".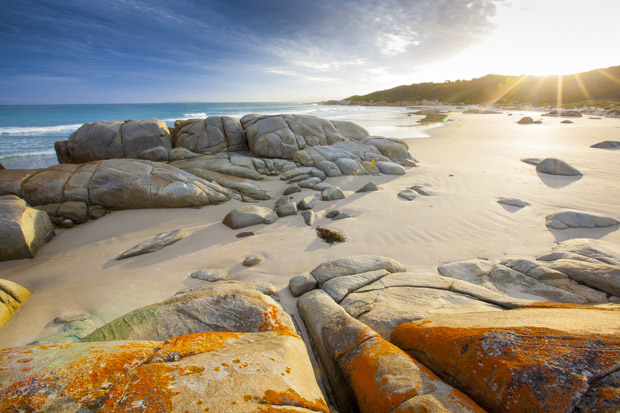
Photo by Chris Bray.
05 SHOOT IN RAW
Of course you can get amazing, perfectly high-quality photos shooting JPEG (which you can edit to some extent later too) – and there are certainly valid arguments against shooting RAW in many cases and for many people – but there’s no denying that if you do shoot RAW, you can squeeze out a lot more hidden detail from your images. You don’t need to learn how to master Photoshop or anything like that to take advantage of post-processing either – it’s becoming more and more common for even basic image viewing programs to allow users to adjust things. There’s obviously a great deal more to post processing than just lifting out the details that otherwise seem lost in the black shadows of your photo and pulling back some detail from the bright highlight areas like the clouds – but even just sliding these two simple editing sliders a little can do wonders to your images, gaining you almost HDR-like contrast range, with the added benefit of being able to do it to moving subjects as well, as it’s just the one single photo rather than the combination of a set of various exposures.
Tip 1: To properly understand some of the important differences between JPEG and RAW, take a read of my comprehensive tutorial on JPEG vs RAW, complete with examples and direct comparisons.
Tip 2: Another useful adjustment to experiment with for RAW files is upping the vibrancy or saturation a little, but be warned, don’t over do it – ‘over-cooking’ your images is perhaps the most common way photographers ruin what could otherwise be a great photo, particularly in the eyes of competition judges or magazine editors. Don’t feel bad about adding a little saturation etc to your RAW files though, as that’s exactly what the camera does when it creates a JPEG for you.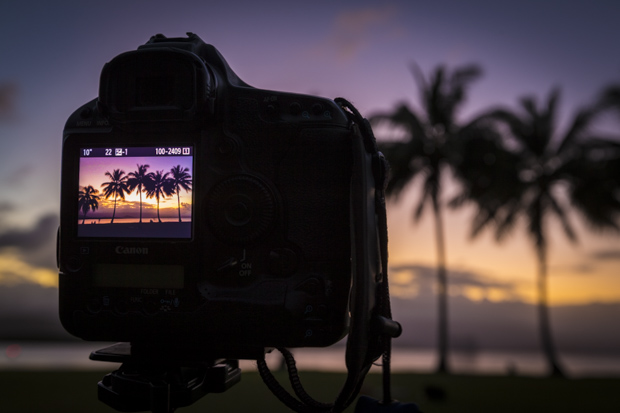
Photo by Chris Bray.
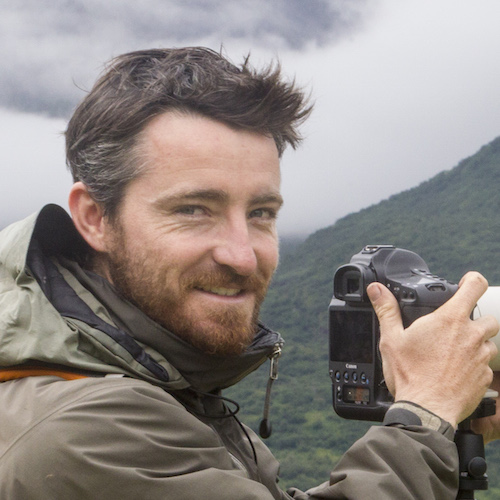
Chris Bray is an award-winning Australian Geographic photographer whose customers include Canon, GoPro, Lowepro, National Geographic Traveller, Discover Chanel and more. Chris also runs Chris Bray Photography, now Australia’s largest photo safari operator leading small groups of photographers to the world’s most wonderful places including Alaska, Antarctica, the Amazon, Galapagos, Patagonia, Kenya, Iceland, Greenland, Tasmania, Kangaroo Island, Christmas Island and more! Together with his team of photographers they also run highly successful 1 day photography courses at zoos and botanic gardens all around Australia – check out Chris’s website www.ChrisBray.net for details, and follow him on Instagram at @ChrisBrayPhotography.