
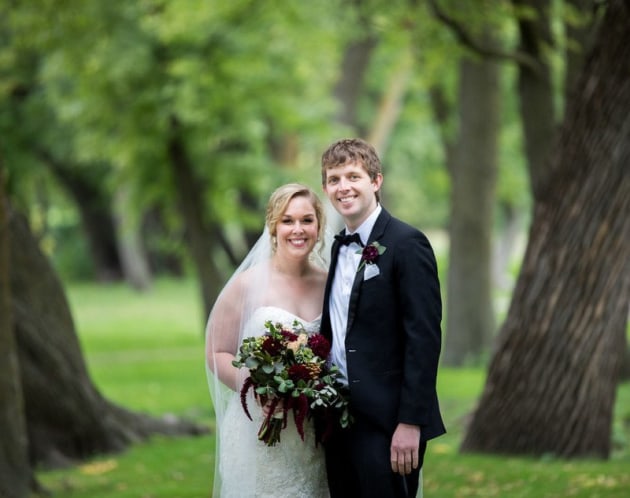
I Shot My First Wedding and Didn’t Mess It All Up. Here’s What I Learned.
My name is Alex Hengen, and I’m a non-pro, non-wedding photographer. Last year I took a few pictures at my sister’s wedding, and my cousin, having his own wedding coming up, saw some of my shots on Facebook and asked if I would photograph their wedding. I agreed.
I had 8 full months to prep. My experience and comfort zone consists mainly of landscapes, astrophotography, and some candid stuff, though I like to push into new styles and subjects to force myself to learn more.
This is going to be a long post, but I want to say a few things for anyone in my situation that this post might help out. I’m a wedding photography beginner, so if anyone wants to nitpick or correct, I take no offense. And by no means is this the best post ever, I’m simply putting out my thoughts and impressions from my perspective, along with some things I spent a decent amount of time researching.
This isn’t definitive and I don’t know everything, so apologies if it comes off as a bit know-it-all-ish, I just really felt compelled to put everything I picked up along the way together in a cohesive, easy to digest form, mostly to help anyone in my shoes.
How It All Started
First off, my cousin and his then-fiancee reached out to me, asked me to photograph the wedding, and explained that it would help them out a great deal. They preferred dealing with someone they knew, and it would end up saving them money as well. They asked for my rate, but I explained I’d do it for free, as they’re family. They insisted on giving me some money for travel and accommodations, since this was out of town for me, and that’s fair.
I set the expectation early in terms of experience, # of shots to expect (~500), time to deliver (under-promised 4-6 weeks, I expect to over-deliver within two), basically everything I could think of. I’m confident in my abilities and planning, but I let them know I’m not a seasoned wedding pro.
Gear Talk
Let’s get the gear talk out of the way early. In my opinion, your gear is important, but not as important as being familiar with it and what it can do (how to change settings quickly on the fly — namely aperture and exposure compensation — how high you can push your ISO, how a given aperture affects DOF, what your minimum shutter speed should be for handheld for a given lens, how much you know you can push — exposure or cropping — something when editing, etc).
Here’s the camera gear I used:
- Canon 6D
- Canon 5D Mark IV
- Sigma Art 35 f/1.4
- Canon 85 f/1.4
- A rental Canon 70-200 f/2.8
- Lots of memory cards (2x 128GB SD and 2x 128GB CF for 5D MK IV, 2x 64GB SD for 6D)
- Lots of batteries (went through 2 batteries per camera, just about)
- Monopod (for the 70-200mm at the ceremony, as that sucker is heavy)
- Good backpack of your choosing (Peak Design Everyday for me)
- Comfortable camera straps of your choosing (PD Sling for me), I was wearing both cameras most of the day, one on each shoulder for fast easy access
- I’m probably forgetting stuff, but this was what stuck out
Here’s the non-photo gear:
- Water
- Snacks (3-4 Cliff bars for me)
- Tide stick
- Band-Aids
- Tums
- Visine
- Ibuprofen
- Sharpie
- Tissues
- Makeup/facial wipes
- Ear plugs (for the dance floor near the speakers)
- Good amount of gaffer tape wrapped around a tripod/monopod leg
- Compression socks (seriously guys, they help)
- Comfortable shoes (I got a pair of black Allbirds, they looked sharp enough and were so damn comfortable)
- Backup pair of clothes kept in trunk of car – underwear, dress shirt, dress pants and shoes. I got a nosebleed right as I was leaving for the bridal prep, and that spare dress shirt came in handy.
I used the 35mm and 85mm for the bride and bridesmaids prep, and the 35mm and 70-200mm for the ceremony, portraits, and reception. I brought along lenses I wasn’t planing on using, lenses that could duplicate a focal length in a pinch. If I dropped my 35, I had a wide angle zoom that could replace it. If I broke the 70-200mm, I had a slower 70-300mm and an 85mm I could substitute. And in a real pinch, I guess I could have shot the entire wedding with my 50mm f/1.8.
Research and Preparation
For research and prep, I’d go on /r/photography, /r/weddingphotography, PetaPixel, YouTube, Google, etc. and search, read, bookmark, read, reread, etc.
I contacted the main photographer for my sister’s wedding, Harmony Lynn (who is also her/my good friend), and picked her brain. She linked me to a posing guide she used when starting out, and she gave me good information that you’d only really pick up through experience. Things like…
1. Getting friendly with the wedding coordinator and DJ (who can ask to store your gear at their table during reception, and they can help light up the dance floor during important dances for you. If the DJ is cool [mine was very awesome], they can also give you a heads-up before each dance/cake cutting/anything major so you can get ready, and also get the catering crew to bring you food early so you can shovel it away and get back to work. Seriously, he was the best).
2. Being assertive.
3. Picking up a few flashes and gel kits if possible (in order to help light the reception hall).
4. Dinner requirements if you want to eat at the reception.
5. Having all of the detail shoot stuff ready in one place in advance (shoes, dress, veil, all 3 rings, etc), preferably wherever the bride is getting ready.
6. Nailing the timeline.
Organizing the Information
Staying organized was absolutely critical for me to keep myself from being overwhelmed and feeling lost with all of this new information. To help myself out, I created a Google Docs form that I had them fill out, with as much detail as possible. I basically combined forms I found online with what I thought of and what my wedding photographer friend suggested, until I had something I was comfortable with. Here’s what I ended up with, and absolutely feel free to copy it if you want.
I saved the resulting timeline and details to my Google Keep as a note and referred to it as the day went on, and it simplified things tremendously being able to have it at hand and not needing to memorize every little part of the schedule.
I kept a good amount of info on Google Keep as a note for reference: shot list (cake cutting, first dance, bride and bridesmaids, groom and groomsmen, family, etc etc), addresses for everything (church, park the couple chose for portraits, reception area), phone numbers for everyone, ideas for the portraits, etc.
Wedding Photography Tips and Pointers
Here are other odds and ends I picked up as I prepared:
- If shooting with two bodies, make sure they each are set to the same time and time zone, to save time editing. When you import, you can sort by capture time, and photos taken with each camera will show up together rather than being all over the place
- If you’re using a posing guide, take photos of the poses with the camera(s) you’re going to use. If you need to refer to them, you can look like you’re reviewing photos and not fiddling with a phone and looking like you don’t know what you’re doing
- Get rest and drink/eat when you can. Sit when you can. My lower back and feet hurt off and on (I’m not the most active individual). Force yourself to eat a snack in your car on your way to the next location — who knows when you’ll have time next.
- Look for microexpressions on the faces of everyone in between taking your crucial shots. Especially the bride, groom, and their parents. I got a lot of great, unplanned shots with the zoom lens while watching for reactions to events and speeches from parents and friends.
- For the love of God, don’t miss the father walking his daughter down the aisle, or their kiss after being announced husband and wife. You don’t get a redo and those are super important.
- Meet up with the couple a day or two before the wedding, if possible. Go over everything you got in the form you sent them, go over your shot list, go over your schedule, your notes, etc. and ask if there’s anything else they need. They may have made a change or forgotten to mention something, in my case it was a cool bus that was made to look like a trolley to ferry the bride and groom and their friends to the park, which resulted in some cool unplanned shots.
- Give yourself more time than you think you need. We got to the park only to find another couple, just wed, was using the same bridge and shady area with their photographer! We took shots elsewhere while waiting for them to finish up, and luckily had plenty of time set aside.
- If possible, ask the bride and groom to hold their kiss for an extra beat or two for you, and ask if the bride and her father can walk slowly down the aisle when they see you step out, so you can nail that shot.
- Burst shooting is your friend. Taking a group photo of 10 people, or of a kid or two? Either pray they all have their eyes open and smiles on at the same exact time, or just hold down that shutter button and get 10-15 shots and multiply your chances.
- Shoot more than you think you need. I walked away with 4,200 photos, and will likely deliver around 500-600.
- Learn how to use a flash. Bounce flash indoors if you need to, or use it as fill light outdoors. I got really lucky in that the day of the wedding was overcast, so the light was honestly ideal and I didn’t need any fill flash. However, I was prepared with a flash and flashbender to fill if needed.
- Back up your photos immediately. I made a copy, moved it to an external drive, another copy to my Google Drive, removed the SD cards from the cameras and set them aside until I’m done editing everything.
- If you’re not sure whether or not you need to capture something, just do it. Worst case you don’t need it and it costs you a few minutes when culling.
- Get to the reception area before the guests so you can take pictures of the details before people start putting bags, coats, etc everywhere.
- Have people skills. I am not the best with people, but I pushed myself and made it work out, and ended up getting along well with basically everyone. It helps a lot when you need help.
- Figure out how the couple is leaving the church and reception. If people are throwing rice or confetti or what have you, then you want to be in place and ready.
Conclusion
That’s essentially all of the technical information I can think of. Hopefully, it will help at least one person in some way. I’m not a pro with posing or weddings, and I’m sure others can add a lot to the discussion in the comments, but in my research I found myself looking for posts like this one, so hopefully it helps.
Once I had this stuff down and felt prepared to handle those points, I was free to focus on composition, lighting, posing, taking creative shots, and having a bit of fun with the couple, bridesmaids, and groomsmen.
One last note… I wasn’t anxious or nervous for months, and it wasn’t until two days before the wedding that the nerves hit me and I started getting anxiety. I didn’t expect that and it took me by surprise, considering how calmly I’d planned everything and how ready I thought I was. Staying in touch with the couple and meeting up with them the day before the wedding helped a lot, and once I actually got into it, I was fine. Having emergency clothes and everything I might need in my kit helped with that too, it was a small comfort over-preparing all the gear and supplies.
Good luck!
About the author: Alex Hengen is a photographer with interests in fine art, landscapes, astrophotography, and more. You can find more of his work on his website and Instagram.